Save these instructions – LBL Lighting Suspension canopy User Manual
Page 2
7400 Linder Ave, Skokie, IL 60077
800.323.3226 - 847.626.6300
www.lbllighting.com
© 2008 LBL Lighting. All rights reserved. The "LBL Lighting" graphic is a
registered trademark of LBL Lighting. LBL Lighting reserves the right to
change specifications for product improvements without notification.
A Generation Brands Company
2
SAVE THESE INSTRUCTIONS!
1E
9
4"
10
9
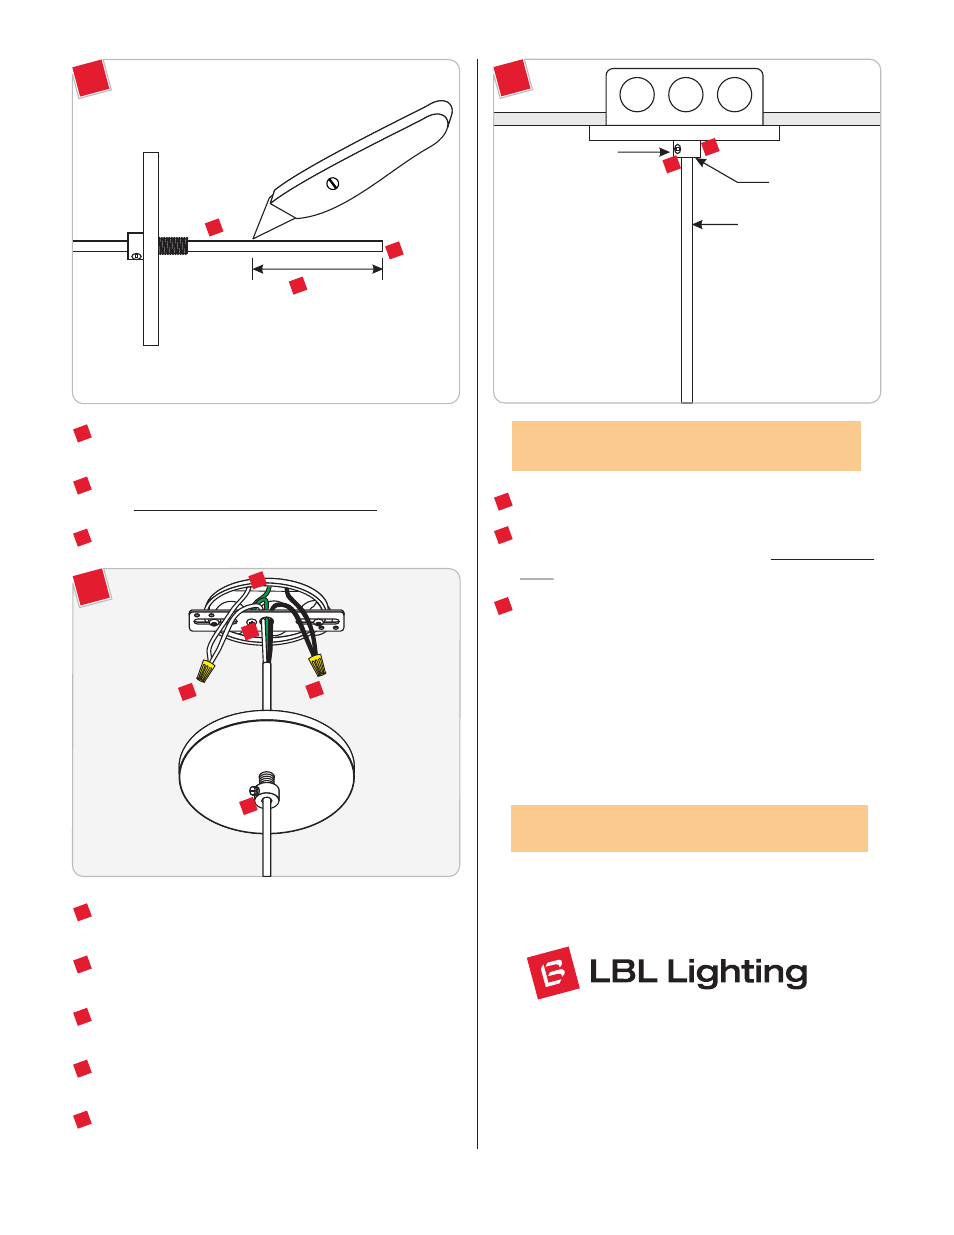
Leave 6" of the cord behind the canopy for power connections.
Cut the excess cord.
From the end of the cord, strip the insulation 4" using a sharp
knife. Make sure not to nick the inner wires.
Strip the end of the wires.
11
10
11
1F
Feed the fixture wires through the crossbar center hole an
then bring them out of the electrical box.
Connect the fixture ground wire to the ground in accordance
with local electrical codes.
Connect the other fixture wires properly to power line wires
with wire nuts.
Place all wires and wire nut connections properly inside the
electrical box.
Loosen (Do not remove) the plastic set screw on strain
relief so that it can slide.
12
13
14
17
18
Align the canopy center hole with the crossbar center hole.
Slide the canopy up against the ceiling and secure it in place by
tightening the strain relief into the crossbar. Do not turn the
cord.
Push the cord into the canopy and line up the marked point on
the cord with bottom of the strain relief. Tighten the plastic set
screw to secure the fixture in place.
STRAIN RELIEF
NOTE:
It is recommended that one person hold the
fixture while the electrician finishes the installation.
CORD
PLASTIC SET SCREW
19
1G
18
19
15
12
13
14
16
16
14