English – Wagner HVLP Conversion Gun User Manual
Page 6
6
© Wagner Spray Tech. All rights reserved.
English
Replacing the air valve Seals
1. Remove the old rear air valve seal. It may stay on the end
of the needle guide shaft spring or in the material flow
adjustment housing.
2. Slide the new rear seal into the material adjustment housing.
3. Remove the front seal retaining clip using a snap-ring pliers.
4. Slide the old front air valve seal off of the needle guide shaft.
5. Place the new front air valve seal on the needle guide shaft
with the beveled side facing the gun.
NOTE: Make sure that the new front air valve seal looks like
the one that was just removed.
SIDE VIEW
Front Air Valve Seal
Beveled Side
6. Snap the front seal retaining clip onto the needle guide shaft.
Needle
Guide Shaft
Rear Air
Valve Seal
Spring
Material Flow Adjustment Housing
Front Air
Valve Seal
Front Seal Retaining Clip
Removing the Packing
1. Remove the packing nut using a 3⁄8 inch wrench.
2. Insert a long, narrow-bladed flathead screwdriver through the
back of the gun and into the packing hole.
3. Press the screwdriver firmly into the packing and turn
counterclockwise. This should back the old packing out of the
threaded hole. If it does not, push the screwdriver more firmly
into the packing and try again. If this still does not remove the
packing, use a pick tool to pull the packing out.
Packing Nut
Packing Hole
NOTE: Make sure all of the old packing is removed before
installing the new packing.
Installing the New Packing and Reassembling the Gun
1. Place the new packing into the packing hole.
2. Thread the packing nut one turn into the packing hole. Do
not tighten.
3. Push the needle guide shaft through the back of the gun body
and thread on the retaining nut.
4. Grasp the material flow adjustment housing with the needle
attached. Slide the needle with the spring and the rear
air valve seal through the needle guide shaft and into the
packing nut. Tighten the material flow adjustment housing
securely using a wrench.
5. Tighten the packing nut securely using a 3/8 inch wrench,
then loosen the packing nut a quarter turn.
6. Assemble the trigger by inserting the retaining pin or pins and
attaching the snap rings.
7. Pull the trigger to make certain the needle moves freely. If
the needle sticks, loosen the packing nut. If the packing leaks,
tighten the packing nut.
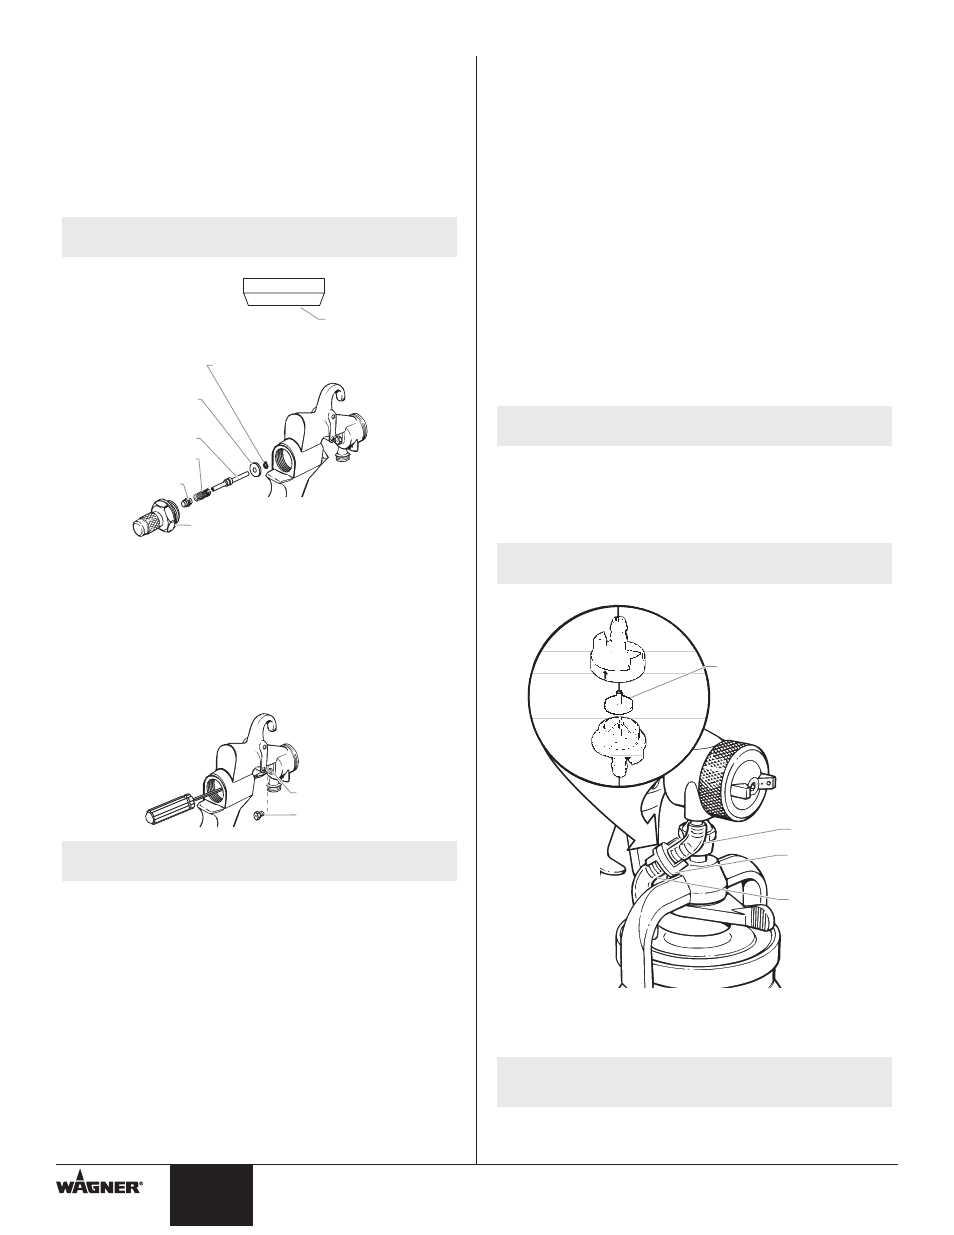
Replacing the Check valve, valve Seal, and air Tubes
The check valve is a one-way valve designed to allow air into the
cup, pressurizing the cup’s contents. Because it is a one-way valve, it
prevents paint from seeping up the air tube into the air passages of
the gun. It also eliminates any delay in material flow when the gun is
triggered by maintaining pressure in the cup.
The check valve rotates open easily for cleaning. It contains a valve
seal that can be removed and cleaned with soap and water for
waterborne materials or a compatible solvent for other materials. To
replace the check valve, the valve seal, and/or the air tubes:
1. Pull the lower air tube from the bottom of the check valve.
2. Pull the check valve from the upper air tube.
3. Unscrew the two halves of the check valve.
4. Remove the worn valve seal.
5. Clean the check valve body with a solvent appropriate to the
type of material being used.
NOTE: Thoroughly clean the inside of the top half of the
check valve but do not scratch it.
6. Insert a new valve seal, stem up, into the top of the check
valve as shown.
7. Tighten the two halves of the check valve together.
8. Insert the top of the check valve into the upper air tube.
NOTE: Insert the check valve into the air tube so that the
arrow on the valve points toward the gun.
GUN
Check Valve
Air Tube
Air Tube
Valve Seal
9. If the lower air tube is too long, trim the tube so that it fits the
gun.
10. Push the lower air tube onto the bottom of the check valve.
NOTE: Make sure to attach the shorter air tube to the gun
fitting and the longer air tube to the cup lid air
nipple.