Dishwasher installation steps, Figure 7 – AMICA ZZM616W EN User Manual
Page 24
22
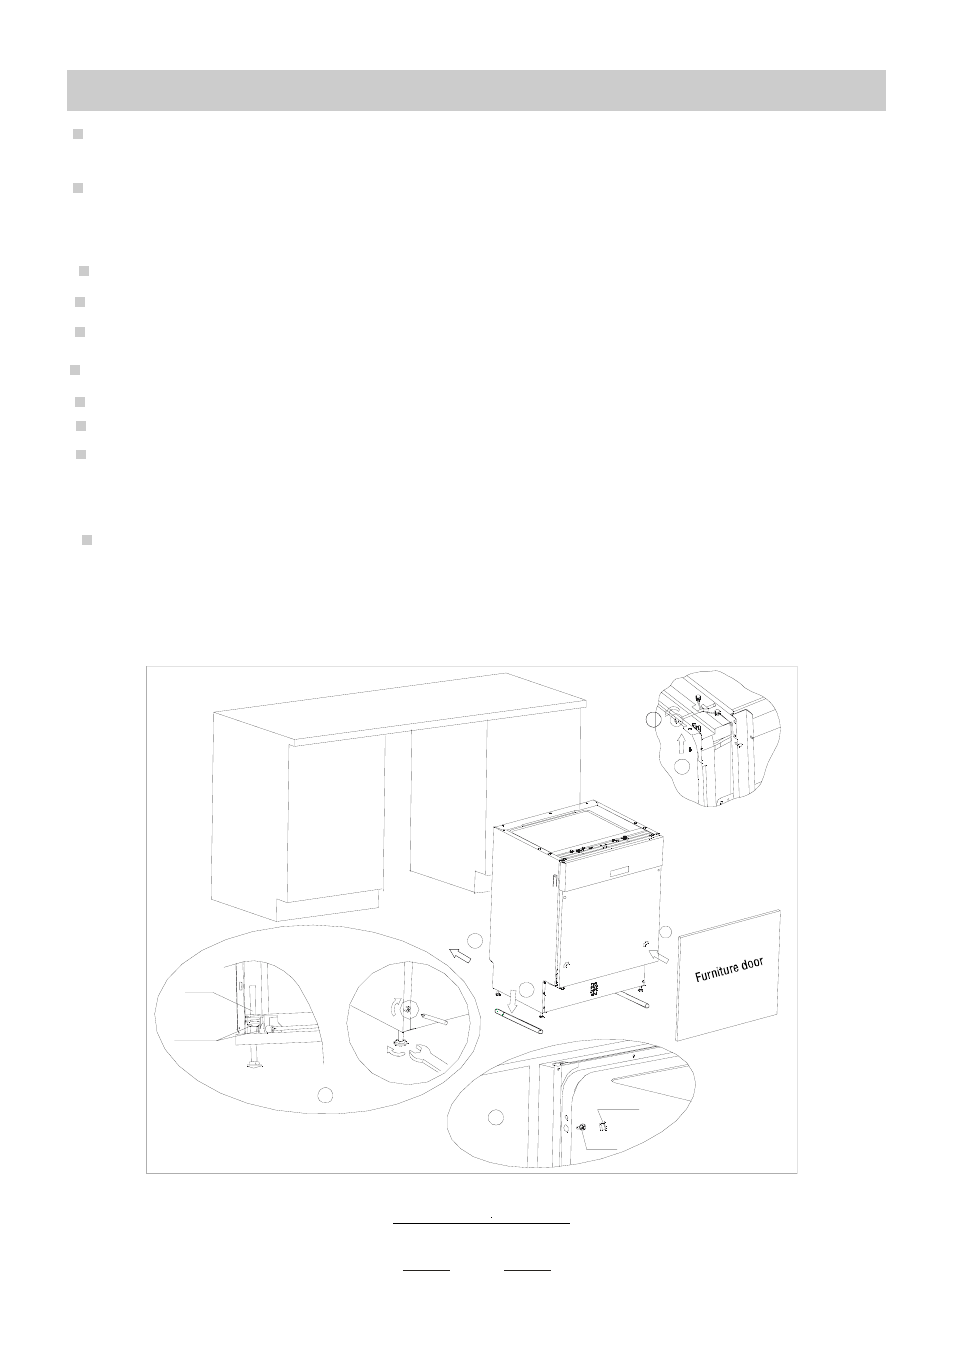
【Figure 7】
Installation steps
Dishwasher installation steps
●
Install the furniture door to the outer door of the dishwasher using the brackets provided. Refer
to the template for positioning of the brackets.
Adjust the tension of the door springs by using an Allen key turning in a clockwise motion to
tighten the left and right door springs. Failure to do this could cause damage to your dishwasher
(Illustration 2).
Connect the inlet hose to the cold water supply .
Connect the drain hose. Refer to diagram.(Figure 6)
Connect the power cord.
Put the dishwasher to slide rails(Illustration4)
Add the condensation strip following instructions on the reverse side of the condensation strip
Place the dishwasher into position.
Level the dishwasher. The rear feet can be adjusted from the front of the dishwasher by turning
the screws on the left and right hand side of the cabinet (Illustration 6A). To adjust the front feet,
use a wrench and turn the front feet until the dishwasher is level (Illustration 6B).
The dishwasher must be secured in place.
Work surface-secure to the work surface by using two woodscrews ensuring the dishwasher
weight is not being hit by the surface (Illustration 7).
1
2
3
4
5
6
7
8
9
10
.
.
1
5
4
6
2
7
CONE GEAR
SCREW
8
COVER
SCREW
RUBBER
6B
6A
Note: When adjusting the back feet through the FABF(Front adjustable back feet) , we advise
to adjust the moment below 1.2N m
·