1 version 12vdc/24vac, 2 version 115/230vac, 3 installing the housing – Videotec NXM User Manual
Page 7: 1 sunshield mounting (if equipped), 1 version 12vdc/24vac 6.1.2.2 version 115/230vac
EN - English - I
nstruc
tions manual
5
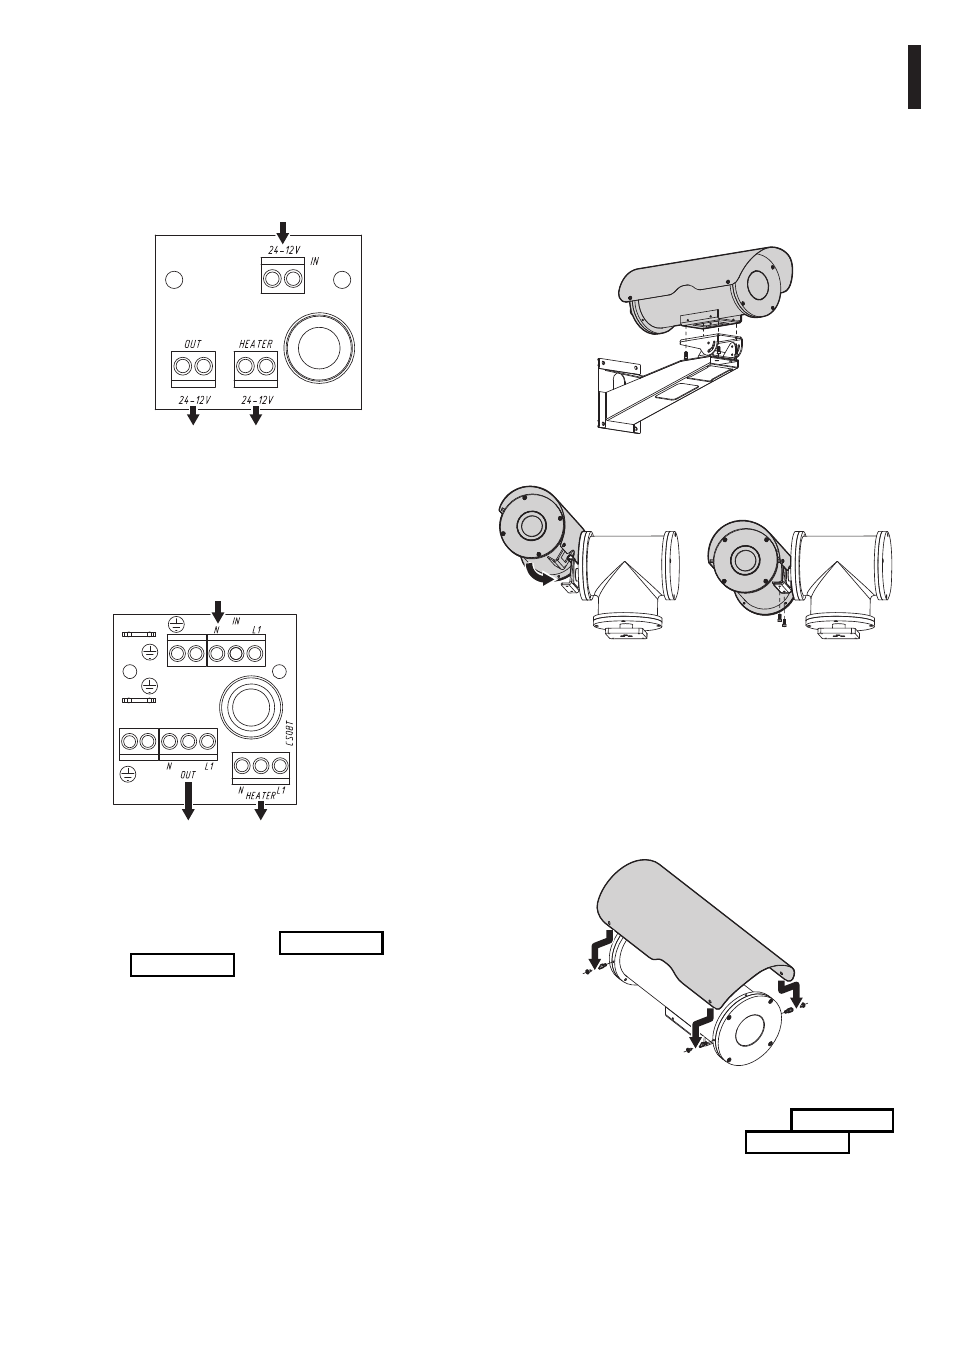
6.1.3 Installing the housing
This section describes how to install the housing on
the wall bracket or on the Pan & Tilt head.
Be sure to have rightly fitted the internal slide of the
housing according to the installation required. The
housing base must be fitted under the housing in
case of wall bracket mounting and on the housing
side in case of Pan & Tilt head mounting.
Fig. 06 Wall bracket.
Fig. 07 Pan & tilt.
6.1.3.1 Sunshield mounting (if equipped)
Screw the equipped exagonal mounting spacers
on the side-flanges of the housing in diametrically
opposite position and according to the mounting
required, in order to mount the sunshield above the
housing. Fit the sunshield on the housing and fix it
with the equipped screw on the spacers.
Fig. 08
Mount the housing on the wall bracket (Fig. 06, page 5)
or on the Pan & Tilt head bracket (Fig. 07, page 5).
Feed the cables through the cable grip, and make the
necessary electrical connections, ensuring that the
cable grips are holding firmly.
6.1.2.1 Version 12Vdc/24Vac
When the power supply voltage is 24Vac the circuit
will be connected by the terminals shown.
Heater OUT 12Vdc/24Vac
OUT 12Vdc/24Vac
IN 12Vdc/24Vac
Fig. 04
6.1.2.2 Version 115/230Vac
When the power supply voltage is 115/230Vac the
circuit will be connected by the terminals shown.
OUT 115/230Vac
IN 115/230Vac
Heater OUT 115/230Vac
Fig. 05
Before closing the housing reinsert the bottom
orientating the slide according to the installation
required, on the wall bracket (Fig. 06, page 5) or on the
Pan & tilt (Fig. 07, page 5) head, for the right camera
fitting.
Close the housing, taking care not to damage the
seals (ensure that they are correctly fitted in their
respective positions).