Aussie Kanga User Manual
Page 17
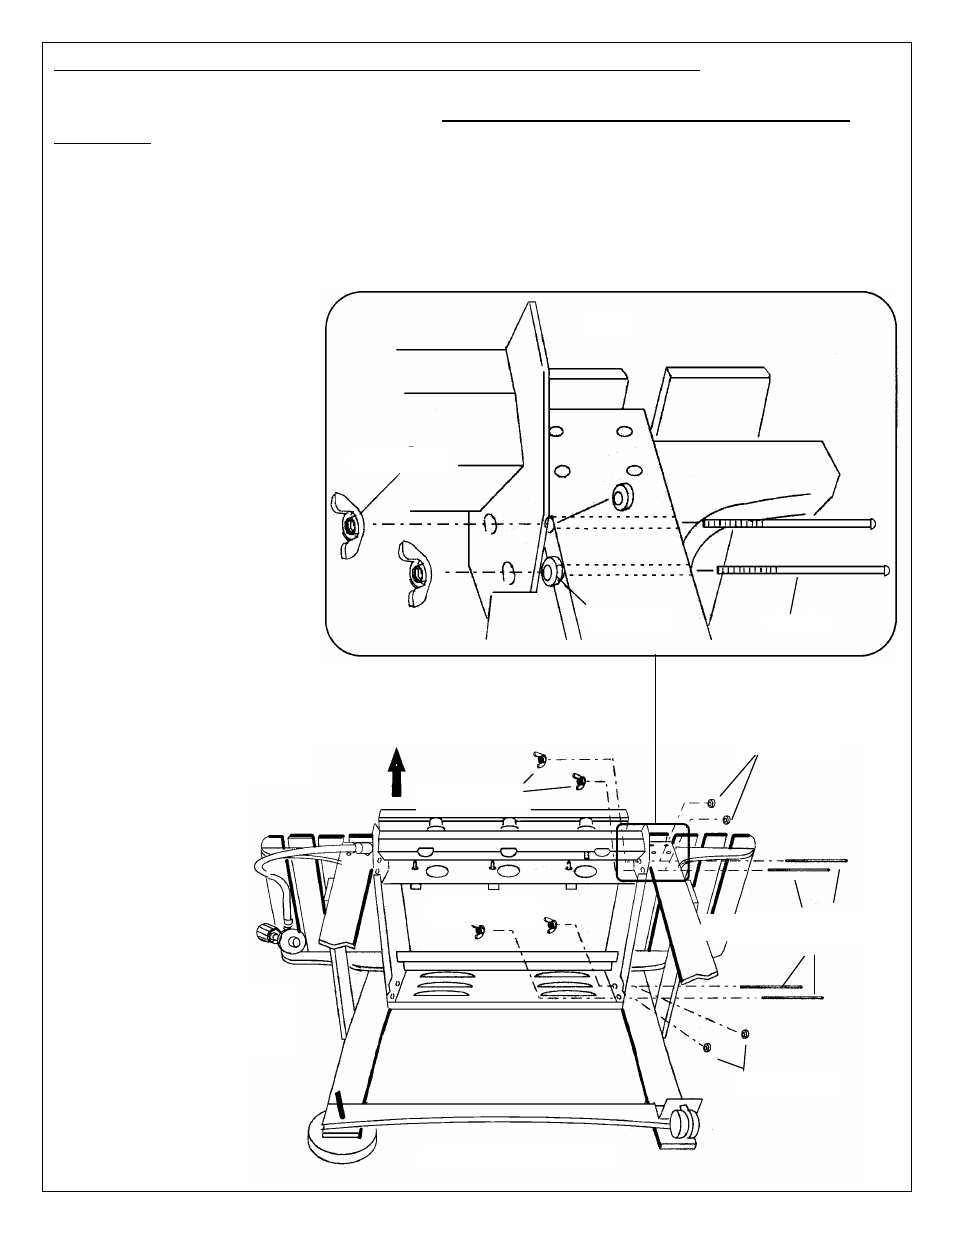
STEP 7-(CONTINUED) GRILL BODY/CART ASSEMBLY- BONZA MODELS
•Lay Grill Body on its back side with control panel up. Place Grill Body between legs and Side Tables
with Hose and Regulator on Wheel Leg end. Do not lay Grill Body on, or step on Hose and
Regulator.
•Align slotted holes on sides of Grill Body with holes through edges of legs (Fig F). Hold Spacers
between Leg and Body (Needle Nose Pliers may help) and insert Body Bolts through Leg, Spacers,
and slotted holes in Grill Body. Secure using Wing Nuts, but only partially tighten. Repeat assembly
for remaining three Cart Legs.
•Using a second person, turn
full grill assembly upright with
wheels and legs/casters on
the ground. Grill Body
should slide down and seat
itself within the slotted holes.
If not, loosen the Body Bolts
and push Body down at the
corners. Tighten all Body
Bolts and Wing Nuts and
then tighten all other Bolts.
•Adjust the Lock Lever up or
down on each Caster to lock
or unlock as desired. (NOTE:
Deluxe models do not use
casters.)
CONTINUE ASSEMBLY OF
BONZA & BONZA DELUXE
MODELS AT STEP 8.
WINGNUTS
CONTROL PANEL UP
GRILL BODY LYING
ON BACK SIDE
WINGNUTS
SPACERS
SPACERS
6mm x 110mm BOLTS
WINGNUTS
CART ASSEMBLY
17
SPACERS
BOLTS
FIG. F