Removing procedure – Kenwood DNX5210BT User Manual
Page 26
26
Quick Start Guide
Microphone unit
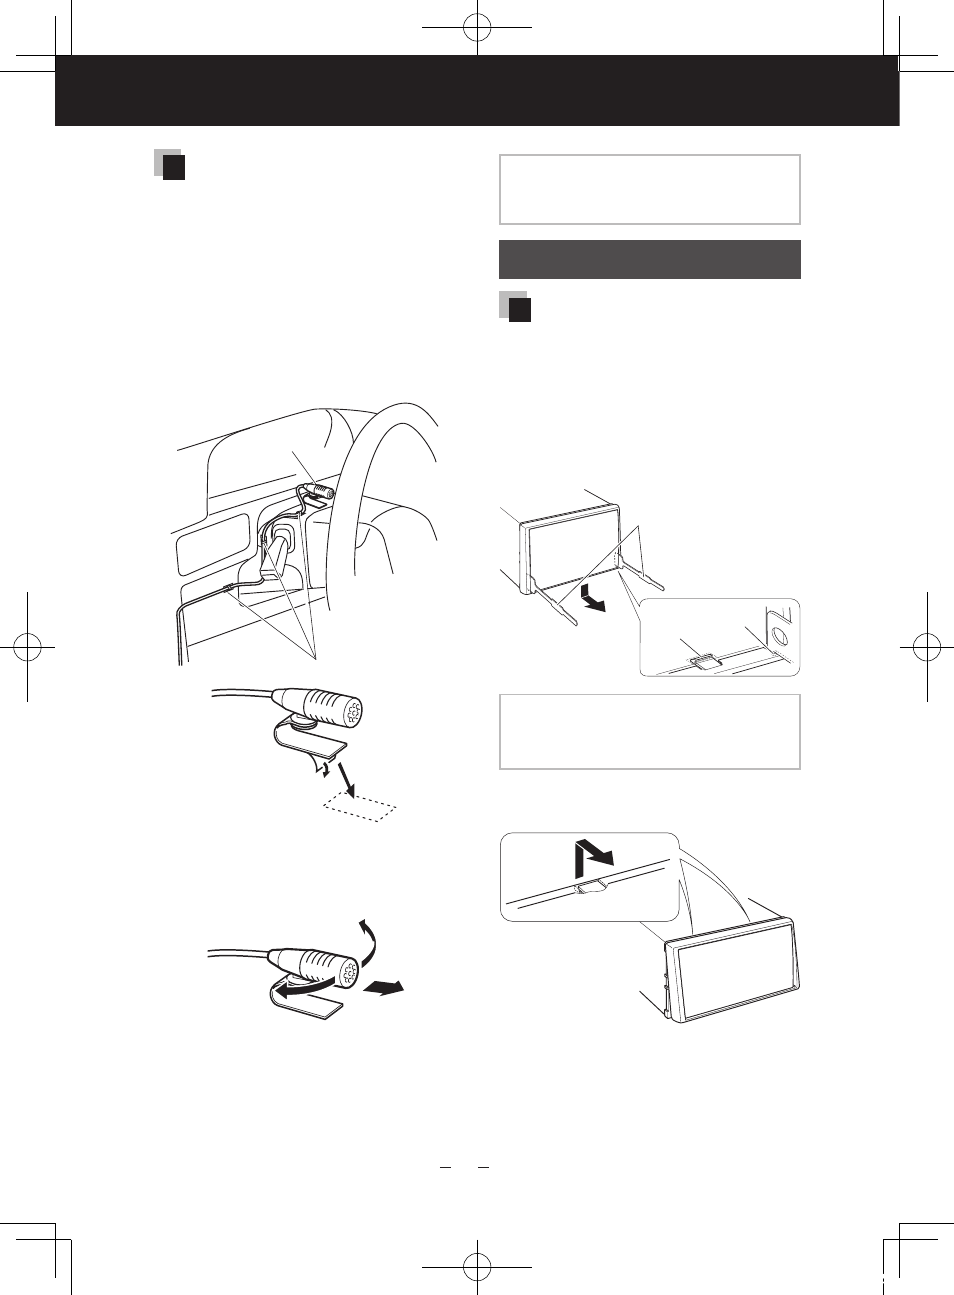
1) Check the installation position of
the microphone (accessory 8).
2) Remove oil and other dirt from
the installation surface.
3) Install the microphone.
4) Wire the microphone cable up to
the unit with it secured at several
positions using tape or other
desired method.
8
Fix a cable with a commercial item of tape.
Peel the release coated paper of
double-face adhesive tape to fix on
the place shown above.
Adjust the direction of the
microphone to the driver.
NOTE
• Install the microphone as far as possible
from the cell-phone.
Removing Procedure
Removing the hard rubber
frame (escutcheon)
1) Engage the catch pins on the
removal tool (accessory3) and
remove the two locks on the
lower level.
Lower the frame and pull it
forward as shown in the figure.
3
Lock
Catch
NOTE
• The frame can be removed from the top
side in the same manner.
2) When the lower level is removed,
remove the upper two locations.
B59-2101-00_00_12DNX7_QSG_E.indd 26
11/12/02 14:20