Steffy Wood Products Changing Table with Pad and Strap User Manual
Page 3
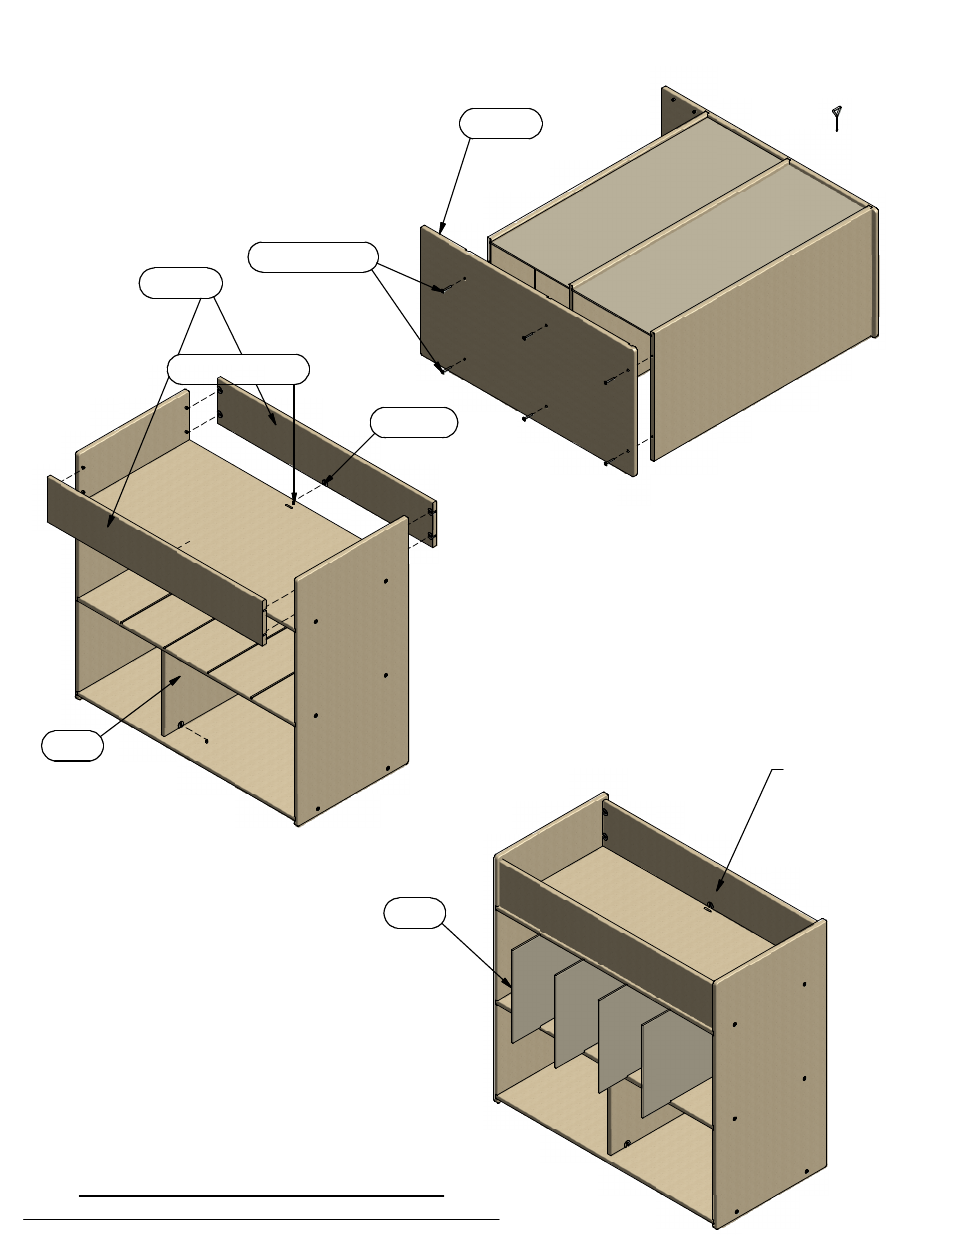
5
Attach the remaining side panel using 6
connecting bolts and the hex key. Be sure
each back panel is in the slot in the side
panel.
6
Attach the top strips to the side and top panels by
inserting the plastic connectors in the top strips to the
connecting screws on the top and side panel. Using an
appropriate sized screwdriver, turn the screw located in
the plastic connector clockwise until tight.
7
Attach the divider to the shelf and bottom panel using the
same procedure in step 6. Be sure the rounded, smooth
edge is facing front.
8
Slide the dividers into the slots in the top
panel and shelf. Be sure the rounded,
smooth edge is facing front.
9
From the top of the unit, insert the end of the
strap through the slot in the top and pull it up
through the slot on the opposite slot in the top.
Feed the end of the strap through the slots in
the buckle. To release the buckle, squeeze the
sides of the buckle until it snaps open.
Place the table pad on the top of the unit. Be
sure the strap in located on top of the table
pad.
CHECK ALL BOLTS AND CONNECTORS
PERIODICALLY TO MAKE SURE THEY ARE TIGHT!
SIDE PANEL
CONNECTING BOLT
TOP STRIPS
DIVIDER
DIVIDER
Slot for strap
CONNECTOR
CONNECTING SCREW