Triton Sediment User Manual
Page 10
Page 7
the classification process, the area around each sample location is compared to the
texture of the imagery to develop an understanding of what each bottom type should
look like in the imagery.
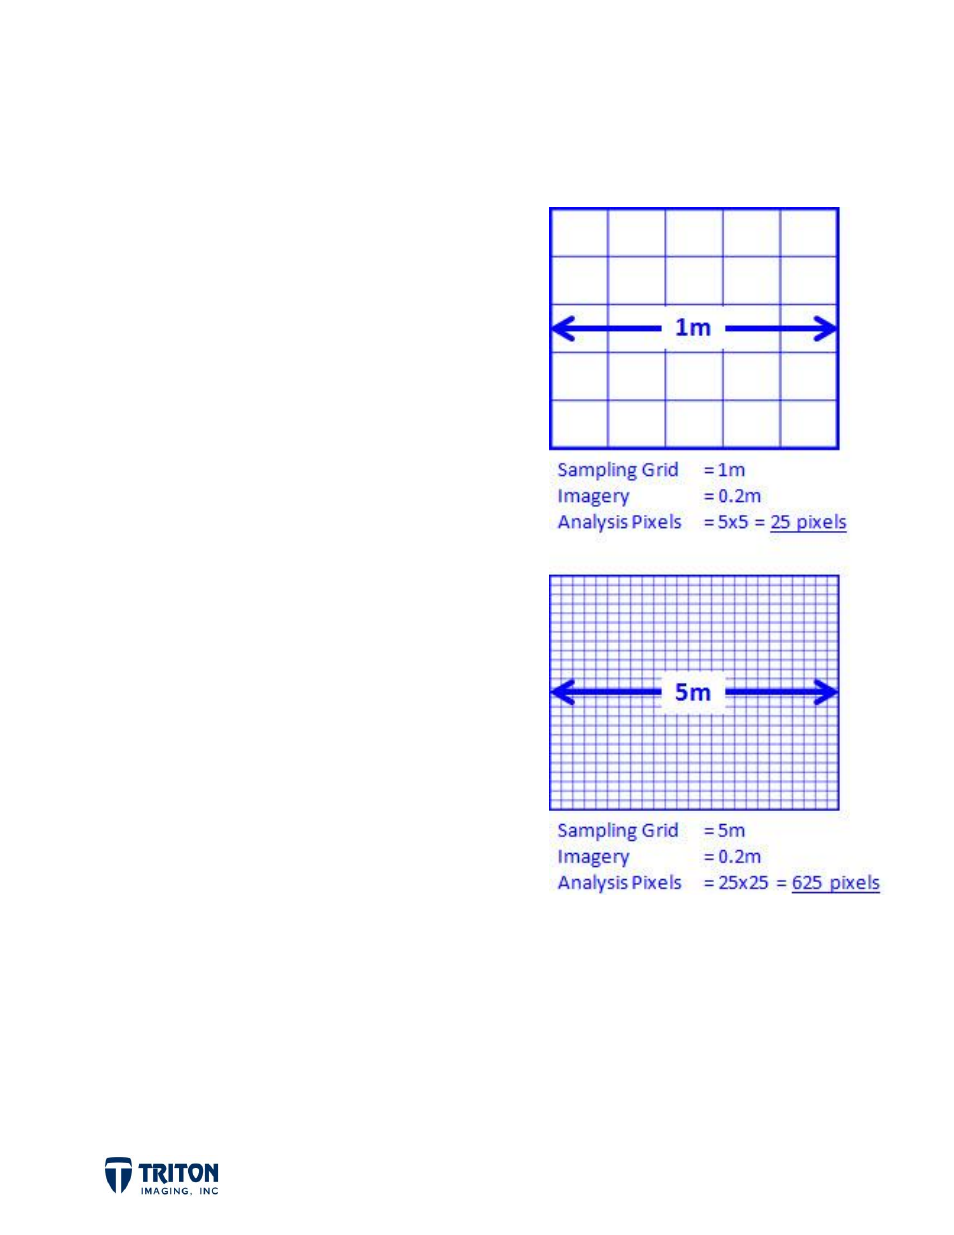
Within each sampling area (set by the
Sampling
Grid Size
), the number of unique values to
interpret is a function of the imagery resolution!
This is really important to understand!!! So for
0.2m resolution imagery, using a
Sampling Grid
Size
= 1m only gives the software 5x5=25 pixels
to analyze within this sampling area. This is not
enough for the software to produce the best
results. Increasing the
Sampling Grid Size
= 5m
gives the software 25x25=625 pixels to analyze
within this sampling area. While this is plenty of
pixels to use for the analysis, the area size may
now include more than just the one bottom type
sampled at the center of the area.
Therefore, there is a trade-off between
increasing the number of pixels in the sampling
area which is good, versus increasing the size of
the area which may not be so good depending on
the complexity of the imagery to be classified.
In general, using a sampling grid size of at least
10 times the imagery resolution will produce good
results from the classification process.
*******************************************************************************
Once the Name has been entered and
Sampling Grid Size
selected in the
Create Training
Set
page of the SeaClass wizard, click
Next
to advance to the next page.
This page is called
Edit Classes & Samples
and is for creating a Class for each bottom type,
and then adding the sample locations to the classes. Samples can be added to each class
automatically from Feature files or manually by clicking the location in the map view.