2 replacement of internal parts, 1 replacement of plug and stem, 2 replacement of seals of pressure balanced plugs – ARI Armaturen STEVI 471 EN User Manual
Page 12: Pressure balanced plugs
Page 12
Rev. 0040305000 0410
Operating and installation instructions
Straight through control valves - STEVI
®
470 / 471
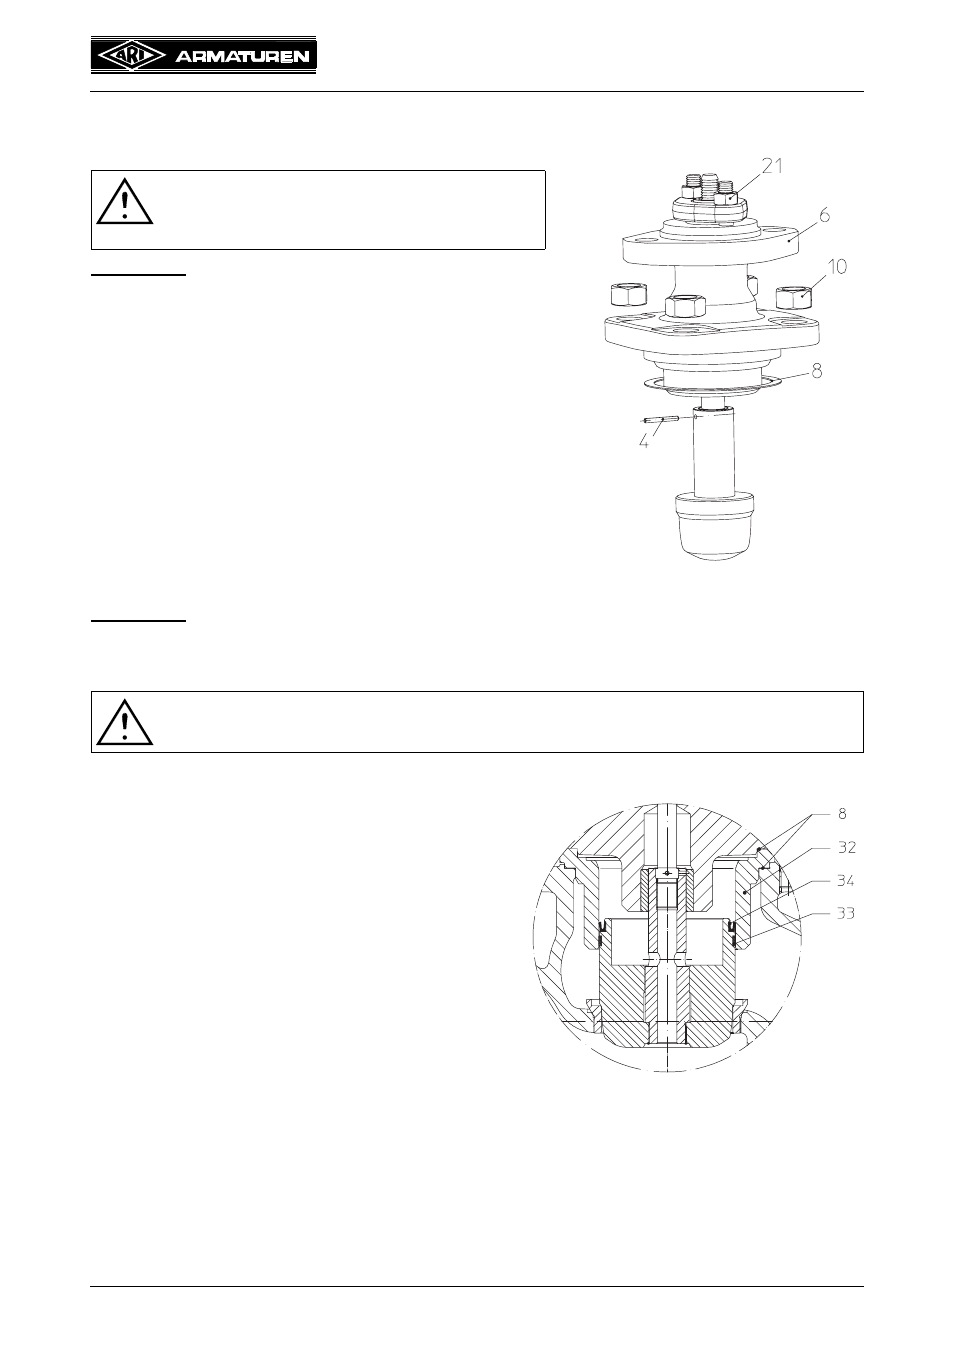
7.2 Replacement of internal parts
7.2.1 Replacement of plug and stem
Series 470
- Loose nuts (pos. 10).
- Detach the mounting bonnet (pos. 6) resp. stuffing box
housing (pos. 24).
- Slacken nuts (pos. 21) by about 2-3 turns.
- Extract plug (pos. 3) and stem (pos. 5).
- Drive pin (pos. 4) out with a drift.
- Unscrew plug (pos. 3).
- Bolt new parts togethe, drill and pin them.
- Replace the gasket (pos. 8).
- Assemble in reverse order
- Secure with nuts (pos. 10) and tighten them crosswise.
(For tightening torques refer to item 7.3.1)
Series 471:
For replacement of plug and stem with bellows sealing (Series 470) refer to item 7.1.3.
7.2.2 Replacement of seals of pressure balanced plugs
- Remove actuator. (Refer to operating instructions for actuator!)
- Remove plug as described in item 7.2.1.
- Prise worn piston seal (pos. 34) out of groove in
plug with suitable tool (e.g. screwdriver).
- Insert new piston seal (pos. 34), taking care that it
is in the correct position (refer to Fig. 17).
- Replace guide ring (pos. 33).
- Clean sliding surface of guide bush (pos. 32);
smooth with fine abrasive if necessary.
- Replace 2 gaskets (pos. 8).
- Assemble in reverse order.
- Secure with nuts (pos. 10) and tighten them
crosswise.
(For tightening torques refer to item 7.3.1)
ATTENTION !
Refer to item 10.0 and 11.0 before
dismantling the valve.
ATTENTION !
Refer to item 10.0 and 11.0 before dismantling the valve.
Fig. 16: Series 470
Fig. 17: Pressure balanced plug