Haws 2500.FS User Manual
Page 5
6/13
Model 2500.FS
Page 5 of 12
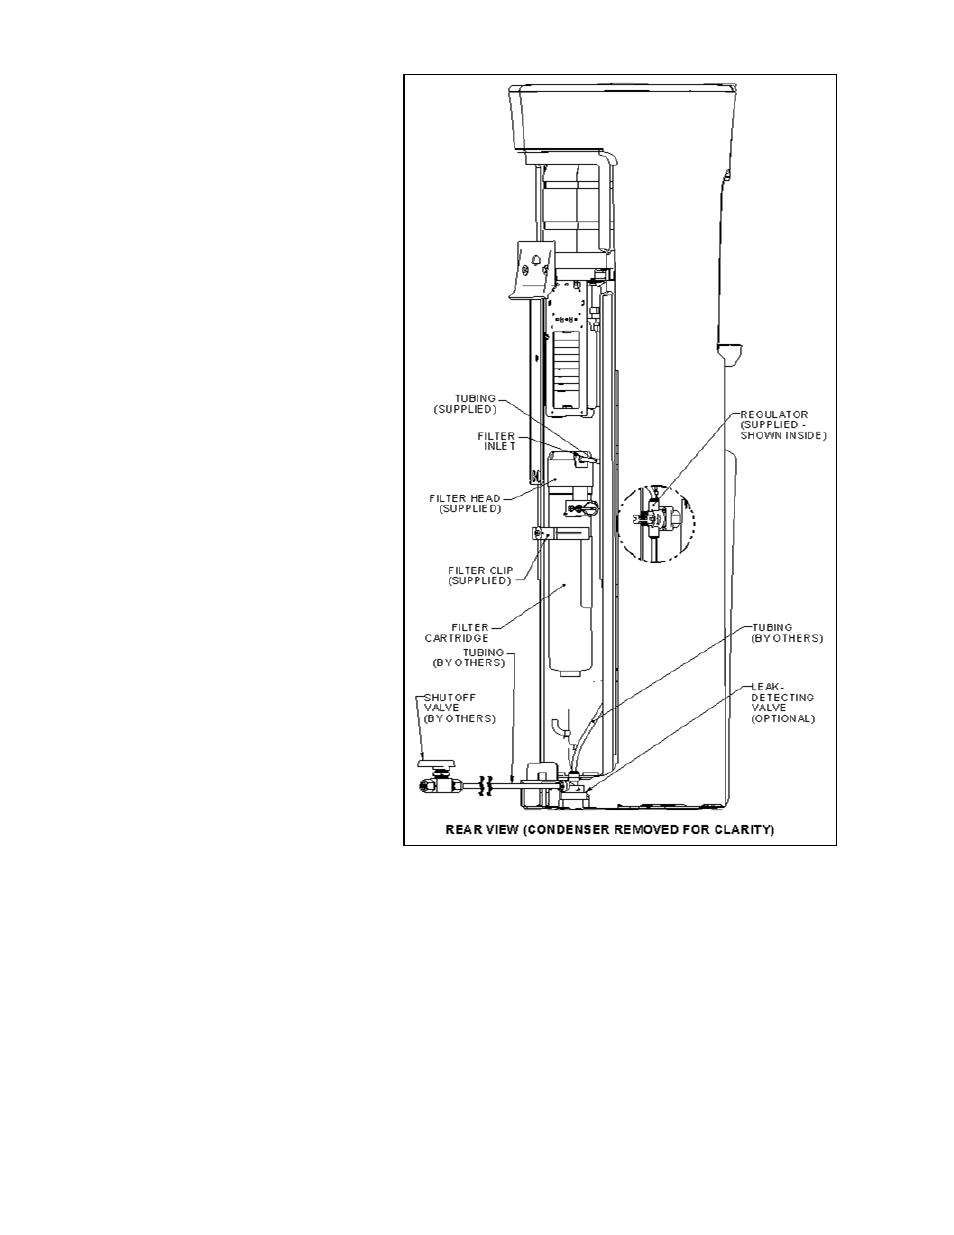
Step 4:
Attach the inlet tubing from
the cooler, found inside the
unit, to the filter head outlet
(ports are labeled), and
attach the outlet tubing of
the pressure regulator into
the filter head inlet. The
regulator itself may be
inside or outside the unit.
Press the filter assembly
into the mounting clip until
it snaps into place.
NOTE: The regulator
protects against sudden
pressure increases in the
supply line.
Step 5:
Provide a water supply inlet
of 1/4" tubing with a code-
compliant shutoff valve. If
the optional Model 2518
1/4" leak-detecting valve
was purchased, install it in
the inlet plumbing as well.
This valve is designed to
shut off the water supply if
water contacts it, so it is
best to secure it firmly to
the floor, very close to the
unit itself (NOTE: Take
care not to introduce water
to this valve by mopping,
etc.). Connect the
assembled water supply
plumbing to the inlet of the
pressure regulator.
NOTE: The optional
Model 2520 cooler base
has mounting geometry to
allow the leak-detecting
valve to be mounted
directly upon it.
Step 6:
Any new filter cartridge must be purged of bubbles and carbon particles (both of which are
normal in a new filter) before it can be used. Do not purge the filter through the cooler; do
this instead:
Disconnect the tubing at the filter outlet and install a separate length of tubing (by others) into
the outlet (see note 5 on page 3). Direct this tubing into a suitable container or drain, and
turn on the water supply to purge 5 gallons water through the filter and into the container.
Turn off the water and re-install the original filter plumbing when done.
This step is necessary for replacement filters as well.
Step 7:
Turn on the inlet water supply to fill the system. Check the inlet tubing and the unit for leaks.
Reinstall the cup dispenser.
Step 8:
Make sure that the hot water tank power switch on the back of the unit (see diagram on
next page)
is in the “Off” position. Plug the unit into 115VAC wall power.