Leakage checkpoints – State GS6 75 URRBS User Manual
Page 25
25
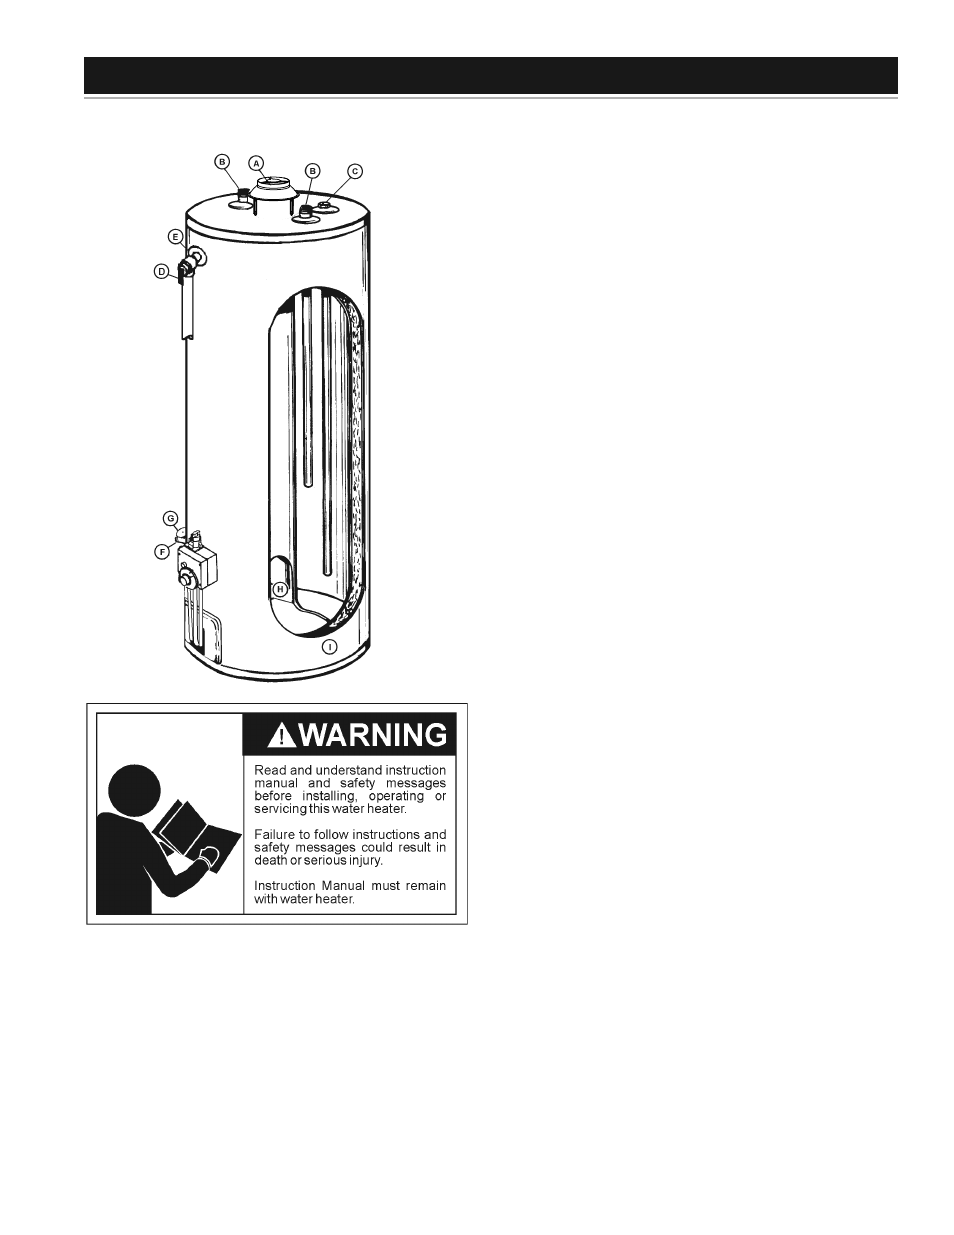
LEAKAGE CHECKPOINTS
Read this manual fi rst. Then before checking the water heater make
sure the gas supply has been turned “OFF”, and never turn the gas
“ON” before the tank is completely full of water.
Never use this water heater unless it is completely fi lled with water
to prevent damage to the tank. Water must fl ow from the hot water
faucet before turning “ON” gas to the water heater.
A. Water at the draft hood is water vapor which has condensed out
of the combustion products. This is caused by a problem in the
vent. Contact a qualifi ed service technician.
B. *Condensation may be seen on pipes in humid weather or pipe
connections may be leaking.
C. *The anode rod fi tting may be leaking.
D. Small amounts of water from temperature-pressure relief valve
may be due to thermal expansion or high water pressure in your
area.
E. *The temperature-pressure relief valve may be leaking at the
tank fi tting.
F. Water from a drain valve may be due to the valve being slightly
opened.
G. *The drain valve may be leaking at the tank fi tting.
H. Combustion products contain water vapor which can condense
on the cooler surfaces of the tank. Droplets form and drip onto
the burner or run on the fl oor. This is common at the time of
start-up after installation and when incoming water is cold.
I. Water in the water heater bottom or on the fl oor may be from
condensation, loose connections, or the relief valve. DO NOT
replace the water heater until a full inspection of all possible water
sources is made and necessary corrective steps taken.
Leakage from other appliances, water lines, or ground seepage
should also be checked.
* To check where threaded portion enters tank, insert cotton
swab between jacket opening and fi tting. If cotton is wet, follow
“Draining” instructions in the “Periodic Maintenance” section and
then remove fi tting. Put pipe dope or tefl on tape on the threads
and replace. Then follow “Filling the Water Heater” instructions
in the “Installing the New Water Heater” section.