Maxsa Innovations Solar Party Color-Changing Path Light User Manual
Page 2
90 DAY LIMITED WARRANTY
MAXSA Solar Color-Changing lights are warranted against faulty material and/or workmanship
for a period of 90 days from date of original purchase (excluding the batteries).
The obligation of the manufacturer, under this warranty, is limited to servicing and replacing
defective parts when the unit is returned to MAXSA Innovations, freight pre-paid during the
warranty period. To obtain warranty repair, the purchase receipt should be returned with the
product.
This warranty becomes void on any unit which has been tampered with, damaged by
accident, or damaged otherwise by improper operation.
This guarantee is in addition to any guarantees implied by State or Federal Legislation.
TO REPLACE RECHARGEABLE BATTERIES
Note: Dispose of old batteries properly. Do not dispose by general household refuse or into a fire.
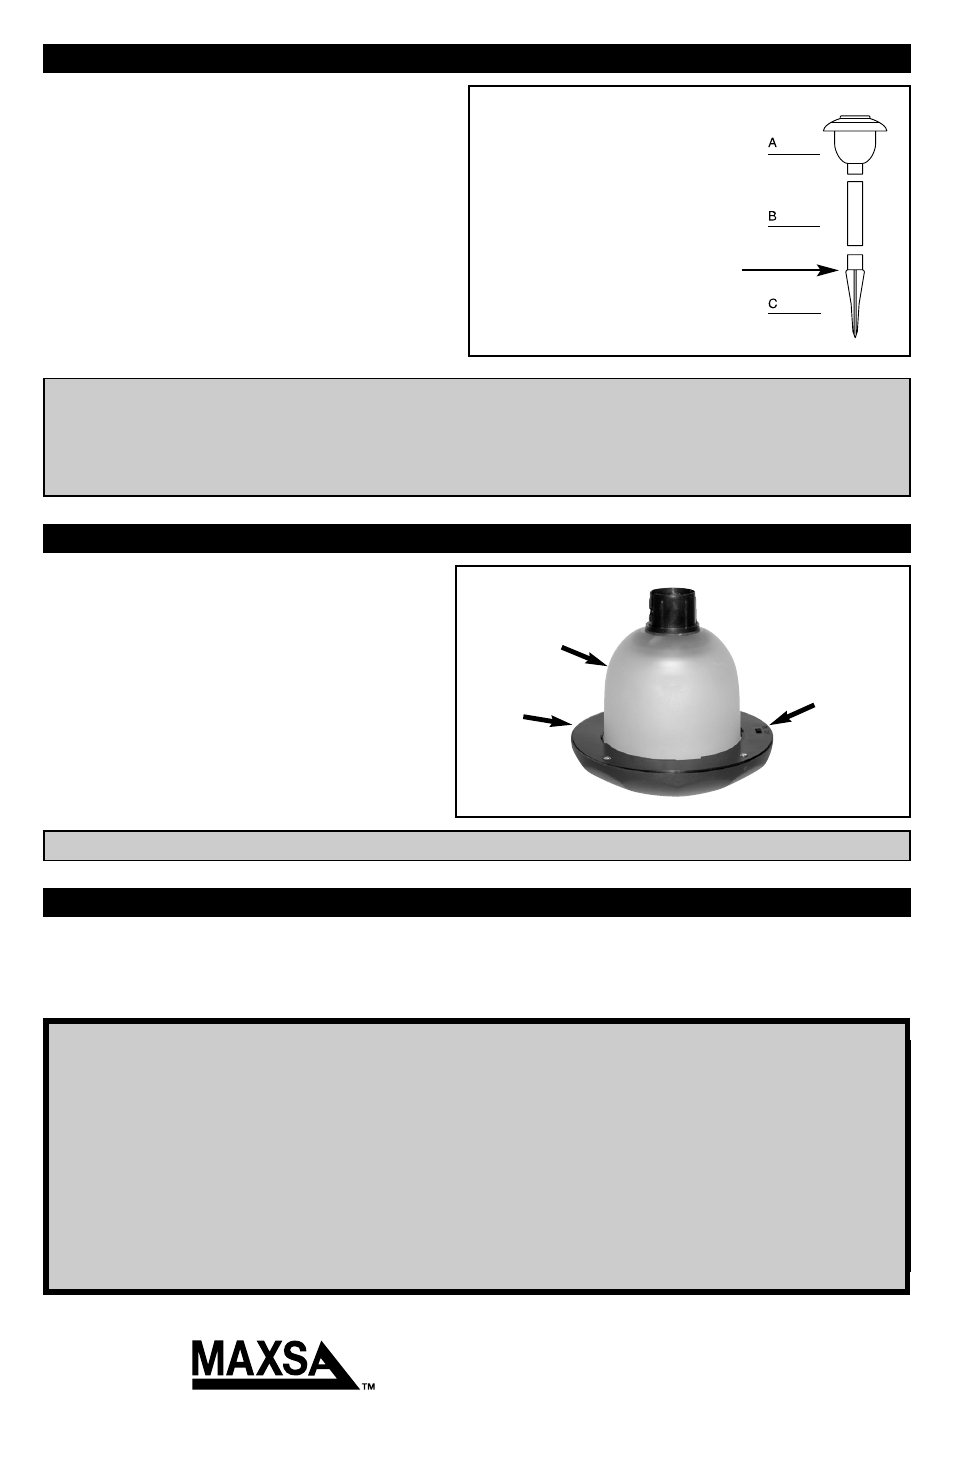
ON/OFF
SWITCH
MAXSA Innovations
8412 Cathedral Forest Drive
Fairfax Station, Virginia 22039
www.maxsainnovations.com
Tel: 703-495-0661
v4.2
1. Remove the solar light from the
extension pole.
2. Turn solar light upside down and slide
power switch to the OFF position.
3. Twist light from hood to open.
4. Open battery compartments and replace
batteries.
5. Repeat steps in the “Before First Use of
Your Solar Path Light” section to ensure
the new batteries are fully charged.
USE AND CARE OF YOUR SOLAR PATH LIGHT
For best results, periodically wipe your solar path light with a damp cloth to remove any dirt.
To prolong the life of your solar path light and reduce the risk of corrosion, install the light away
from salty, corrosive or highly fertilized areas.
LIGHT
HOOD
*Note: If the ground is hard and packed, moisten the ground with water before inserting the
ground stake to avoid breakage.
Use a rubber mallet (not included) if necessary, to gently tap the ground stake. Do not hit the
solar light (A) or solar panel.
Parts List:
(A) Solar light
(B) Straight section
(C) Ground stake
Note: 2 AA rechargeable
batteries 1.2V/600mAh are
pre-installed in the solar light
Insert into ground up to here.
The solar path light needs to be assembled
prior to installation.
1. Carefully insert the pointed end of the ground
stake (C) into the ground* where desired.
Push the ground stake into the ground until
the arrow portion is even with the ground.
2. Insert the straight section (B) into the solar
light (A).
3. Attach the ground stake (C) by inserting
into the straight section (B). Push together
until secure.
ASSEMBLING YOUR SOLAR PATH LIGHT