Included parts – Maxsa Innovations MAXSA BRIGHT Solar Security Light in Silver with 16 Surface Mount LEDs User Manual
Page 2
2
Motion-Activated Solar Security Light
www.maxsainnovations.com
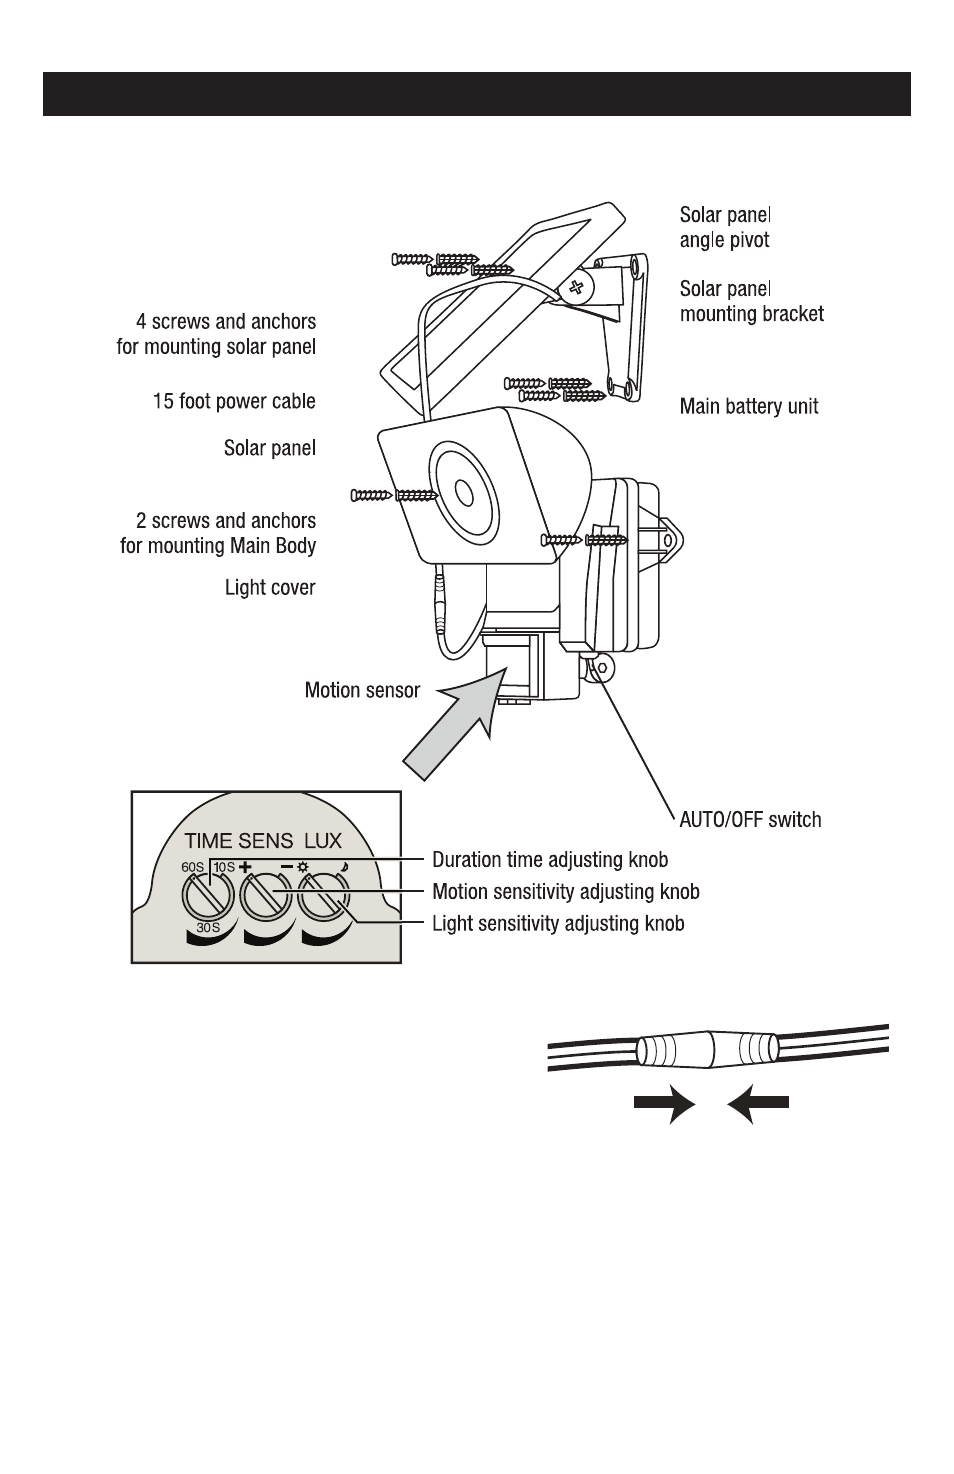
INCLUDED PARTS
Carefully remove and identify all the parts from their protective packaging and lay them out in
front of you.
2
Carefully remove and identify all the parts from their protective packaging and lay
them out in front of you.
INCLUDED PARTS:
the solar panel to your Solar Security Light
by plugging the 15 foot cord into the cord
attached to the front of the Solar Security
Light. Turn and twist the cords while pressing
Adjustment dials are located on the underside of the motion sensor. Move the
motion sensor to allow for easier access to the controls. Move sensor back into
position upon completion.
Once you have identified all parts, connect the solar
panel to your Solar Security Light by plugging the
15 foot cord into the cord attached to the front of
the Solar Security Light. Turn and twist the cords
while pressing firmly together until they are attached
tightly.
Adjustment dials are located on the underside of the motion sensor. Move the motion sensor to
allow for easier access to the controls. Move sensor back into position upon completion.