Quick set up – Pure Chronos iDock User Manual
Page 6
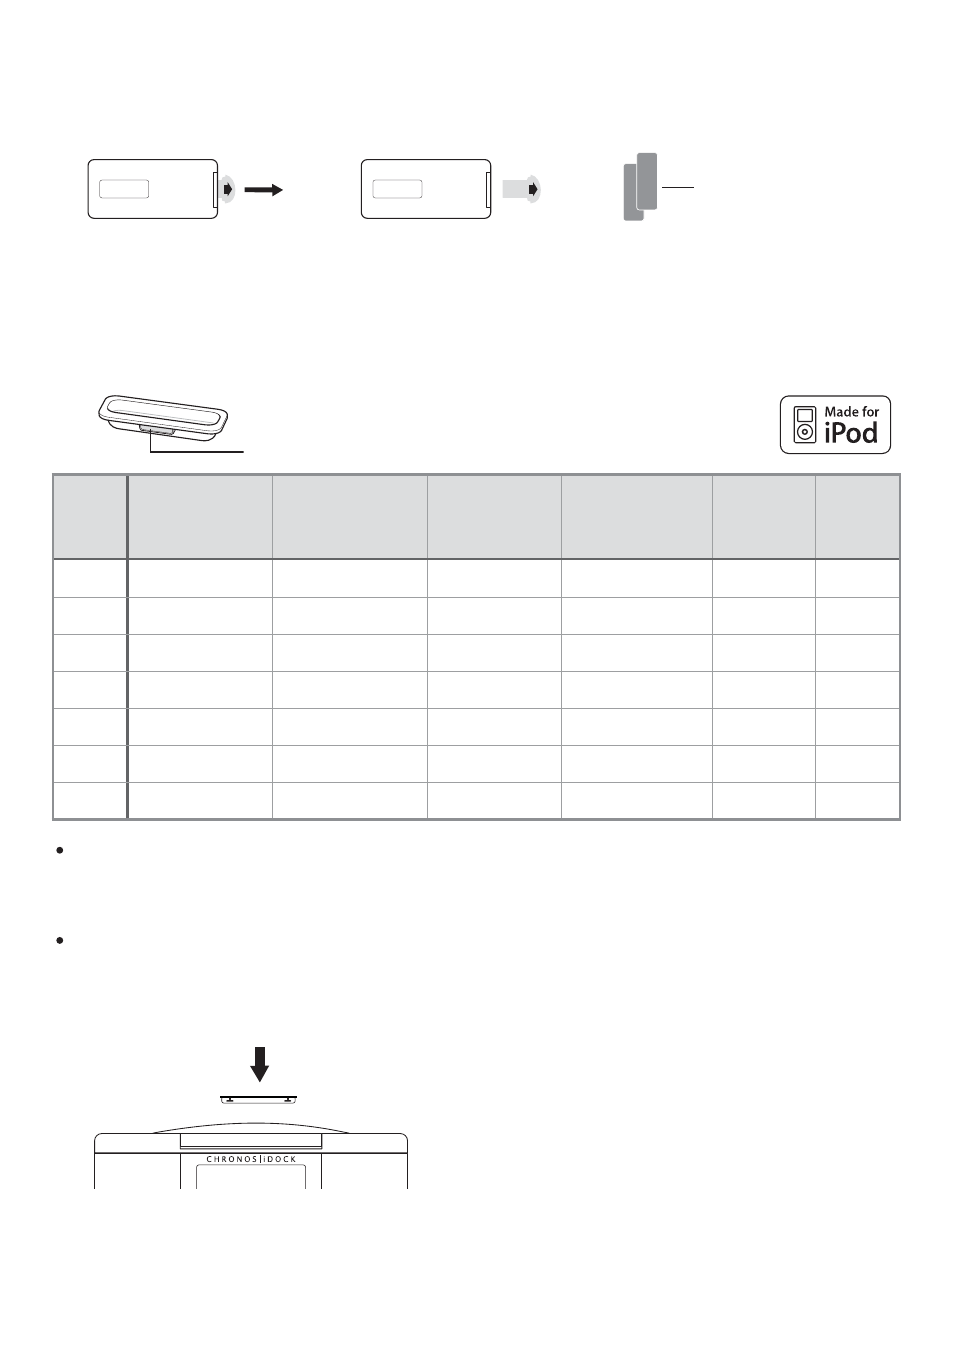
4
Dock Adapter number (3, 6-11)
Dock
Adapter
number
iPod
4th generation
(colour display)
iPod nano
1st generation
iPod
5th generation
(video)
iPod nano
2nd generation
(aluminium)
iPod mini
iPod
classic
3
4GB, 6GB
6
20GB, 30GB
7
40GB, 60GB
8
1GB, 2GB, 4GB
9
30GB
80GB
10
60GB, 80GB
160GB
11
2GB, 4GB, 8GB
Quick set up
1. Pull out the plastic slip from the remote control battery compartment.
2. Open the box containing the iPod Dock Adapters and select the adapter that is compatible with
your model of iPod as detailed in the table below.
3. Fit the Dock Adapter to the top of the unit with the adapter number facing towards the rear.
5. Wait for Chronos iDock to complete an Autotune for all available DAB stations (takes about a minute).
The table above lists the seven included Dock Adapters and the iPod models they are compatible
•
with. Chronos iDock is compatible with all iPod models that connect to the iPod Universal Dock,
except 3rd generation models.
A compatible Dock Adapter is provided with most iPod models. If your model of iPod is not listed
•
in the table, and if you do not already have a compatible Dock Adapter, we recommend that you
purchase the correct type from Apple.
4. Hang the aerial wire vertically, connect the mains adapter to the underside of the unit and plug
the unit into the power supply.
The remote can be magnetically attached to the side of the unit for handy storage. If you’d like
to do so, affix one of the supplied adhesive magnetic strips to the recess on the reverse of the
remote and one to the side of the unit.
Magnetic strips (x2)