页面 4 – Monoprice 8576 MDA03-223 User Manual
Page 4
6
5
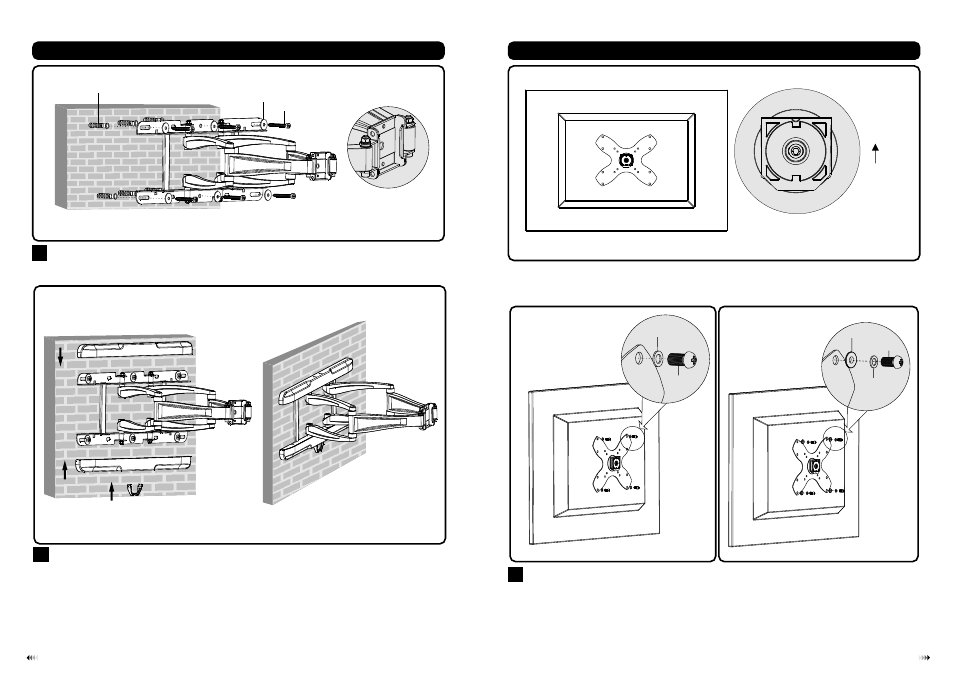
Installing Adapter Bracket
:
3
•
To prevent scratching the screen, set a cloth on a flat, level surface that will support the weight of the
screen.
•
Place screen face side down. Place adapter on the back of screen, align to holes, and center on back of
screen, as shown in fig.3.1.
•
Attach the adapter bracket to the back of the screen using the appropriate combination of screws,
washers, and spacers, as shown in fig.3.2 and fig.3.3.
•
Snap the plastic covers to top and bottom of wall plate rails and then insert the cable clip from the bottom of the
plastic cover as shown in fig. 2.1.
2
Mounting The Plastic Covers and The Cable Clip
fig. 2.1
fig. 3.3
• Begin with the proper screw, hand thread through washer and adapter bracket into screen as shown in fig.3.2
and fig.3.3.
• Screw must make at least three full turns into mounting hole and fit snug into place. Do not over tighten.
• Repeat for remaining mounting holes, level bracket and tighten screws.
M-G/M-H
M-C/M-D
M-I
M-E/M-F
M-A/M-B
Hang the bracket mounted display onto the plate of articulated arm assembly, and then tighten safety screws
securely with a proper screwdriver as shown in fig.4.1.
Important: Make sure the bracket mounted display is correctly mounted and the safety screws are tightened
securely before loosening the display.
You can adjust tighter or looser using a 4mm allen key according to the weight of the display you will be installing.
Installing the Display
4
fig. 3.2
fig. 1.3
W-A
W-B
W-C
Make sure the wall plate is
correctly placed
fig.3.1
Top of display