页面 3, Warning – Monoprice 8576 MDA03-223 User Manual
Page 3
4
3
Wood Stud Wall Mounting:
1a
WARNING
• Make sure that the supporting surface will safely support the combined load of the
equipment and all attached hardware and components.
• Tighten wood screws firmly, but do not over tighten. Over tightening can damage
the screws, greatly reducing their holding power.
• Make sure that mounting screws are anchored into the center of the studs. Use of
an “edge to edge” stud finder is highly recommended.
• Hardware provided is for attachment of mount through standard thickness drywall
or plaster into studs. Installers are responsible to provide hardware for other types
of mounting situations.
•
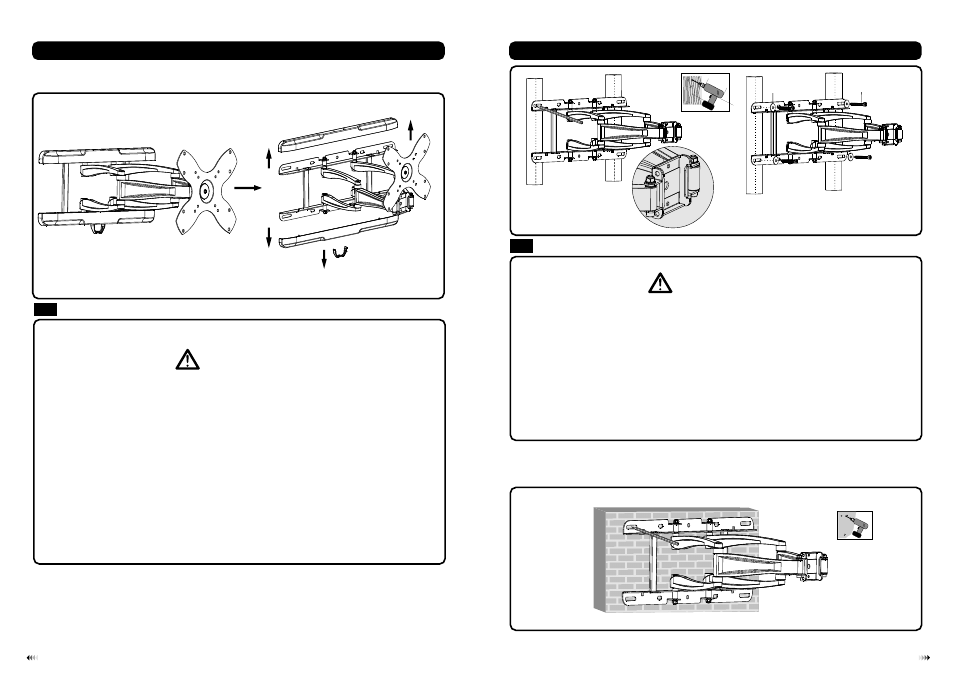
Use a stud finder to locate the edges of the studs. Use of an edge-to-edge stud finder is highly recommended.
Based on their edges, draw a vertical line down each stud’s center.
•
Place wall plate on wall as a template. And mark the center of the four mounting holes. Make sure that
the mounting holes are on the stud centerline.
•
Drill four 1/8” (3mm) dia. Holes 1.2” (30mm) deep. Make sure that the wall plate is level, secure it using
four screws (W-A) as shown in fig. 1.1.
Solid Brick And Concrete Block Mounting:
1b
WARNING
•
Use the wall plate to mark six holes locations on the wall. as shown in fig.1.2.
•
Pre-drill these holes with a 10mm masonry bit to at least 60mm in depth. Insert a concrete anchor (W-B)
into each of these holes. Attach the wall plate to the wall using six screws (W-A) and six washers (W-C),
as shown in fig.1.3.
Disassemble the wall mount as shown below.
Loosen the safety screws with a proper screwdriver to disassemble the adapter bracket for easy
installation.
fig. 1.1
fig. 1.2
W-C
W-A
Make sure the wall plate is
correctly placed
When installing to a cinder block wall, please verify you have a minimum of
concrete thickness. Do not drill directly into mortar joints, be sure to mount to a
solid part of the block generally 1” minimum from the side of the block. It is
suggested to use an electric drill with a slow setting instead of a hammer to avoid
breaking the wall.
Please verify the supporting surface will safely support the capacity of hardware
and equipment prior to installing.
•
•