Tuff Country 24975 - Ford 08-14 F250/F350 5 box kit User Manual
Page 9
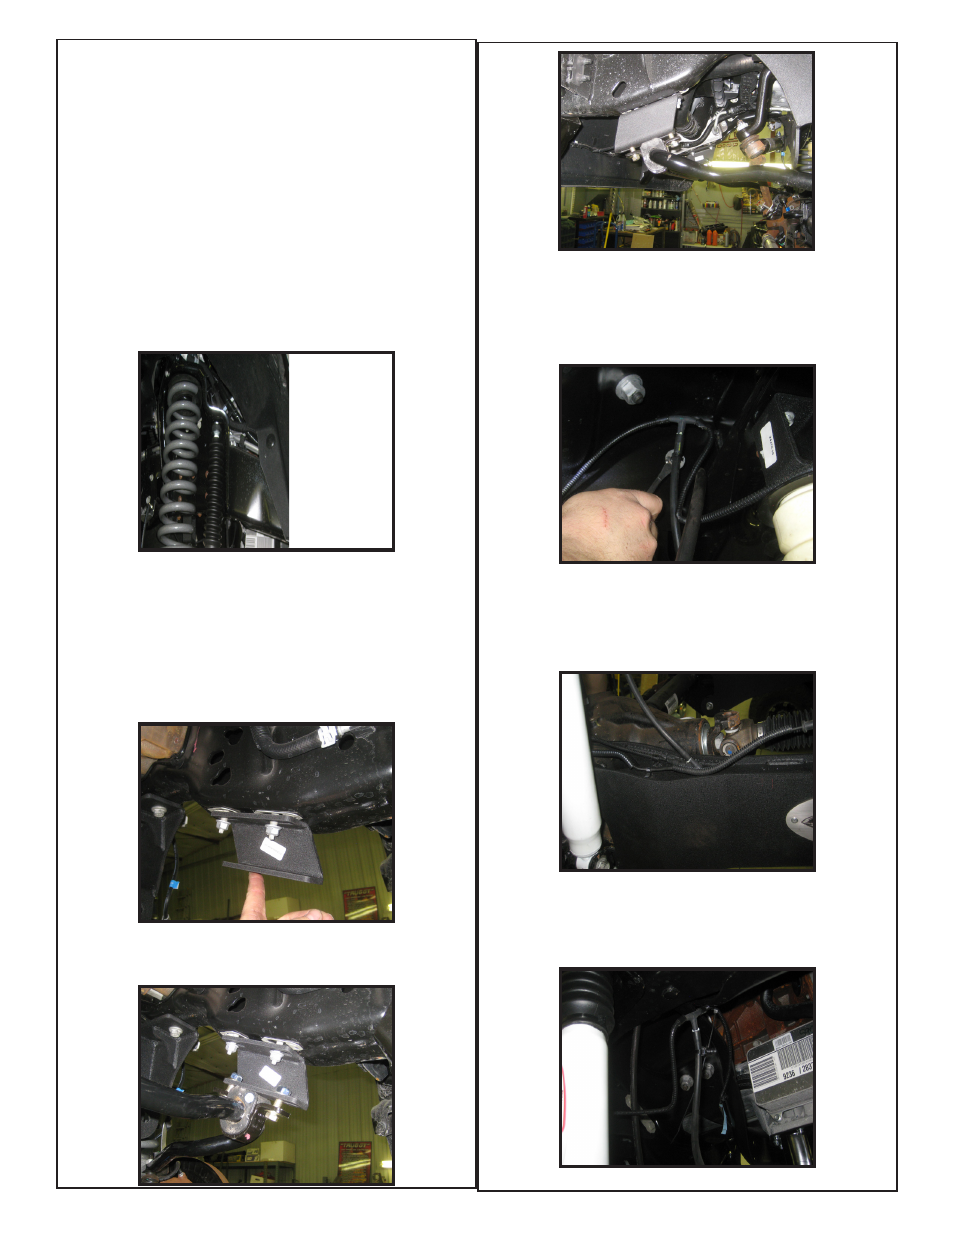
28. Locate the new front shocks.
Special note: New longer
front shocks are needed, if you have not already ordered
shocks, please contact Tuff Country or your local
Tuff Country dealer and order the proper shocks. Tuff
Country recommends using a 26” fully extended nitro-
gen gas shock. Locate the new poly bushings and proper
sleeves that are packaged with the new shock and install
them into the lower eyelet of the new shocks.
Special note:
Make sure to use a lithium or moly base grease prior
to inserting the new lower shock bushings and sleeves
into the new lower shock eyelet. This will increase the
life of the bushing as well as prevent squeaking.
29. Install the new shocks into the OE position using the OE
hardware on the bottom and new hardware on the top.
30. Locate the driver side sway bar drop bracket, also (2)
7/16” x 1 1/2” bolts, (4) 3/8” washers, and (2) 7/16” uni-
torque nuts from hardware bag 24975NB. Install the new
bracket to the bottom of the frame using the OE swaybar
mounting hardware, Leave loose for now.
31. Repeat on Passenger side using the passenger side
drop bracket.
32. Swing the sway bar up and attach it to the newly installed
drop brackets using the new 7/16” hardware. Leave loose at
this time.
33. Looking under the vehicle on the driver side, located on
the engine crossmember, find the plastic plug that is holding
the T-fitting for the ABS brake lines and pop the plastic plug
out of its hole. this is done to gain slack in the line so it can
be re-attached to the radius arm.
34. With the newly gained slack, you can re-attach the ABS
line and any other line/wires that can be plugged back onto
the holes provided in the new radius arms. Repeat on the
passenger side.
35. Using the provided zip tie in hardware bag 24975NB,
secure the ABS line T fitting that was unplugged in step #33
to the ABS wire near the bottom of the frame rail.