Tuff Country 24975 - Ford 08-14 F250/F350 5 box kit User Manual
Page 11
45. working on the driver side, install the new block between
the bottom of the leaf spring pack and the axle perch. Install
new u-bolts and hardware.
Special note: at this time you
should only hand tighten the u-bolt nuts, we will go back
and torque them once the passenger side is done.
Repeat steps 42-45 on the passenger side.
46. Now go back and tighten all the new u-bolt hardware.
Torque to
135 ft lbs. Special note: Re-attach the ABS line
clips to the new u-bolts.
47. Locate the new rear shocks.
Special note: New lon-
ger rear shocks are needed, if you have not already
ordered shocks, please contact Tuff Country or your
local Tuff Country dealer and order the proper shocks.
Tuff Country recommends using a 33” fully extended
nitrogen gas shock. Locate the proper sleeves that are
packaged with the new shock and install them into the upper
and lower eyelet of the new shocks.
Special note: Make
sure to use a lithium or moly base grease prior to insert-
ing the new lower shock bushings and sleeves into the
new lower shock eyelet. This will increase the life of the
bushing as well as prevent squeaking.
48. Install new rear shocks using the OE hardware. Torque
bolts to
80 ft lbs.
49. Re-install the emergency brake cable bracket to the driv-
er side frame rail using the OE hardware that was removed
in step #39
Rear Installation Complete!
50. Re-install the tires and wheels and lower the vehicle
back onto the ground so it is no longer supported by jack
stands.
51. Go back to the front of the vehicle and adjust the sway
bar so that the endlinks are as close to straight up and down
as you can, once there, torque the swaybar mounting bolts
to
42 ft lbs.
52. Re-attach the front track bar to the newly installed drop
bracket using the OE hardware.
Special note: The best
method we have found to get the track bar lined up with
the bracket holes is to have someone in the vehicle turn-
ing the steering wheel slightly, this will cause the vehi-
cle to shift side to side until it lines up and allows the
bolt to be inserted. Torque track bar bolt to 350 ft lbs.
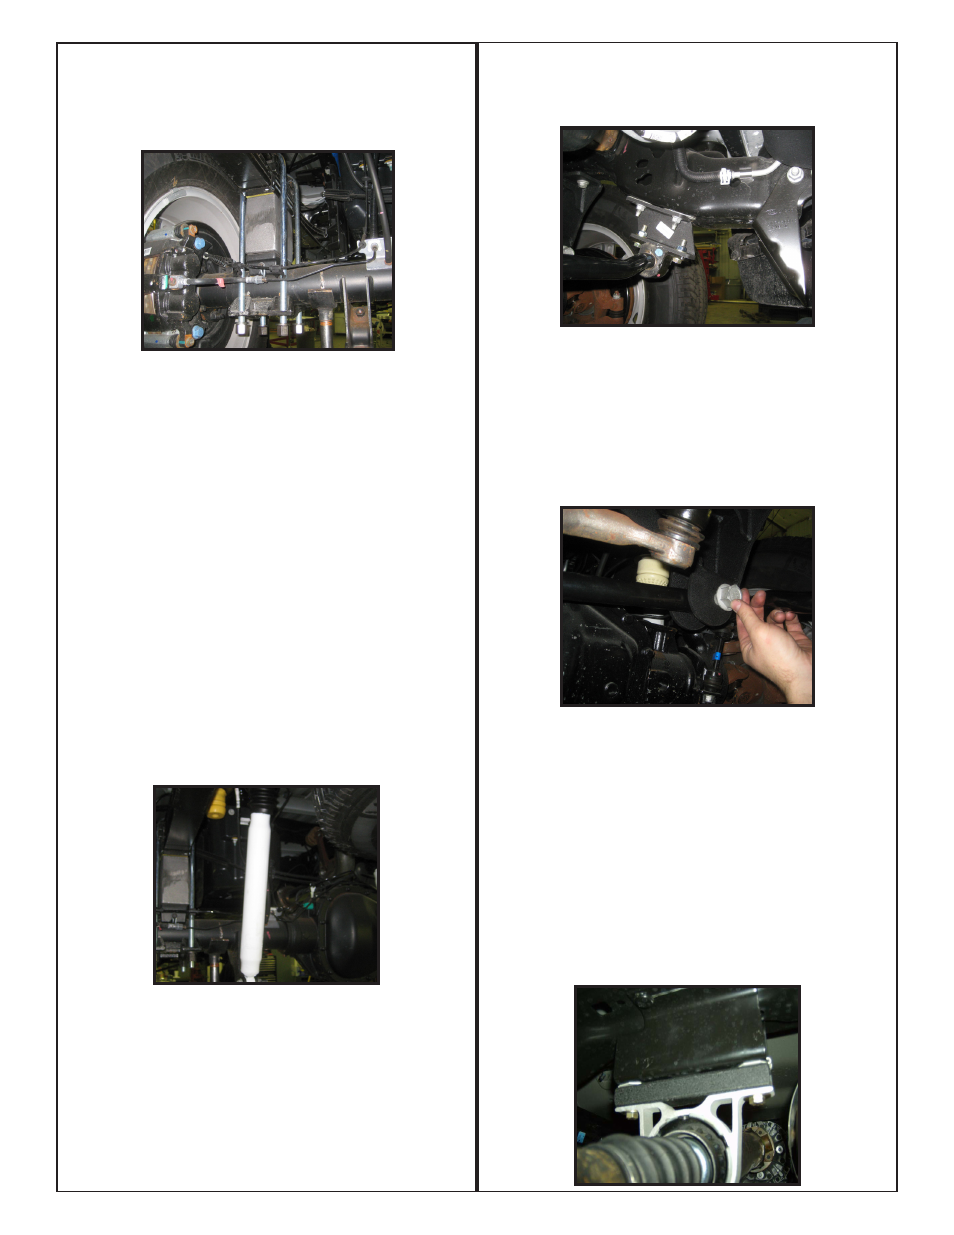
If the vehicle you are working on is equipped with a
2-piece rear drive shaft, please install the carrier bearing
relocation bracket using the next steps.
53. Working on the rear drive shaft, support the drive shaft
with a tall hydraulic jack.
54. Remove (2) OE bolts that are holding the carrier bearing
to the crossmember and discard hardware.
55. Carefully lower the jack approximately 1” down and
install the new carrier bearing bearing spacer. Secure using
the new 7/16” x 2 1/2” bolts and hardware from 24975NB
hardware bag.