Mc Leod Mag Force User Manual
Page 2
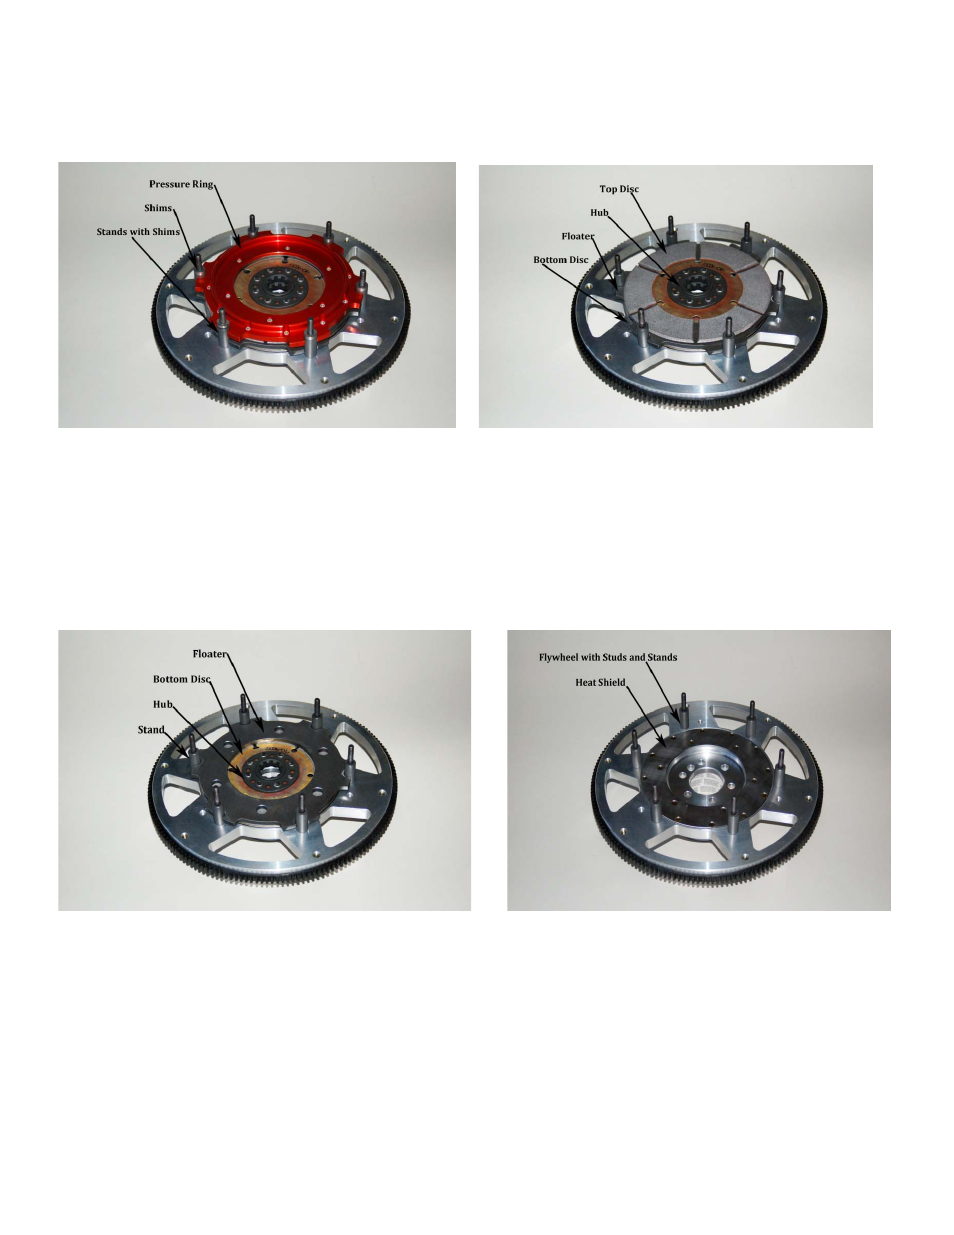
2) Lift off pressure plate, pressure ring and top disc and set aside. Reinstall nuts onto studs to retain
the shims and stands. Do Not Remove the Shims and Stands! Figure 2.
Figure 2
Figure 3
3) Caution: The shim packages on top of the stands are calibrated! Do not mix the shims!
Remove the shims only as a set and return the shims to the proper stud during reassembly!
4) Note the hub positioning when removing the top disc. This side of the disc assembly must be
toward the transmission. The flat side of the disc assembly with the large rivet heads must be
toward the flywheel. See Figure 3.
Figure 4
Figure 5
5) Note the engagement of the floater to the stands. Note the hub positioning when removing the
bottom disc. This side of the disc assembly must be toward the transmission. The flat side of the
disc assembly with the large rivet heads must be toward the flywheel. See Figure 4
6) This aluminum flywheel includes a heat shield for the disc contact surface to greatly improve
durability. These flywheels may also include a bolt on counter balance weight to match your
engine requirement. See Figure 5
7) Bolt the flywheel to the crankshaft using high quality fasteners (McLeod recommends ARP, Inc.).
Torque to recommended factory specs. Install pilot bushing into crankshaft.