Mc Leod 1955-57 Chevy Hydraulic Conversion Instructions User Manual
Page 2
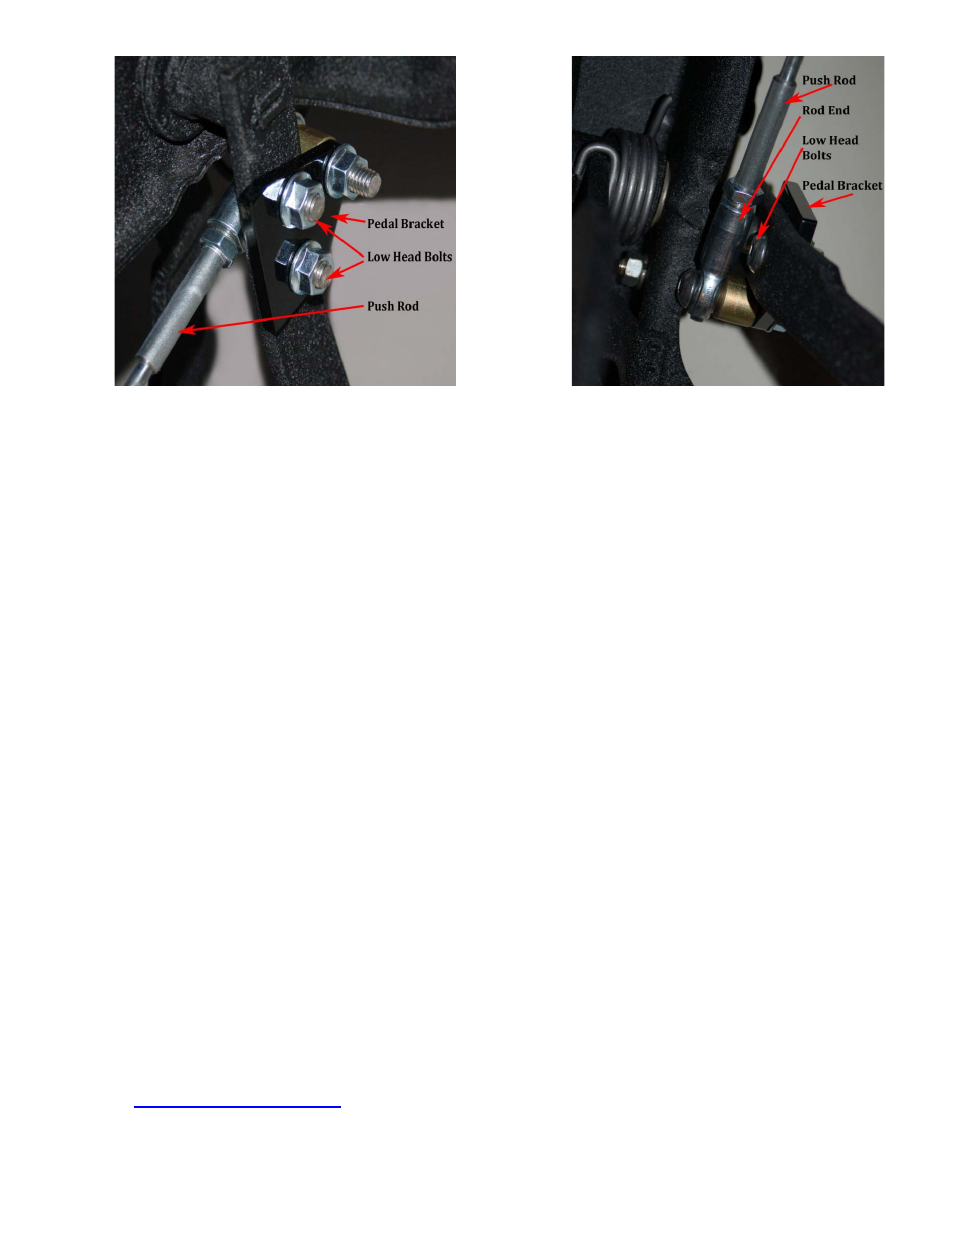
Figure 3
Figure 4
5) Install the pedal bracket to the pedal under the dash using the two supplied “low head bolts” and
nuts, tighten to 35 lbs ft. (It is important that you use the low head bolts at these locations to
provide clearance at the rod end). See Figure 3.
6) Connect the rod end on the end of the push rod on the pedal bracket in this order: Bolt, flat
washer, rod end, spacer, pedal bracket, lock washer and nut. Tighten securely.
Swing the pedal through its range of motion to be certain there is no interference with any
component including bolt heads, wires and or hoses. See Figure4
7) Mount the clutch master cylinder reservoir in a convenient location above the clutch master
cylinder. Connect the reservoir to the master cylinder with the black hose into the port shown in
Figure 1.
8) Connect the McLeod master cylinder to the slave cylinder with the supplied AN4 line (not shown
in Figure 1). Fill the master cylinder with Dot 3 or 4 brake fluid (Do not use synthetic brake fluid!)
and bleed system completely.
9) Adjustments to the pedal height can be made at the rod end attached to the bracket on the brake
pedal. Loosen the jam nut and rotate the rod end to obtain the desired pedal height. Reattach the
fasteners in proper order (Step 6) and tighten securely. There should be no pressure on the push
rod while in the relaxed or adjusted position. Make sure there is a slight amount of free play in the
rod to be certain the piston, in the clutch master cylinder, is not preloaded. Be certain to tighten
the rod end jam nut when adjustment is complete.
10) Re-install the brake lines to the brake master cylinder and bleed the brakes.
McLeod Racing, LLC 1600 Sierra Madre Circle Placentia, CA 92870 714.630.3668 Tech Line
See us at
I0012