Removal of stock component – MBRP S6050 User Manual
Page 2
S6150 © 2/13
PAGE 2 OF 5
Figure 1
Removal of Stock Component:
1. Apply a penetrating lubricant liberally to all exhaust fasteners, hangers and
rubber isolators.
2. Refer to the illustration in Figure 2 and the chart below to determine where
to cut the existing exhaust rear of the outlet of the particulate filter.
Cab Style
Box Style
Wheelbase Dimension
A
Extension Pipe Cut
Length
CREW
8' 2"
167.7”
13"
23"
CREW
6' 6"
154.2”
6.5"
17"
EXTENDED
8' 2"
157.7”
13”
23"
EXTENDED
6' 5"
144.2”
5.5"
15.5"
3. Remove the factory tail pipe assembly from the factory rubber isolators.
Remove the tail section from the vehicle. Refer to Figures 1 & 3.
4. Remove the passenger side inner fender. See Figure 4. Note: We also
removed the Grille Assembly to prevent damage to it during the removal or
installation of the down pipe.
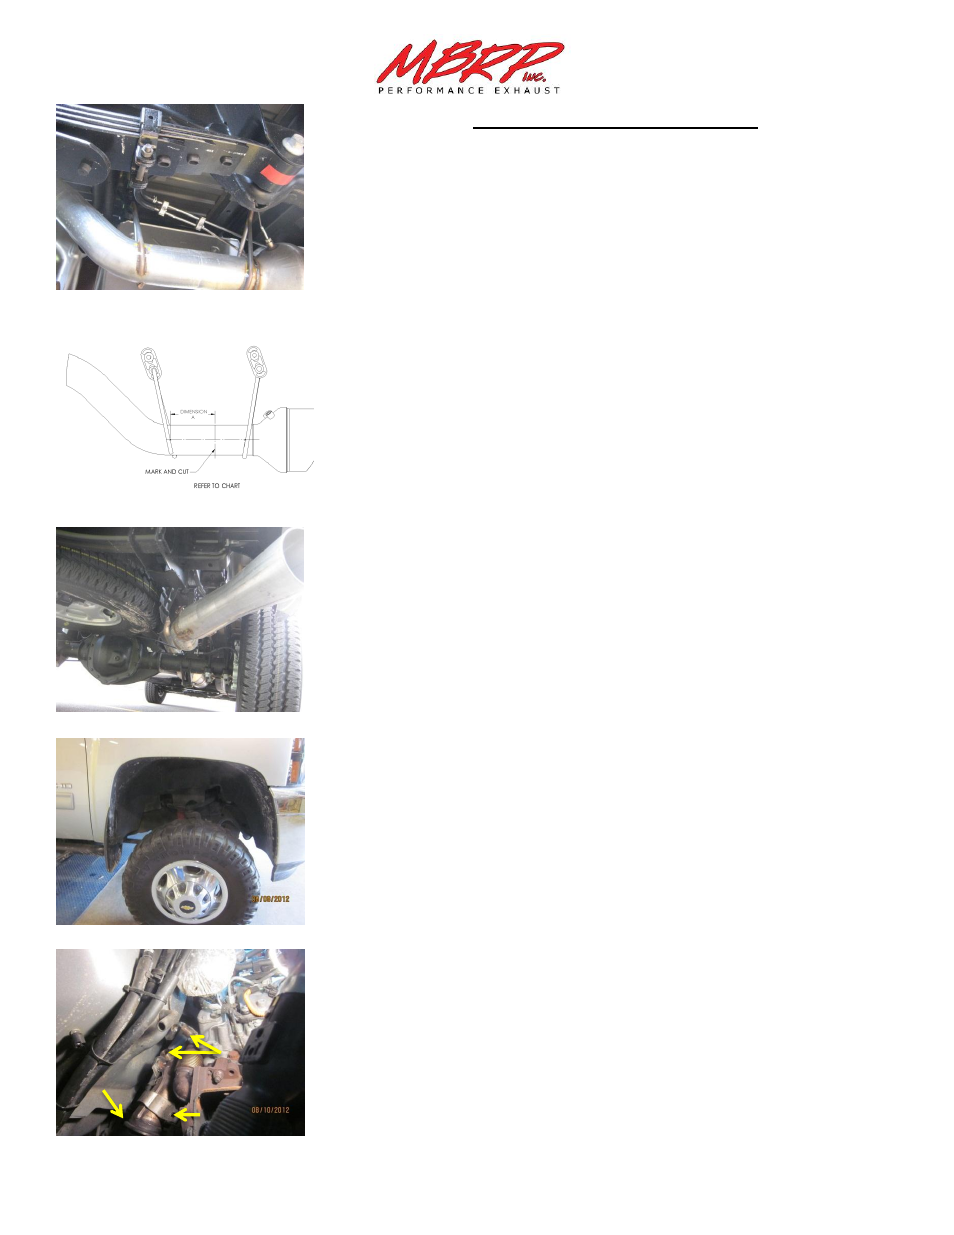
5. Remove the hex bolt securing the down pipe to the exhaust manifold.
Remove the sensor located just above the hex bolt. The V-Band clamp
connecting the front pipe to the down pipe can also be removed. Save the
hex bolt, sensor and V-band clamp for the installation. See Figure 5.
Figure 2
Figure 3
Figure 4
Figure 5
Sensor
Bolt
V-Band clamp