Installing fan to the electrical box, Making the electrical connections – King of Fans Fulton User Manual
Page 8
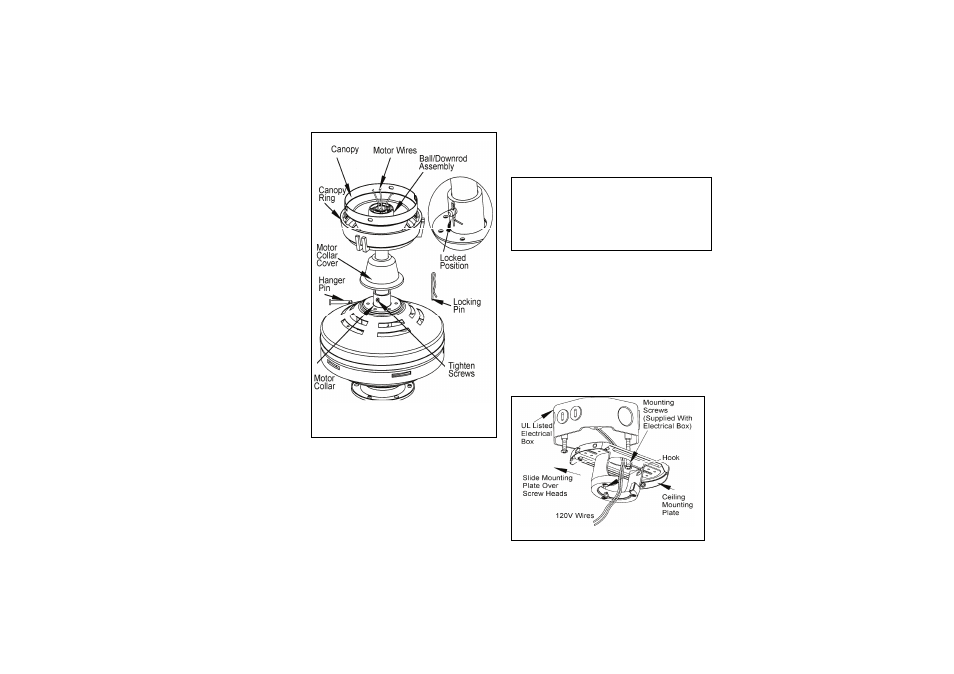
Figure 7
5.
Installing Fan to the
Electrical Box
CAUTION
WHEN MOUNTING THE FAN ON A SLOPED
CEILING, THE STANDARD BALL/DOWNROD
MOUNTING METHOD MUST BE USED. THE
MOUNTING PLATE MUST BE MOUNTED SO
THAT THE SLOT OPENINGS ARE ON THE
LOWER SIDE BY SLIDING THE MOUNTING
PLATE FROM THE TOP DOWN
1. Pass the 120-volt supply wires
through the center hole in the ceiling
mounting plate as shown in Figure 8.
2.
Install the ceiling mounting plate
on the electrical box by sliding the
mounting screws provided with the
outlet box (Figure 8). If necessary, use
leveling washers (not included) between
the mounting plate and the electrical box.
Note that the flat side of the mounting
plate is toward the electrical box (Figure 8).
Figure 8
3. Securely tighten the two mounting
screws.
4.
Carefully lift the fan assembly up to
the ceiling mounting plate. Make sure
the tab on the mounting plate is properly
seated in the groove in the hanger ball.
Making the Electrical
Connections
REMEMBER to disconnect the power. If
you feel that you do not have enough
electrical wiring knowledge or experience,
have your fan installed by a licensed
electrician.
Follow the steps below to connect the fan
to your household wiring. Use the wire
connecting nuts supplied with your fan
and supplied with remote control. Secure
the connectors with electrical tape. Make
sure there are no loose strands or
connections (Figure 9).
l.
Connect both green wires from the
downrod and mounting plate to the bare
copper (Ground) from the electrical box.
2. Connect the black wire (AC IN L)
from the receiver unit to the black wire
from the electrical box.
3. Connect the white wire (AC IN N)
from the receiver unit to the white wire
from the electrical box.
4. Connect the white wire (To Motor N)