Installation of street demon™ carburetor – Demon Fuel Systems 1905 User Manual
Page 4
4
Installation
of Street Demon™ Carburetor
1. Install the carburetor-mounting studs (provided) in the proper location on the intake manifold carburetor flange.
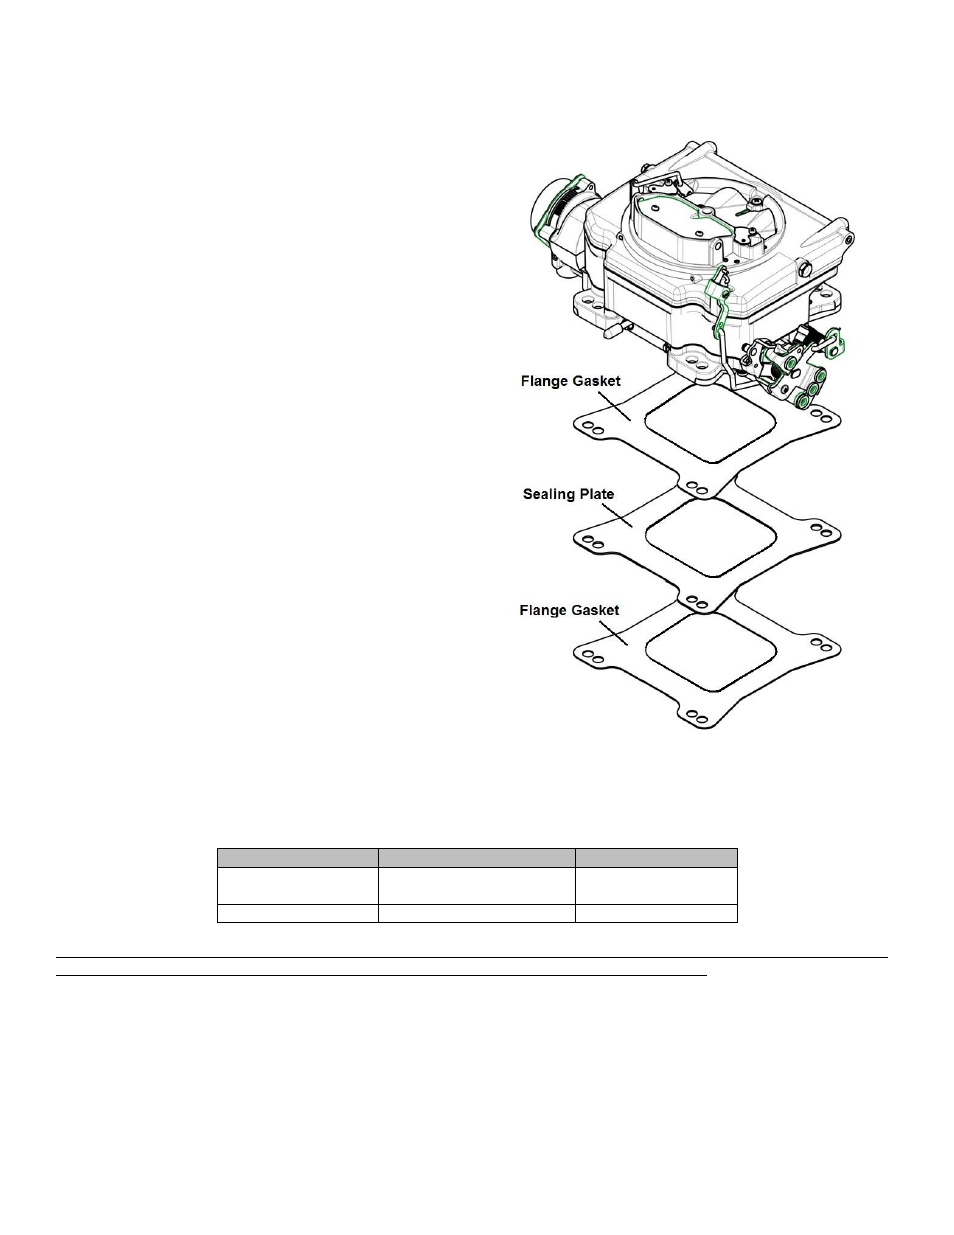
2. Place a new carburetor flange gasket, sealing plate and
second flange gasket provided with the carburetor, in the
proper position on the intake manifold (Fig. 1).
NOTE:
The sealing plate is required for the proper
function of the idle circuit which aids in idle fuel
atomization along with a reduction in heat
transfer from the intake manifold.
NOTE:
If installing the Street Demon™ on a factory cast
iron spread bore style manifold, a spacer may be
required for proper throttle opening.
3. Place the carburetor on top of the flange gasket on the
manifold. Install the hold down nuts and snug down
progressively in a “crisscross” pattern (60-80 in./lbs.).
4. Open and close the throttle a few times to ensure the
throttle operates smoothly with no binding or sticking.
WARNING:
Over tightening may result in a warped or
cracked carburetor throttle body.
WARNING:
Any sticking, binding, or other interference
in the throttle linkage could result in
uncontrolled engine speed. This could
result in engine damage or personal injury.
5. In some cases, the existing fuel line will have to be cut and
connected with a length of rubber fuel hose and a clamp.
The Street Demon
™ carburetor comes with three fuel
fittings. 5/16” hose barb, 3/8” hose barb (installed) and a
3/8” inverted flare fuel fitting for a hard line. Select the
appropriate fuel fitting and install into the carburetor making
sure to use the new fuel inlet fitting gasket also supplied in the kit.
Figure 1
Optional Fuel Inlet Fittings
Street Demon™ 9/16"- 24 threaded fuel inlet boss accepts the following optional fittings:
FITTING TYPE
MANUFACTURER
PART NUMBER
# 6 MALE INLET
SNIPER
PERFORMANCE
60406421 (BLUE)
60406423 (BLACK)
#6 STANDARD
EARL’S
991942ERL
If installation requires cutting the metal fuel line, cut the fuel line with a good tube cutter. This will minimize the chance of
producing metal chip particles. If a hacksaw must be used, then metal chips must be removed.
WARNING:
During the fuel line installation, DO NOT allow any foreign particles to enter the fuel lines, which
could then cause flooding and may result in a fire.
WARNING:
Keep the fuel line away from the EGR valve (if equipped) on the intake manifold.