Ch at pe r 2 - c on ne ct io ns, External amplifier connections – Adcom GFR-700 User Manual
Page 25
25
Ch
at
pe
r 2 - C
on
ne
ct
io
ns
www.adcom.com
GFR-700 Owner’s Manual
External Amplifier Connections
The GFR-700’s built-in 5 x 125 watts per channel am-
plifier has more than enough power for most home
applications. Nevertheless, 7.1 preamp outputs are
provided so you can hook the GFR-700 up to an even
bigger rig (the GFA-7707 comes to mind), if desired.
More importantly, these preamp outputs can also be
used in tandem with the GFR-700’s built-in amplifier
to connect a subwoofer (S) and surround back (RB/
LB) speakers.
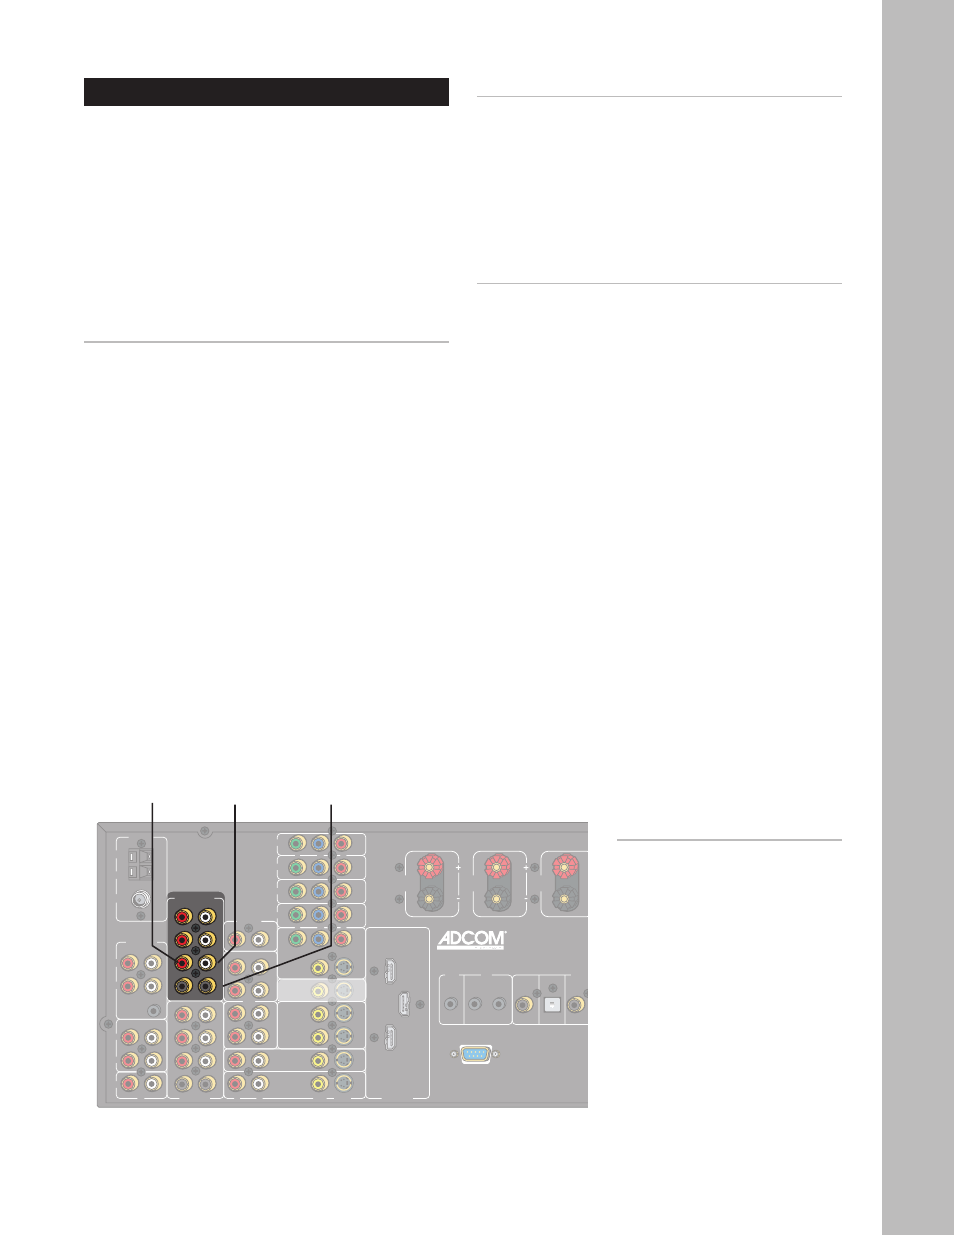
Connecting an Amplifier
1 Using eight RCA cables, connect the 7.1 channel
preamp outputs from the GFR-700 to the corre-
sponding RCA inputs on your external amplifier.
• Connect the RF, LF, RS, LS, RB, LB, and C
outputs to the amplifier and the S output to
a powered subwoofer.
2 If you have a 5.1-channel amplifier, use five RCA
cables and omit the RB and LB connections. Con-
nect the S output to a powered subwoofer.
Connecting Surround Back Speakers
For full 7.1 surround sound, you’ll want to connect
surround back speakers, which must be connected to
an external amplifier.
1 Using two RCA cables, connect the RB and LB
outputs from the GFR-700 to the corresponding
RCA inputs on your external amplifier.
2 Connect your right and left surround back speak-
ers to the external amplifier.
Connecting a Subwoofer
The “.1” in 5.1 and 7.1 stands for the all-important
Subwoofer, also known as an L.F.E., or low-frequency
effects channel. No home theater would be com-
plete without a subwoofer rumbling your listening
area with thunderous bass.
1 Using an RCA cable, connect the S output from
the GFR-700 to the corresponding input on your
powered Subwoofer.
������������
��
���
����
����
������
������������������
����������
�����
�������
�������
�������
�������
�����
�����������
��������������
�������
��������������������������
������
��������
��������
��������
�������������
��������������
�����
�������������������������
�����������
�����
�������
����
��������������������
������
���������
���������
���������
���������
���������
���������
������
������
������
��
��
�
��
��
��
���������������
���������
����������
��
��
���
��
�������
���
��
��
��
�������
��
�������
�����
����
�������
�������������
��
��
��
��
���
���
���
�
��
��
��
�������
�������
�������
�������
��
��
��
��
��
�����
��������������
���
�
�
�
�
�
�
�
�
��
��
��
��
��
��
�
�
�
�
��
��
��
��
��
��
�
�
�
�
�����
���
����
��
��������������
��
��
������
�������
��
�
��
��
���������������������������
Notes:
• To configure your speakers,
see pages 34-36
Surround
Back Right
Output
Surround
Back Left
Output
Subwoofer
Output