Clinton Electronics CE-CG-2x2.612 User Manual
Page 3
Pg 3
Figure 1 Figure 2 Figure 3
2.0
Install Column to Ceiling Tile.
2.1
Insert Column up through the center hole on the bottom of the Ceiling Tile with the Column
end that has two (2) holes facing down.
2.2
Install Collar over tubing from above the Ceiling Tile and tighten set screw to achieve desired
height of Column below Panel.
2.3
Insert a #10-24 x 2-1/4 Pan Head Screw and Flat Washers through the top hole in the
Column and tighten with #10-24 Lock Nut.
! CAUTION: This screw acts as a safety feature in the event the collar should slip on the shaft and
must be installed.
2.4
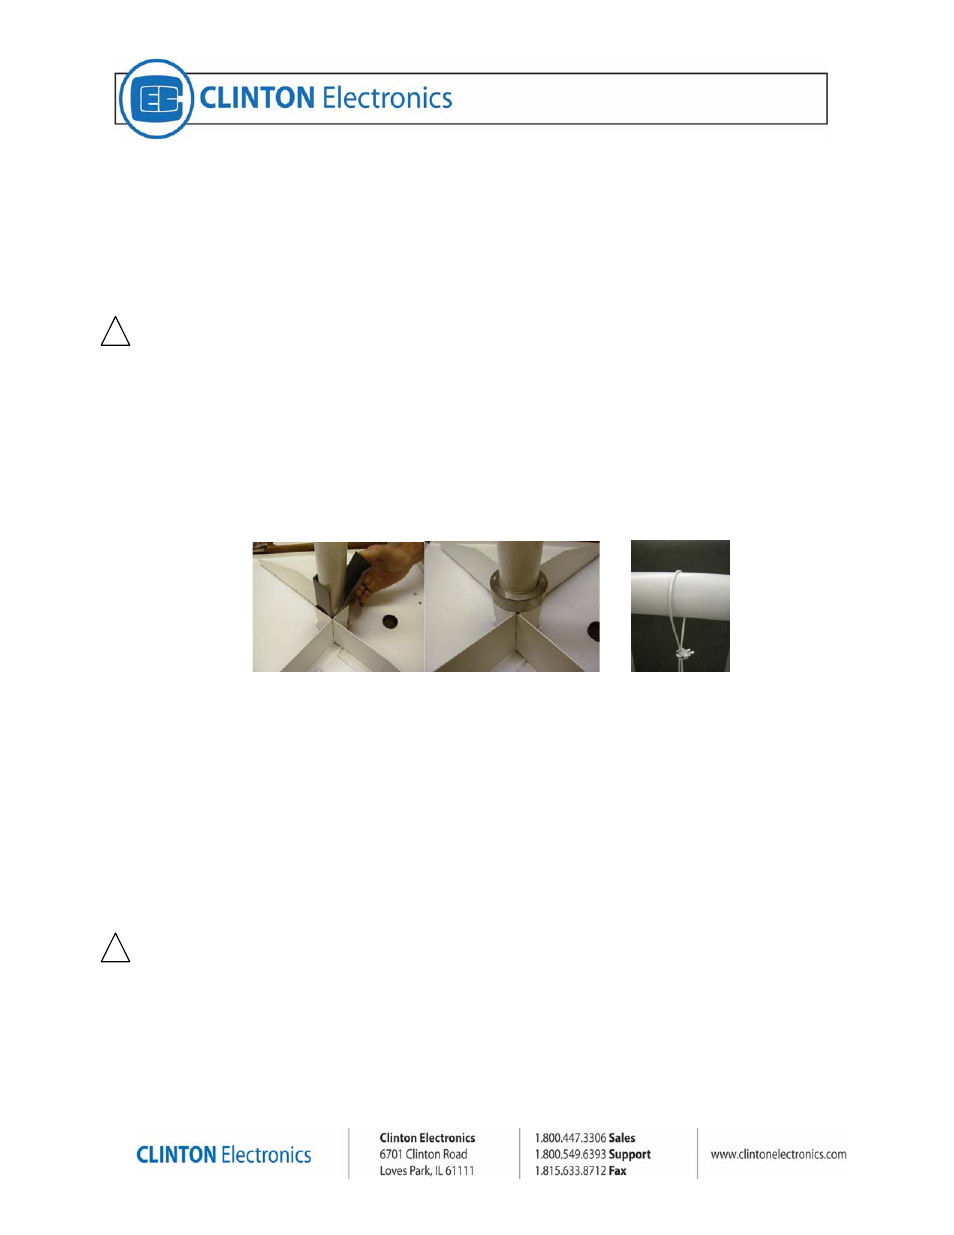
Install two (2) Plastic Angle Shims between the Column and the Tile Gussets above the Tile
surface to lock the column in place (figure 4).
2.5
Insert one (1) Snap Bushing in each end of the Column.
2.6
Run Power and Video cabling through Column, along with the Safety Cable at this time. The
Safety Cable ring eye is to be located at the lower end of the column.
2.7
Attach the plain end of the Safety Cable to the permanent structure directly above the
Column using the included Cable Clamp to loop around the structure and secure the cable to
itself (see figure 5). The end with the lug should extend approx 2” below the Column opening
at the bottom to attach to the monitor.
Figure 4
Figure 5
3.0
Install VESA Plate to Column
3.1
Orient VESA Plate so the arc slot on the two tabs is up. Using two (2) #10-24x2-1/4” Pan
Head Screws, four (4) #10 Flat Washers, and two (2) #10-24 Locknuts, assemble VESA
Plate to bottom of column as shown in Figure 6.
4.0
Install Monitor to VESA Plate
4.1
Using three (3) M4x8 Pan Head Screws, attach Monitor to VESA Plate at the corresponding
holes as shown in Figure 6.
5.0
Install Safety Cable to Monitor
5.1
Using the M4x10 Pan Head Screw included with the Safety Cable, attach the Lugged end of
the Safety Cable to the fourth VESA screw hole as shown in Figure 7.
! CAUTION: This Safety Cable is a safety feature designed to prevent the monitor and bracket from
falling and causing injuries to personnel or property below the Ceiling Mount should some part of the
Ceiling Mount’s structure fail.