Installing the dryer, Step 1: position and level the dryer, Step 2: connect dryer exhaust system – Alliance Laundry Systems D715I User Manual
Page 11: Warning
© Copyright, Alliance Laundry Systems LLC – DO NOT COPY or TRANSMIT
Installation
9
510963
Installing the Dryer
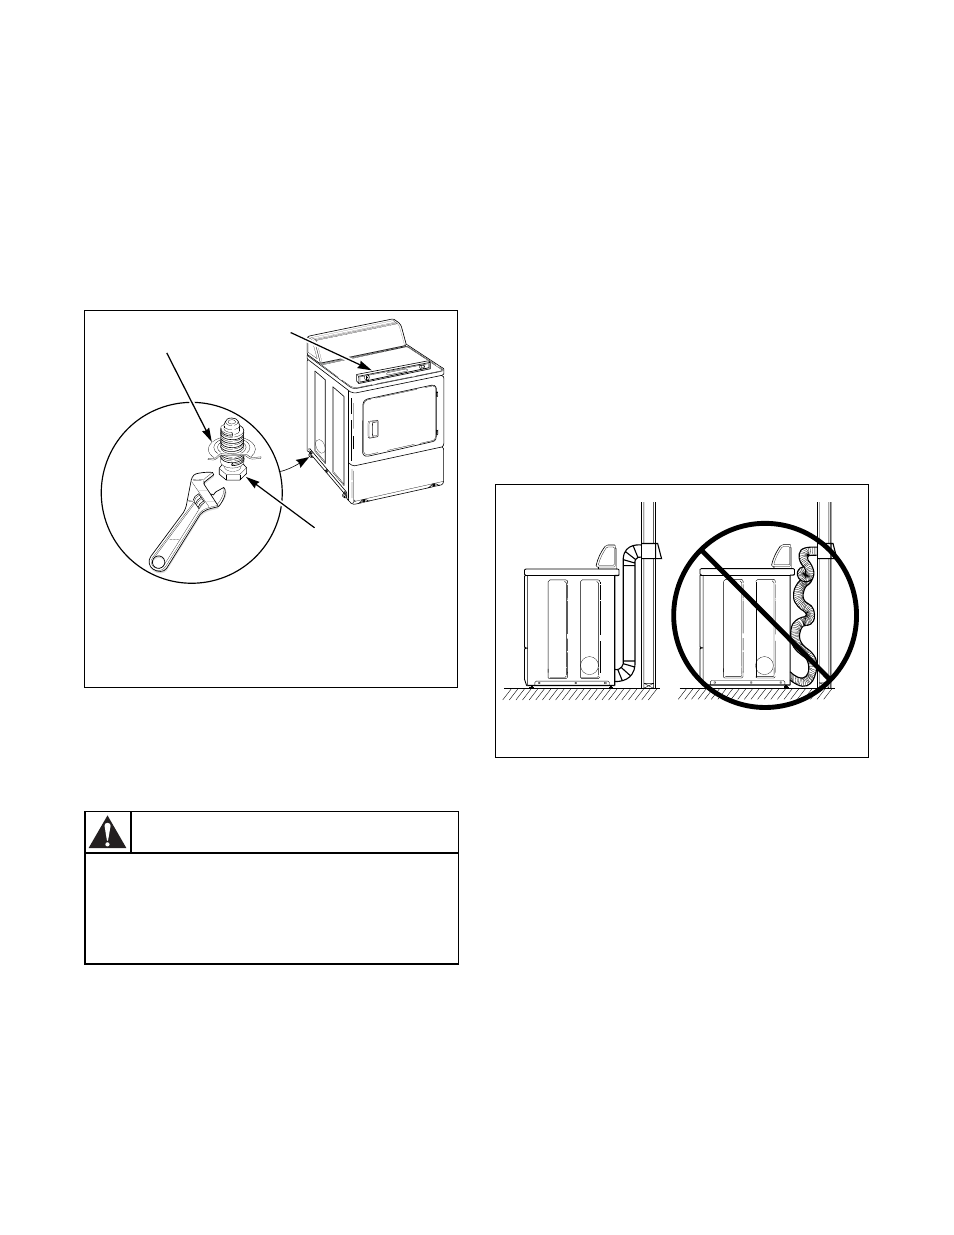
Step 1: Position and Level the Dryer
For further assistance refer to Section on Location
Requirements.
Install dryer before washer. This allows room for
attaching exhaust duct.
Place the dryer in position, and adjust the legs until the
dryer is level from side to side and front to back.
Figure 3
Step 2: Connect Dryer Exhaust System
For further assistance refer to Sections on Location
Requirements and Dryer Exhaust Requirements.
●
DO NOT use plastic or thin foil ducting.
●
Locate dryer so exhaust duct is as short as
possible.
●
Be certain old ducts are cleaned before installing
your new dryer.
●
Use 4 inch (102 mm) diameter rigid or flexible
metal duct.
●
The male end of each section of duct must point
away from the dryer.
●
Use as few elbows as possible.
●
Use duct tape or pop-rivets on all duct joints.
●
Ductwork that runs through unheated areas must
be insulated to help reduce condensation and lint
build-up on pipe walls.
●
Failure to exhaust dryer properly will void
warranty.
Figure 4
NOTE: Venting materials are not supplied with the
dryer (obtain locally).
D699I
1
Dryer Base
2
Level
3
Leveling Leg
D669I
D259I
1
2
3
A clothes dryer produces combustible lint.
To reduce the risk of fire and combustion
gas accumulation the dryer MUST be
exhausted to the outdoors.
W116
WARNING
DRY1915N
DRY1915N
DON’T
DO