Dishwasher installation, Step 23, Step 25 literature – GE ZDT800SSFSS User Manual
Page 14: Step 24 replace toekick, On some models)
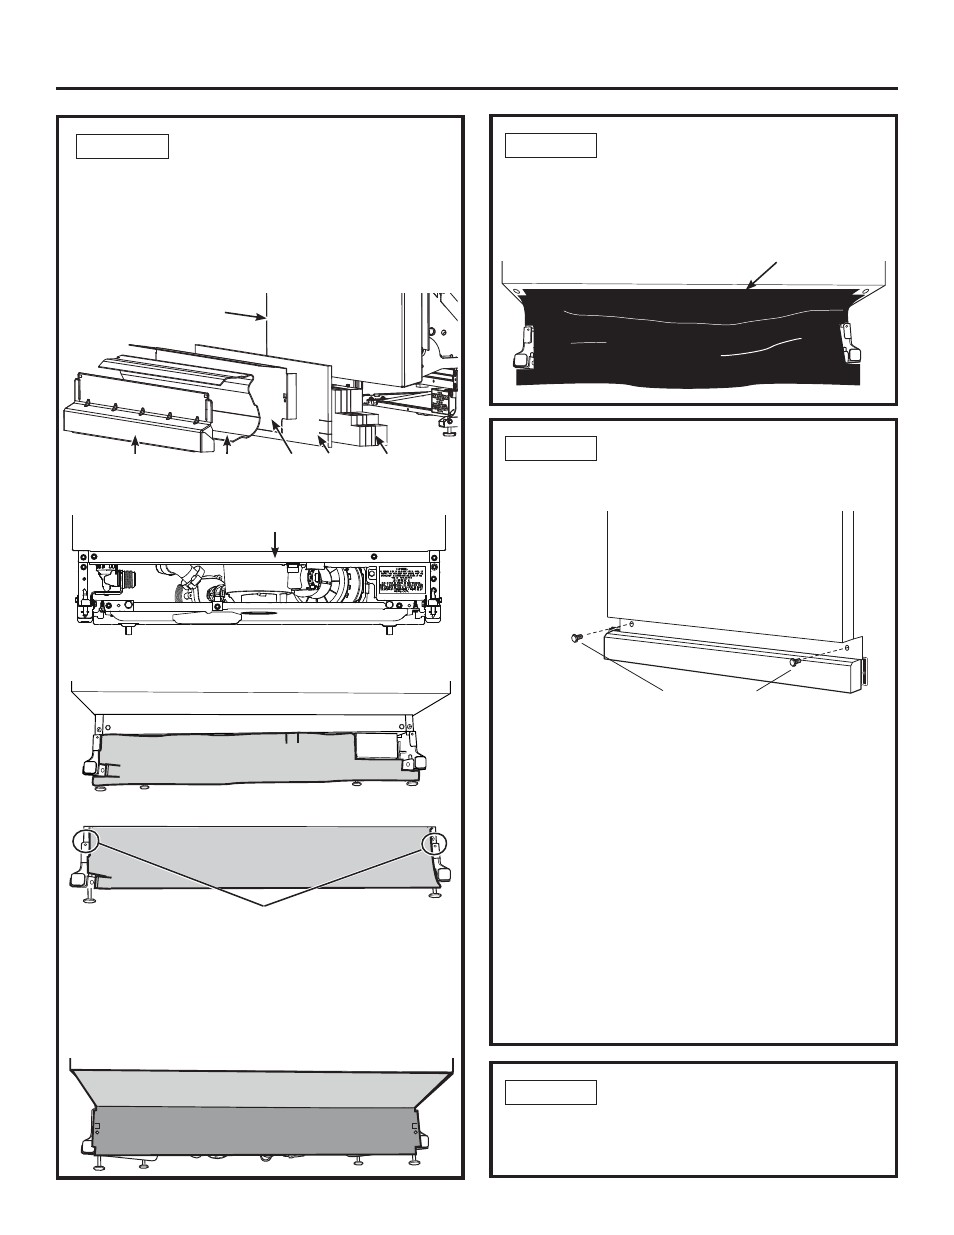
STEP 23
POSITION INSULATION, PRE-
TOEKICK, AND SOUND
BARRIER
(on some models)
Skip this step if the sound insulation package is not
supplied with the dishwasher.
• Locate the sound insulation package and pre-toekick
packages inside the dishwasher.
• Stand the parts upright as shown.
• Locate the control box.
•
Push insulation block portion under the dishwasher until it
is beneath the control box.
• Push the panel portion up to the front of the block.
• Tuck the sides of the front panel behind the toekick
attachment screw holes.
• Open door all the way, if the door doesn’t stay fully open,
adjust the insulation panel.
• On models so equipped, position pre-toekick over the
insulation. Align the screw holes with the screw holes on
the legs of the dishwasher.
Dishwasher Installation
STEP 23
POSITION INSULATION, PRE-
TOEKICK, AND SOUND BARRIER
(on some models) (Cont.)
• On models so equipped, remove the masking tape from the
sound barrier and door front. Position the sound barrier
over the insulation.
Sound Barrier
14
Toekick
Panel
(On some
models.)
Insulation
Block
(On some
models.)
Dishwasher
Door
Pre-
Toekick
(On some
models.)
Sound barrier
(On some
models. Part is
already attached
to door.)
Control Box
STEP 25 LITERATURE
• Be sure to leave complete literature package, these Installation
Instructions and product samples and/or coupons with the
consumer.
STEP 24 REPLACE TOEKICK
• Place toekick against the pre-toekick and legs of the
dishwasher.
• Align the toekick with the bottom edge and make sure it is
against the floor.
• Insert and tighten the 2 toekick attachment screws. The
toekick should stay in contact with the floor.
• When reinstalling the toe kick on models with a sound
barrier, ensure that the bottom edge of the rubberized flap
is flush with the floor. Any excess material should be tucked
up behind the outer door. Do not allow excess rubberized
flap to lay on the floor. If any excess is not tucked completely
behind the outer door, it will bunch up between the door and
toe kick and impede proper opening and closing of the door.
This will be noticeable because the door will not stay fully
open and will spring up.
Tip: Reduce sound from under the dishwasher. Make sure
toekick is against floor.
Figure AJ
Attachment
Screws
Toekick
Push the sides of the insulation behind
the toekick attachment screw holes
Figure AF
Figure AG
)LJXUH$+