Oven controls using the range: o ven contr ols – GE JM250DFBB User Manual
Page 10
10
49-80696-1
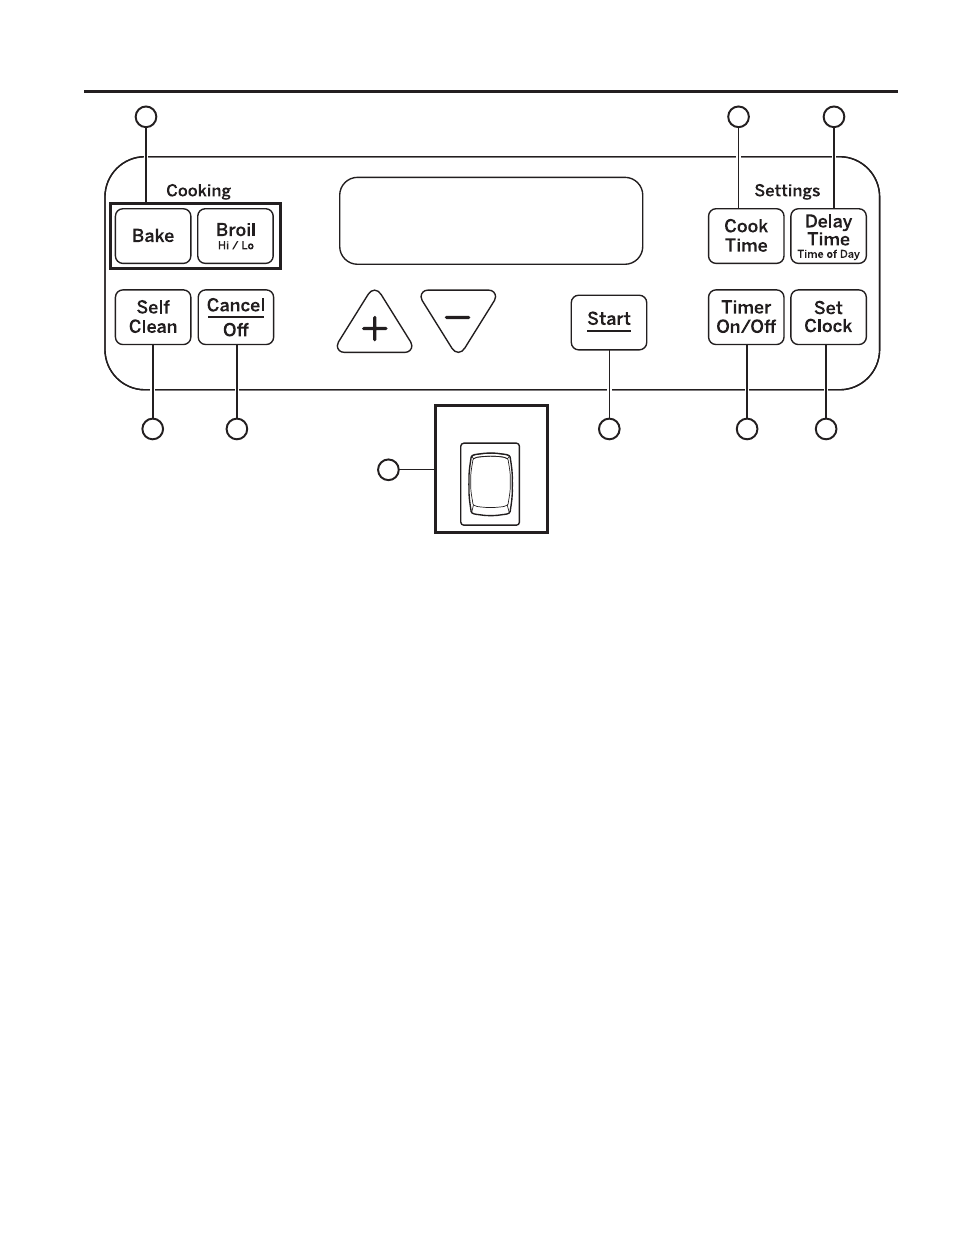
Oven Light
1. Traditional
Cooking
Modes:
Your oven has
WKHIROORZLQJWUDGLWLRQDOFRRNLQJPRGHV%DNHDQG
%URLO+L/R6HHWKH&RRNLQJ0RGHVVHFWLRQIRUPRUH
information.
2. Self
Clean:
See the Cleaning the Oven section for
important information about using this mode.
3. Start:
Must be pressed to start any cooking,
cleaning, or timed function.
4. Cancel/Off:
Cancels ALL oven operations except
the clock and timer.
5. Cook
Time:
Counts down cooking time and turns
off the oven when the cooking time is complete. Press
the Cook Time pad, use the +
- pads to program a
cooking time in hours and minutes, then press Start.
7KLVFDQRQO\EHXVHGZLWK%DNH
6. Set
Clock:
Sets the oven clock time. Press the
Set Clock pad and the +
- pads to program the clock.
Press Start to save the time.
7. Timer:
Works as a countdown timer. Press the
Timer pad and the +
- pads to program the time in
hours and minutes. Press the Start pad. The timer
countdown is complete. To turn the timer off press the
Timer pad.
8. Delay
Time:
Delays when the oven will turn on.
8VHWKLVWRVHWDWLPHZKHQ\RXZDQWWKHRYHQWRVWDUW
Press the Delay Time pad and use the +
- pads to
program the time of day for the oven to turn on then
press Start. Press the desired cooking mode and
temperature then press Start. A cook time may also
be programmed if desired. Follow the directions under
Cook Time for setting this feature. This can only be
XVHGZLWK%DNHDQG6HOI&OHDQ
NOTE:
When using the delay time feature, foods that
VSRLOHDVLO\²VXFKDVPLONHJJVILVKVWXIILQJVSRXOWU\
DQGSRUN²VKRXOGQRWEHDOORZHGWRVLWIRUPRUHWKDQ
1 hour before or after cooking. Room temperature
SURPRWHVWKHJURZWKRIKDUPIXOEDFWHULD%HVXUHWKDW
the oven light is off because heat from the bulb will
speed harmful bacteria growth.
9. Oven
Light:
Turns the oven light on or off.
Oven Controls
USING THE RANGE:
O
ven Contr
ols
1
5
8
2
6
7
4
9
3