Installation instructions, Remove duct knockout(s), For 3 – GE JV536HSS User Manual
Page 12
12
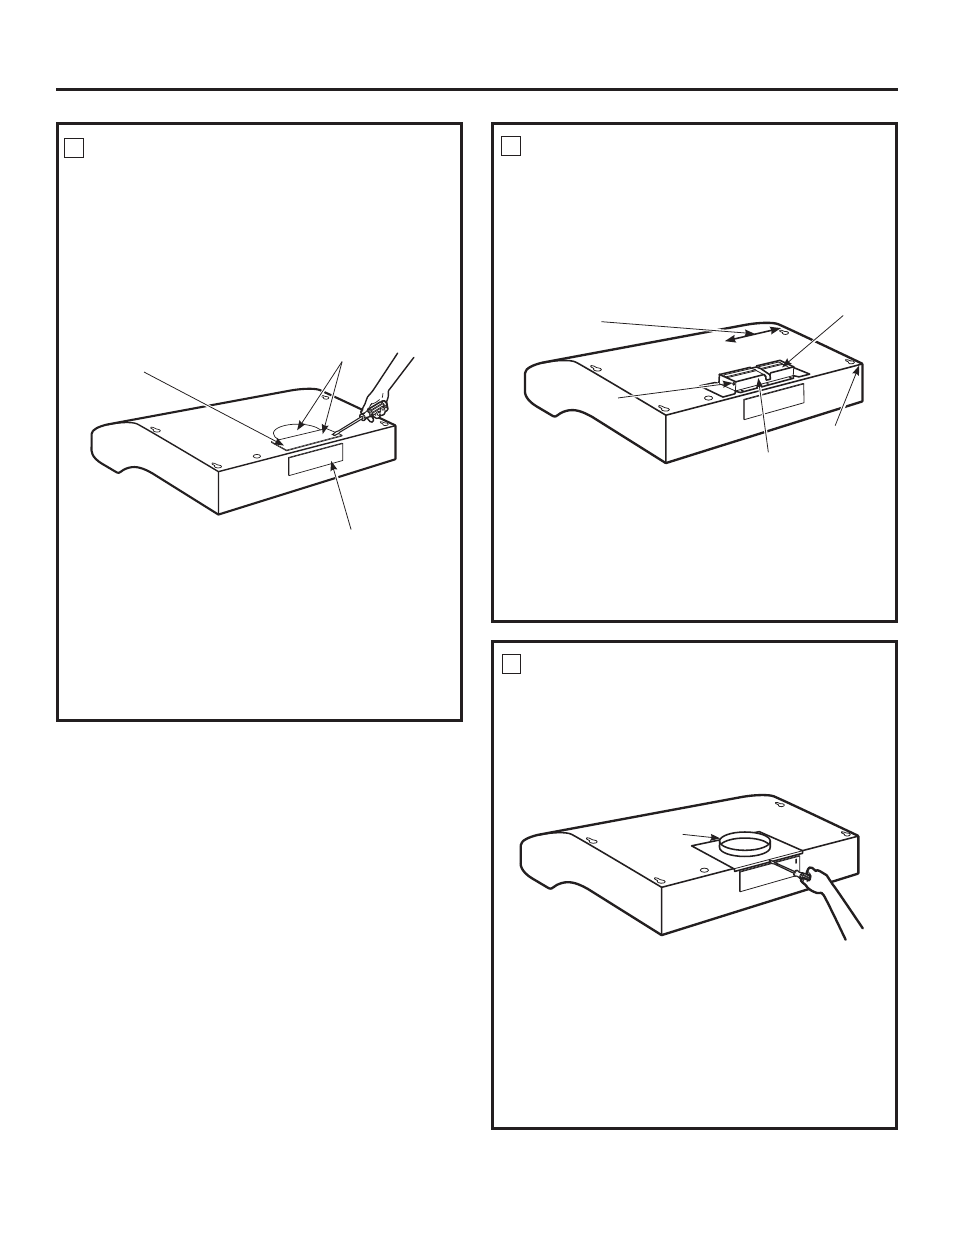
REMOVE DUCT KNOCKOUT(S)
If recirculating, non-vented ductless (optional for
JV5 Series models only), see note below and skip to
6WHS'DQGSURFHHG7KH-96HULHVPRGHOVFDQQRWEH
recirculated.
Using a flat blade screwdriver, remove the appropriate
duct knockout(s) from the top or back of the hood.
3
1
ø
4
” x 10” Rectangular
vertical discharge.
Remove top rectangular
duct knockout only.
7” Round vertical discharge.
Remove semi-circular duct
knockout and top rectangular
duct knockout.
3
1
ø
4
” x 10” Rectangular horizontal
discharge. Remove rear
rectangular duct knockout only.
FOR 3
1
ø
4
” x 10” RECTANGULAR
DUCTED DISCHARGE INSTALLATIONS
ONLY:
Attach
H[KDXVWDGDSWRUGDPSHU over knockout
RSHQLQJZLWKWZRH[KDXVWDGDSWRUVFUHZV0DNHVXUH
damper pivot is nearest to WRSEDFNHGJH of hood.
Remove tape from damper flap.
Up to 1” side-to-
side adjustment
Tape
Top/back edge
([KDXVWDGDSWRUGDPSHU
(vertical discharge
position shown)
Pivot
FOR 7” ROUND VERTICAL DUCTED
DISCHARGE INSTALLATIONS ONLY:
5HLQVWDOOWKH” round exhaust adaptor with its
screws, removed in Step 2 under the “Prepare the
Hood” section.
6
7
8
” round
H[KDXVW
adaptor
NOTE:7KH”URXQGH[KDXVWDGDSWRUFDQEHLQVWDOOHG
up to 1 inch on either side of the hood center to
DFFRPPRGDWHRIIFHQWHUGXFWZRUN,QH[WUHPHRIIFHQWHU
installations, one end of the duct connector may need
to be trimmed to clear the electrical cable clamp.
NOTE: The 7” round damper is not included with
this product. It can be purchased as a kit by calling
2UGHUNLWQXPEHU-;'$
Installation Instructions
NOTE: 7KHH[KDXVWDGDSWRUGDPSHUFDQEHLQVWDOOHG
up to 1 inch on either side of the hood center to
DFFRPPRGDWHRIIFHQWHUGXFWZRUN,QH[WUHPHRIIFHQWHU
installations, one end of the duct connector may need to
be trimmed to clear the electrical cable clamp.
NOTE: If the hood is to be installed in a recirculating, non-
vented ductless manner, order charcoal filters,
NLWQXPEHU:%;IRU
”
hood models, or
NLWQXPEHU:%;IRU
”
hood models.
These kits can be ordered from your GE supplier.
Skip to Step 9 D and proceed.