Assembly instructions – Agri-Fab 45-03152 User Manual
Page 4
4
TOOLS REQUIRED FOR ASSEMBLY
(2)
7/16" Wrenches
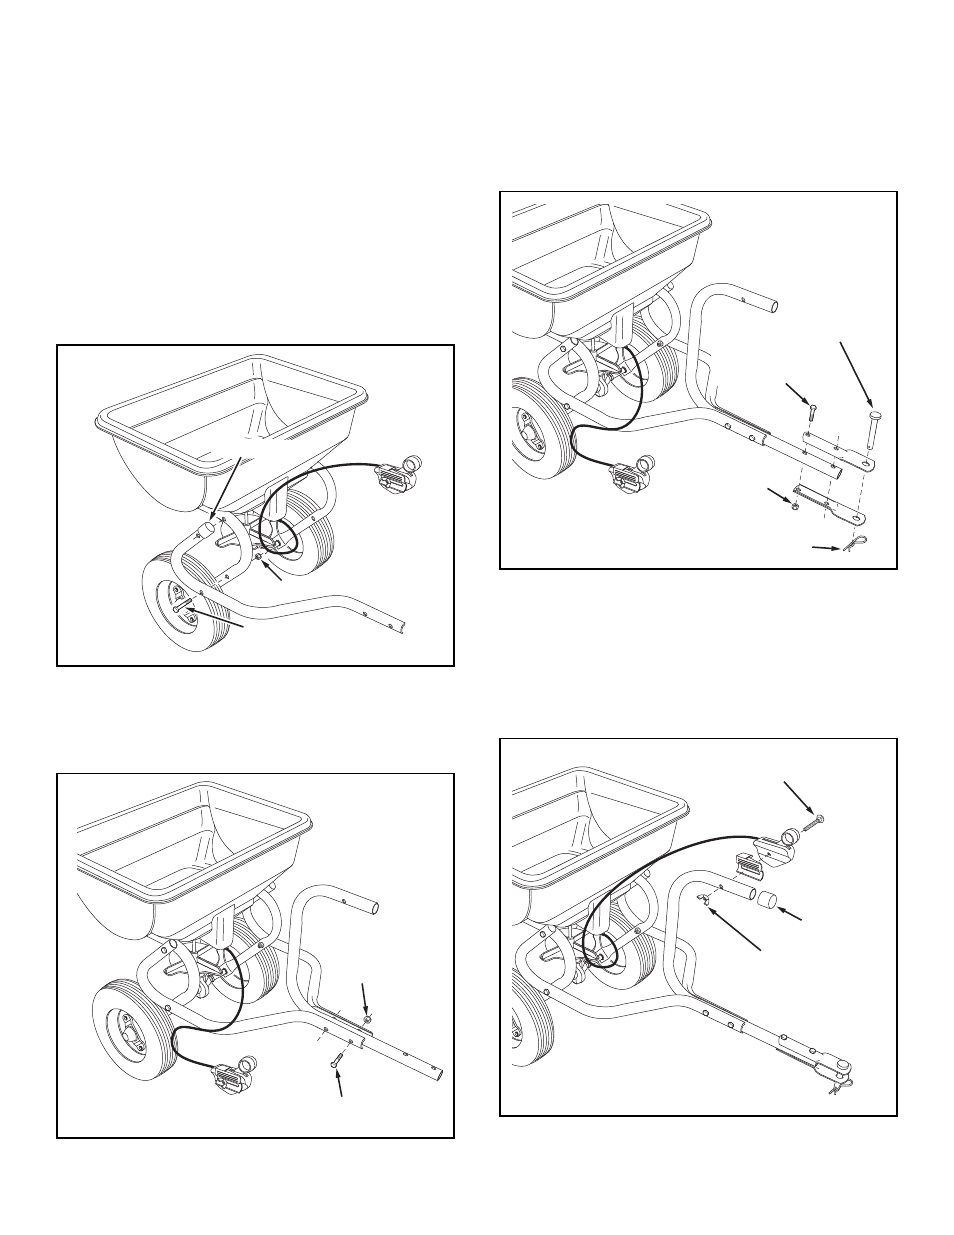
1. Assemble vinyl caps onto the ends of the R.H. and L.H.
Hitch Tubes. See figure 1.
2. Assemble the R.H. Hitch Tube to the spreader frame
tube using two 1/4" x 2" hex bolts and 1/4" nuts.
Do not
tighten yet. Repeat for L.H. Hitch Tube. See figure 1.
FIGURE 1
. Assemble the Hitch Control Tube between the Hitch
Tubes using two 1/4" x 1-/4" hex bolts and 1/4" nuts.
Tighten all bolts and nuts . See figure 2.
FIGURE 2
4. Assemble the Hitch Brackets to the Hitch Control Tube
using two 1/4" x 1-/4" hex bolts and 1/4" nuts.
Tighten.
See figure 3.
5. Assemble the hitch pin through the hitch brackets and
secure with the 1/8" hair cotter pin. See figure 3.
6. Assemble the vinyl cap onto the Hitch Control Tube. See
figure 4.
7. Assemble the Control Cable to the Hitch Control Tube
using the carriage bolt and nylon wing nut. See figure
4.
FIGURE 4
FIGURE 3
ASSEMBLY INSTRUCTIONS
1/4" x 2"
HEX BOLT
1/4" NUT
VINYL CAP
1/4" NUT
1/4" x 1-3/4"
HEX BOLT
1/4" NUT
1/4" x 1-3/4"
HEX BOLT
HAIR COTTER PIN
HITCH PIN
REMOVAL OF PARTS FROM CARTON
Remove all parts and hardware packages from the carton.
Lay out all parts and hardware and identify using the
illustrations on page .
CARRIAGE BOLT
NYLON
WING NUT
VINYL CAP