Table 3-1, Tape drive leds – HP Integrity NonStop J-Series User Manual
Page 17
Operation
5344 Tape Drive Installation and User’s Guide — 546011-001
3 -3
Front Panel
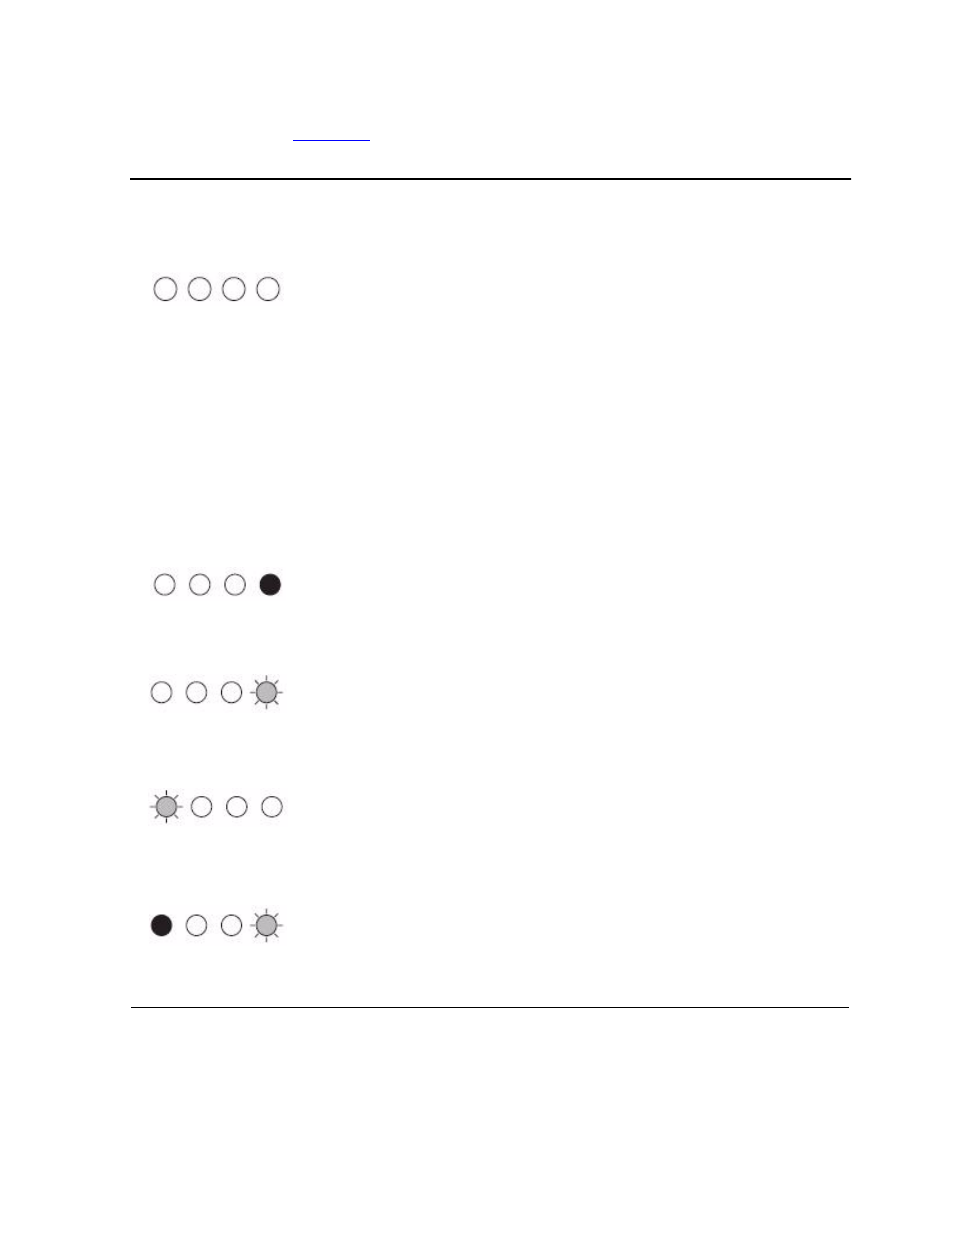
There are two LEDs, labeled Tape and Clean. The meaning of different patterns of
LEDs are shown in
.
Table 3-1. Tape Drive LEDs
LED Sequence
Cause
Action Required
ALL LEDs OFF
Drive may not have power, may
be faulty or may have been
power cycled or reset during a
firmware upgrade.
Make sure the drive is switched
on. The power on/off switch
incorporates a green LED.
If this is not on, check the power
cable connection and replace the
cable if necessary. You can use
the power cable from your monitor
or another device to check that the
connection is working.
If the power supply is present and
all LEDs remain off,
power cycle or reset the drive. If it
still fails, call for service.
READY IS ON
The drive is ready for
operation.
None. This is normal.
READY FLASHES
The drive is carrying out a
normal activity (read, write).
None.
If the drive is upgrading firmware,
do not reset or power cycle it.
CLEAN FLASHES
The drive requires cleaning.
Load the DDS cleaning cartridge.
If the Clean LED is still flashing
when you load a new or known
good data cartridge after cleaning,
call for service.
READY FLASHES
AND CLEAN IS ON
Cleaning is in progress.
None. The cleaning cartridge will
eject on completion.
The cleaning cycle can take up to
5 minutes to complete.