AOC CT500G User Manual
Page 6
7 J
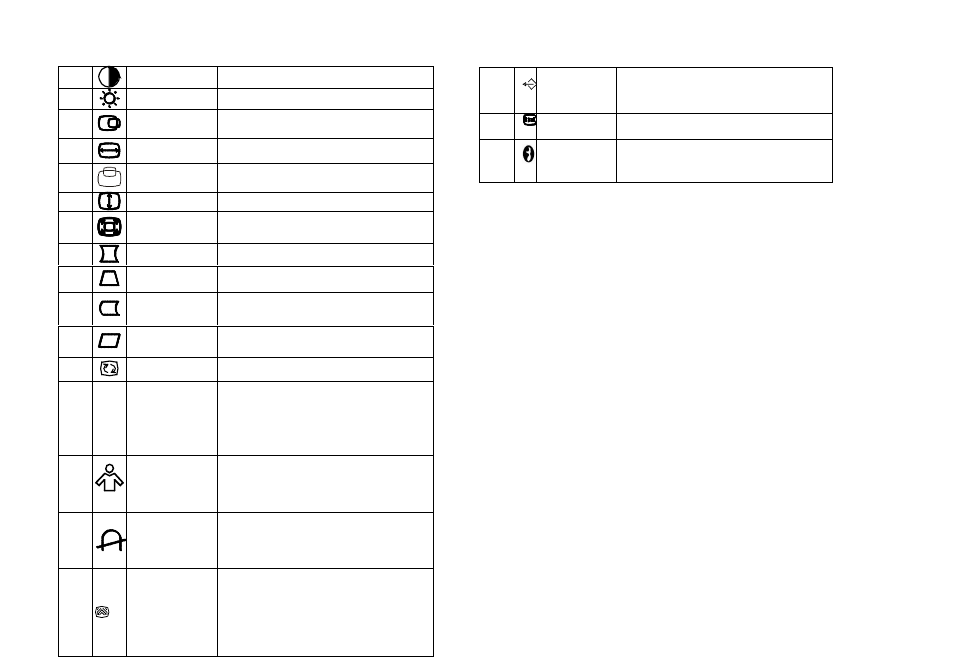
ADJUSTING THE PICTURE (See Figure 3)
1.
CONTRAST
Adjust the picture contrast.
2.
BRIGHTNESS
Adjust the picture brightness.
3.
H- CENTER
Adjust the horizontal position of the picture.
4.
H- SIZE
Adjust the picture’s horizontal size.
5.
V- CENTER
Adjust the vertical position of the picture.
6.
V- SIZE
Adjust the picture’s vertical size.
7.
ZOOM
Adjust the picture’s horizontal and vertical size
simultaneously.
8.
PINCUSHION
Adjust the pincushion and barrel
9.
TRAPEZOID
Adjust the picture’s trapezoid distortion.
10.
PIN-BALANCE
Adjust to compensate the pincushion
unbalance.
11.
PARALLELO-
GRAM
Adjust the picture to be a rectangle.
12.
ROTATION
Adjust the picture tilt to horizontal position.
13.
6500°K/9300°K
( COLOR
TEMPERATURE )
The color temperature for 6500°K is x=0.313,
y=0.329 and 9300 °K is x=0.283, y=0.297. It
presents two different color sets on the screen.
You can select 9300°K or 6500°K by pressing
the Shuttle Knob.
14.
USER COLOR
( Red / Blue )
If the 9300°K normal white or 6500°K warmer
white do not satisfy your desire, properly adjust
R . B GAIN controls to obtain your optimum
whiteness level.
15.
DEGAUSS
If color impurity occurs when moving or
swiveling the monitor, press the Shuttle Knob
and degauss to fix the picture condition.
16.
MOIRE REDUCE
Moire is the result of interference between the
phosphor layout and the video signal. In some
cases, you may find the moire very noticeable.
Press the Shuttle Knob to enter in the moire
reduce setting. Please adjust the level to the
optimum condition. Note: Too high of a setting
will cause the picture to shake.
17.
RECALL
Press RECALL to restore the monitor
to factory settings.
18.
EXIT
Close OSD window.
19.
SELECT
LANGUAGE
Select the language as you like.
HOW TO ADJUST A SETTING
1.
Press the Menu to make the OSD window appear. See figure 4.
2.
Press the Brightness or Contrast Knob to change the settings of the current
function.
3.
When the OSD window is active, it shows the input signal timing. The "H"
stands for the horizontal frequency and "V" for the vertical frequency.
4.
To exit and save, select the exit function, or leave the monitor alone for 10
seconds. If you want to adjust any other function, repeat steps
2-4.