Installing the hood – Electrolux RH30WC60GS User Manual
Page 10
10
Installing the hood
Install supporInstall framing for hood support
If drywall is present, mark the screw hole
locations. Remove the template.
Cut away enough drywall to expose 2 vertical
studs at the holes location indicated by the
template.
Install two horizontal supports at least 4 X 2”
between two wall studs at the bottom and upper
mounting holes installation location.
room side of the studs.
Use cleats behind both sides of the support to
secure to wall studs.
IMPORTANT- Framing must be capable of
supporting 100 lbs.
•
•
•
•
•
8 -1/2” min. opening for ductwork
View from rear
cleats
1” x 6” min
Mounting
Support
Centerline of
installation
space
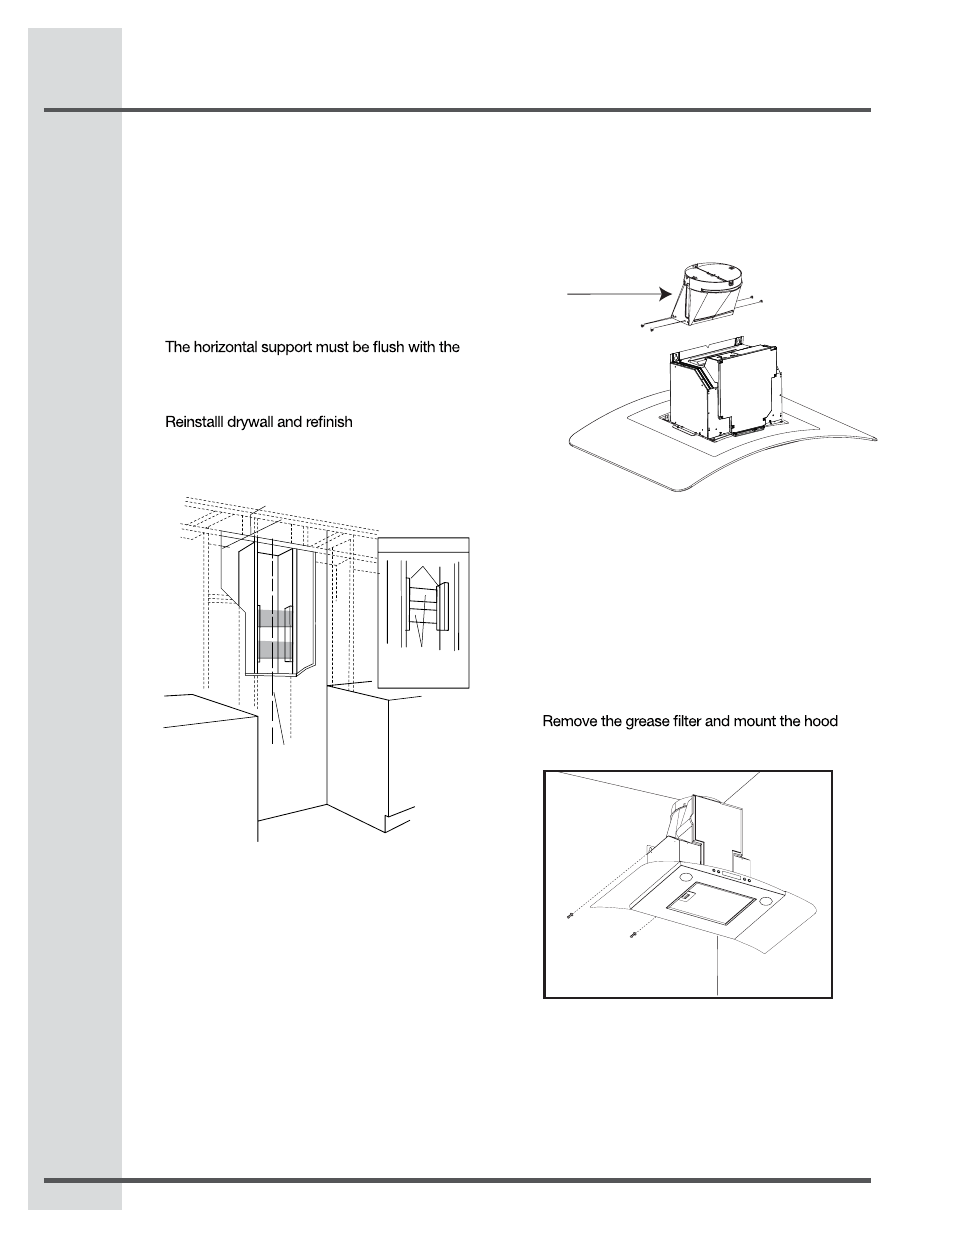
Mounting the hood
WARNING: 2 people are required to lift and position
the hood onto the mounting screws.
Install the 8” round transition as shows the image below.
The installation screws and the 8” round transition are
included on the hood package.
Place the template on the wall along the horizontal
line, make sure the template is leveled and
centered with the centerline.
Mark “upper” screw holes locations in the wall.
IMPORTANT. Check to be sure that hole locations
are leveled and correctly centered by the vertical
centerline.
Drive “upper” wood screws by hand. Leave ¼ “ of
distance between the screw head and the wall.
onto the “upper” screws.
•
•
•
•
•
8”