Caution, Securing the stitching and cutting the buttonhole, Adjusting buttonholes – Brother J17 User Manual
Page 4: Making a buttonhole, Sewing buttonholes and buttons, Preparation
1
2
3
To secure the stitching, turn the
material 90 degrees counterclockwise
and sew straight stitches to the end of
the front bar tack of the buttonhole.
After sewing the left side of the
buttonhole, stitch the right side and
observe the feeding.
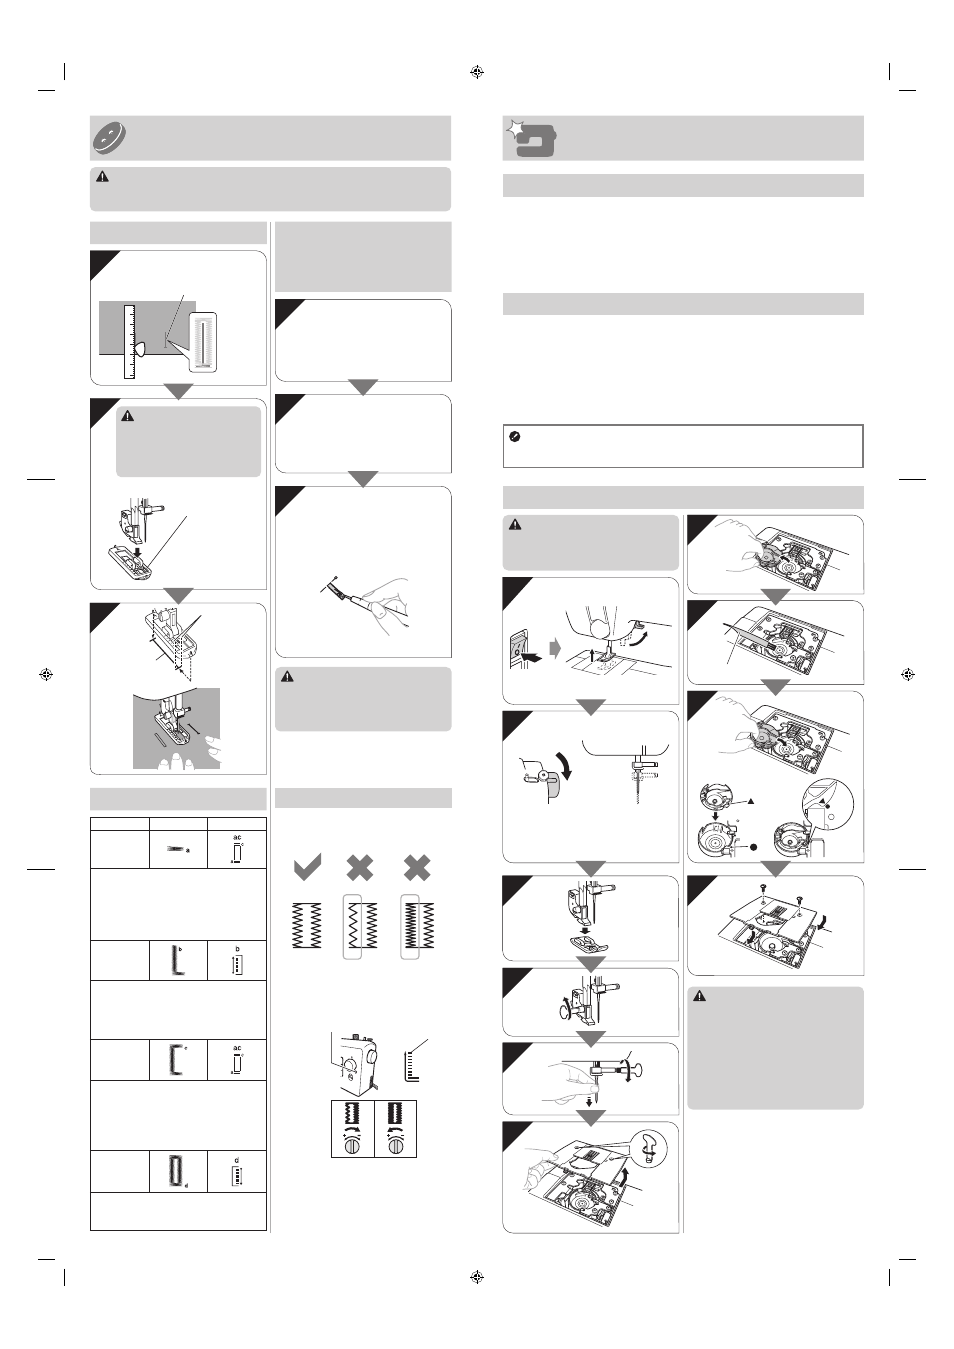
If the left side is too open or tight
compared with the right side, adjust the
buttonhole fine-adjustment screw.
Left side
This
adjustment
ensures both
sides of the
buttonhole
are the same.
Turn the buttonhole fine-adjustment screw
with a large screwdriver as indicated in the
illustrations, according to the buttonhole
appearance.
Remove the material from the
machine. We recommend that you
put pins across both ends of the
buttonhole to prevent the stitches from
being cut.
Cut an opening in the middle of the
buttonhole with the seam ripper tool.
Be careful not to cut through and
stitches.
3
Securing the
Stitching and
Cutting the
Buttonhole
CAUTION
When using the seam ripper to open the
buttonhole, do not put your hand or finger
in the path of the ripper. The seam ripper
may slip and you may be injured.
CAUTION
Never use a bobbin case that is
●
scratched; otherwise the upper thread
may become tangled, the needle may
break, or sewing performance may
suffer. For a new bobbin case (part
code: XE9326-001), contact your nearest
authorized service center.
Make sure that you fit the bobbin case
●
properly, otherwise the needle may
break.
Maintenance
Precautions on storing the machine
Cleaning
Restrictions on oiling
In order to prevent damaging this machine, it must not be oiled by the user.
This machine was manufactured with the necessary amount of oil applied to ensure
correct operation, making periodic oiling unnecessary.
If problems occur, such as difficulty turning the handwheel or an unusual noise,
immediately stop using the machine, and contact your authorized dealer or the nearest
authorized service center.
Exposed to extremely high temperatures
•
Exposed to extremely low temperatures
•
Exposed to extreme temperature
•
changes
Exposed to high humidity or steam
•
Near a flame, heater or air conditioner
•
Outdoors or exposed to direct sunlight
•
Exposed to extremely dusty or oily
•
environments
Note
In order to extend the life of this machine, periodically turn it on and use it. Storing this
●
machine for an extended period of time without using it may reduce its efficiency.
Do not store the machine in any of the locations described below, otherwise damage to
the machine may result, for example, rust caused by condensation.
CAUTION
Make sure you unplug the machine before
you clean it, otherwise you risk getting an
electric shock or being injured.
1
2
Mark on the wheel points up to rise the
needle
3
4
5
6
7
8
9
10
Clean the race
Adjusting buttonholes
3
2
Making a buttonhole
Match up the
bar tack mark
to the two red
lines on the
presser foot.
Line the chalk
mark under the
center of the
presser foot.
Step
Sewn section
Pattern
Step 1
(Front bar
tack)
1. Set the pattern selection dial to “a”.
2. Lower the presser foot and sew 5 to 6
stitches.
3. Stop the machine when the needle is
at the left side of the stitches and then
raise the needle from the material.
Step 2
(Left side)
1. Turn the pattern selection dial to “b”.
2. Sew the length of the tailor’s chalk line.
3. Stop the machine when the needle is at
the left side of the stitch and then raise
the needle.
Step 3
(Back bar
tack)
1. Turn the pattern selection dial to “c”
(same position as in step 1).
2. Sew 5 to 6 stitches.
3. Stop the machine when the needle is at
the right side of the stitch and then raise
the needle from the material.
Step 4
(Right side)
1. Set the pattern selection dial to “d”.
2. Sew the right side until the needle
reaches the stitches sewn in step 1.
CAUTION
Always turn off the machine before replacing the presser foot. Otherwise, injuries may occur
if the foot controller is accidentally pressed and the machine starts sewing.
Sewing Buttonholes and Buttons
1
Preparation
1
Using tailor’s chalk, mark the
position and length of the buttonhole
on the fabric.
Buttonhole sewing
2
Push the frame
back until it stops
with the plastic
insert at the front
of the frame.
Attach the buttonhole foot.
CAUTION
If the presser foot is not installed
with the correct orientation, the
needle may strike the presser
foot, which may bend or break the
needle and cause injury.
XF4097-001.indd 2
4/11/2012 5:56:18 PM