Testing, Setting up for automatic operation – Timeguard NSLDD1000 User Manual
Page 5
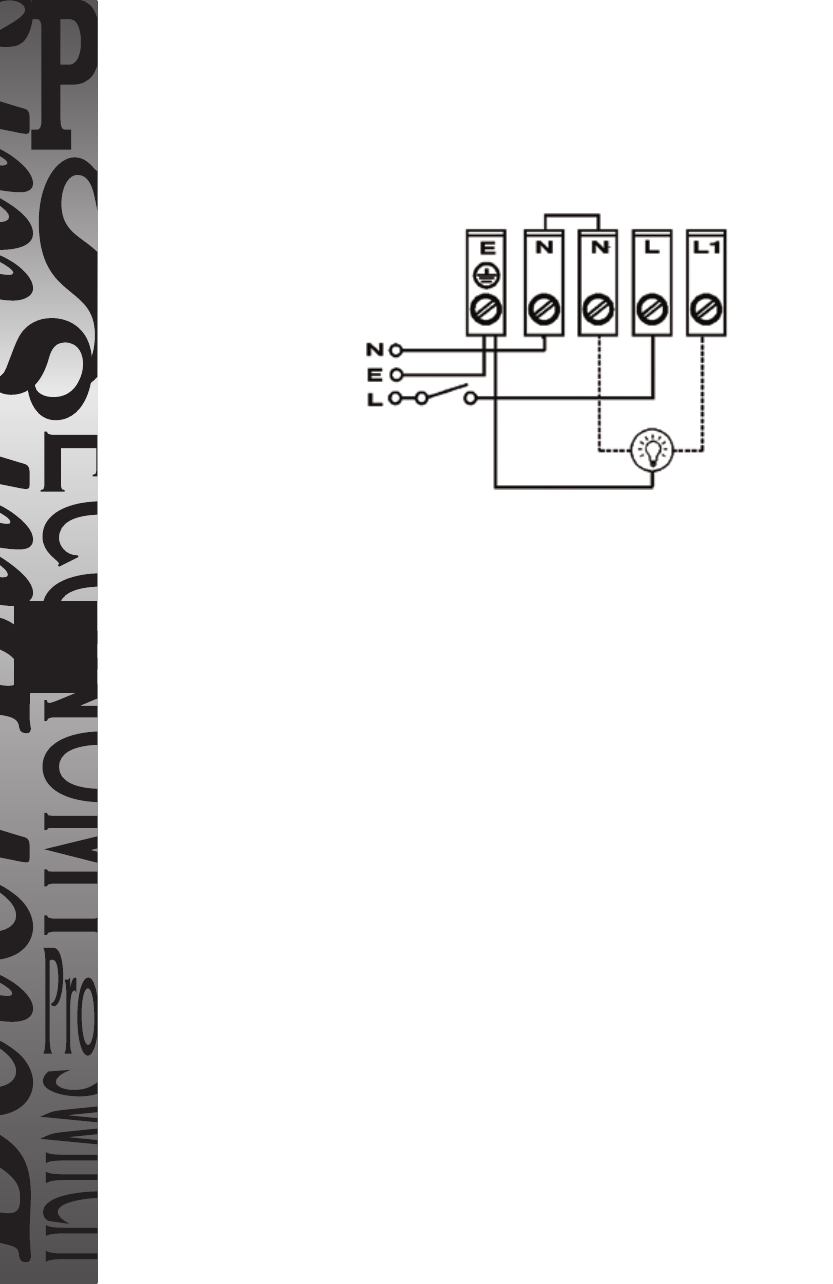
Isolation
switch
Mains in
4
Please note the the N terminals are common.
Ensure that the connections are secure.
Re-attach the cable clamp and secure.
Close the front cover.
Installation is complete.
Connection
Diagram
Testing
Set the adjustment knobs as follows:-
See diagram D.
Dusk setting, fully anti-clockwise (daylight setting)
The Dusk setting determines at which light level the
NSLD1000 will turn its connected load “ON”
Turning this setting fully anti-clockwise allows you to test
the circuit during daylight.
Connect the unit to the mains and switch power on.
After a short delay, the unit will switch ON. This is
indicated by the red LED see diagram C. Any attached
lights will also illuminate.
Setting up for automatic operation
The TIME control determines how long the lamp remains
illuminated after activation. There are 5 designated “time
on” settings O (or off), 2, 4, 6, 8 hours and dusk/dawn.
The DUSK (LUX) control determines the level of darkness
required for the unit to start operating.
The setting is best achieved by the procedure below:
Set the Dusk control knob fully anti-clockwise and the Time
control to the required number of hours or dusk/dawn (do
not leave in the O (off, fully anti-clockwise) position).