Timeguard TS900B User Manual
Page 3
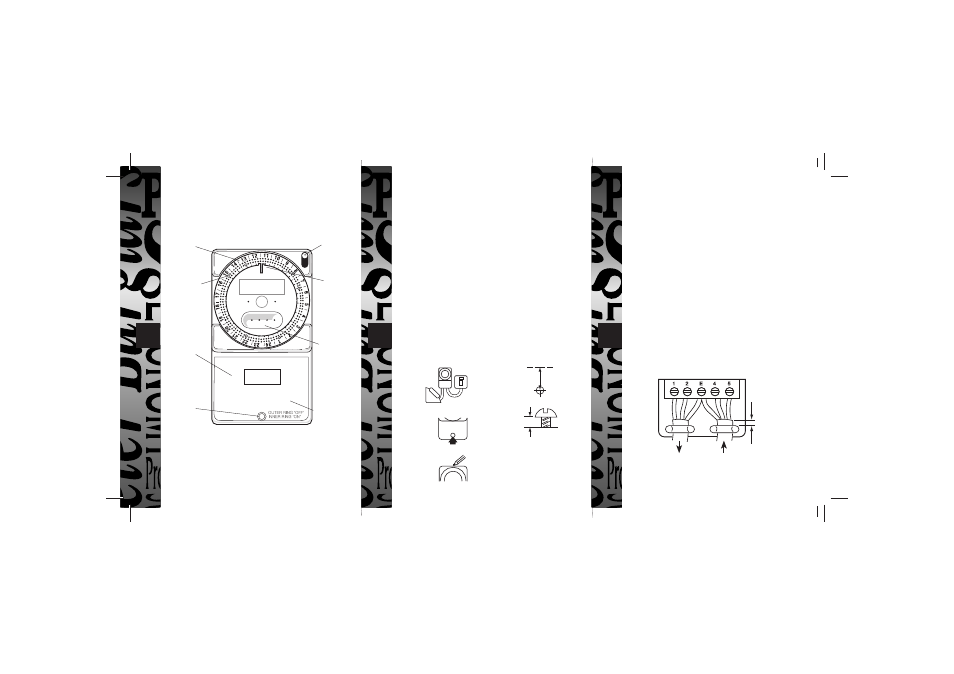
TS900B 24 Hour Immersion
Heater Time Controller
1
2
3
Self-cancelling and
Override switch
Time
indicator
Setting
pins
24 hour
programme ring
Store for
unused
setting
pins
Concealed
wiring for
safety
Cover
fixing
screw
Removable
cover
FITTING INSTRUCTIONS
1. Choose any suitable flat surface between switched supply
and immersion heater to fit the TS900.
2. Remove cover by undoing screw on lower front cover.
3. Place timeswitch in required position (it must be mounted
vertically with the time indicator at the top) and mark wall at
the centre of the top side.
4. Measure down from this mark 5mm/0.2" and make a second
mark. At this second mark drill a hole and plug, if necessary,
to take a No 6 woodscrew.
5. Screw in woodscrew until head is 2.5mm proud (see
diagram).
6. Place ‘Keyhole’ in back of timeswitch over screw head and
slide downwards. Now mark wall through large recessed hole
near bottom of unit. Remove Timeswitch, at this third mark
drill and plug as before.
7. Replace Timeswitch over screw head. Fit second woodscrew
into recessed hole and tighten into wall.
8. You are now ready to wire up.
5mm
minimum
To Heater
From Supply
SL N
N
L
WIRING INSTRUCTIONS
1. SWITCH OFF AT MAINS.
2. Cut cable to suit Timeswitch position and bare ends of cable,
connecting to Timeswitch as shown below.
3. From immersion heater fit live connection (brown) into
terminal 1. From immersion heater fit neutral connection
(blue) into terminal 2. From both cables fit both earth
connections (green yellow) into terminal E. From switch/supply
fit neutral connection (blue) into terminal 4. From switch /
supply fit live connection (brown) into terminal 5. Ensure all
screws are tightened.
4. Fit two cable clamps using 4 self-tapping screws and tighten
to grip outer insulation of both cables.
5. Replace cover, tighten screw.
6. Switch on mains and programme Timeswitch to your own
requirements.
5mm
2.5mm
1
2
3
5
4
Please refer diagrams
1-5 to sections 1-5 in
above instructions.