Operating your chiller, Typical installations – Teco US TR5-60 User Manual
Page 8
Page 14
Page 15
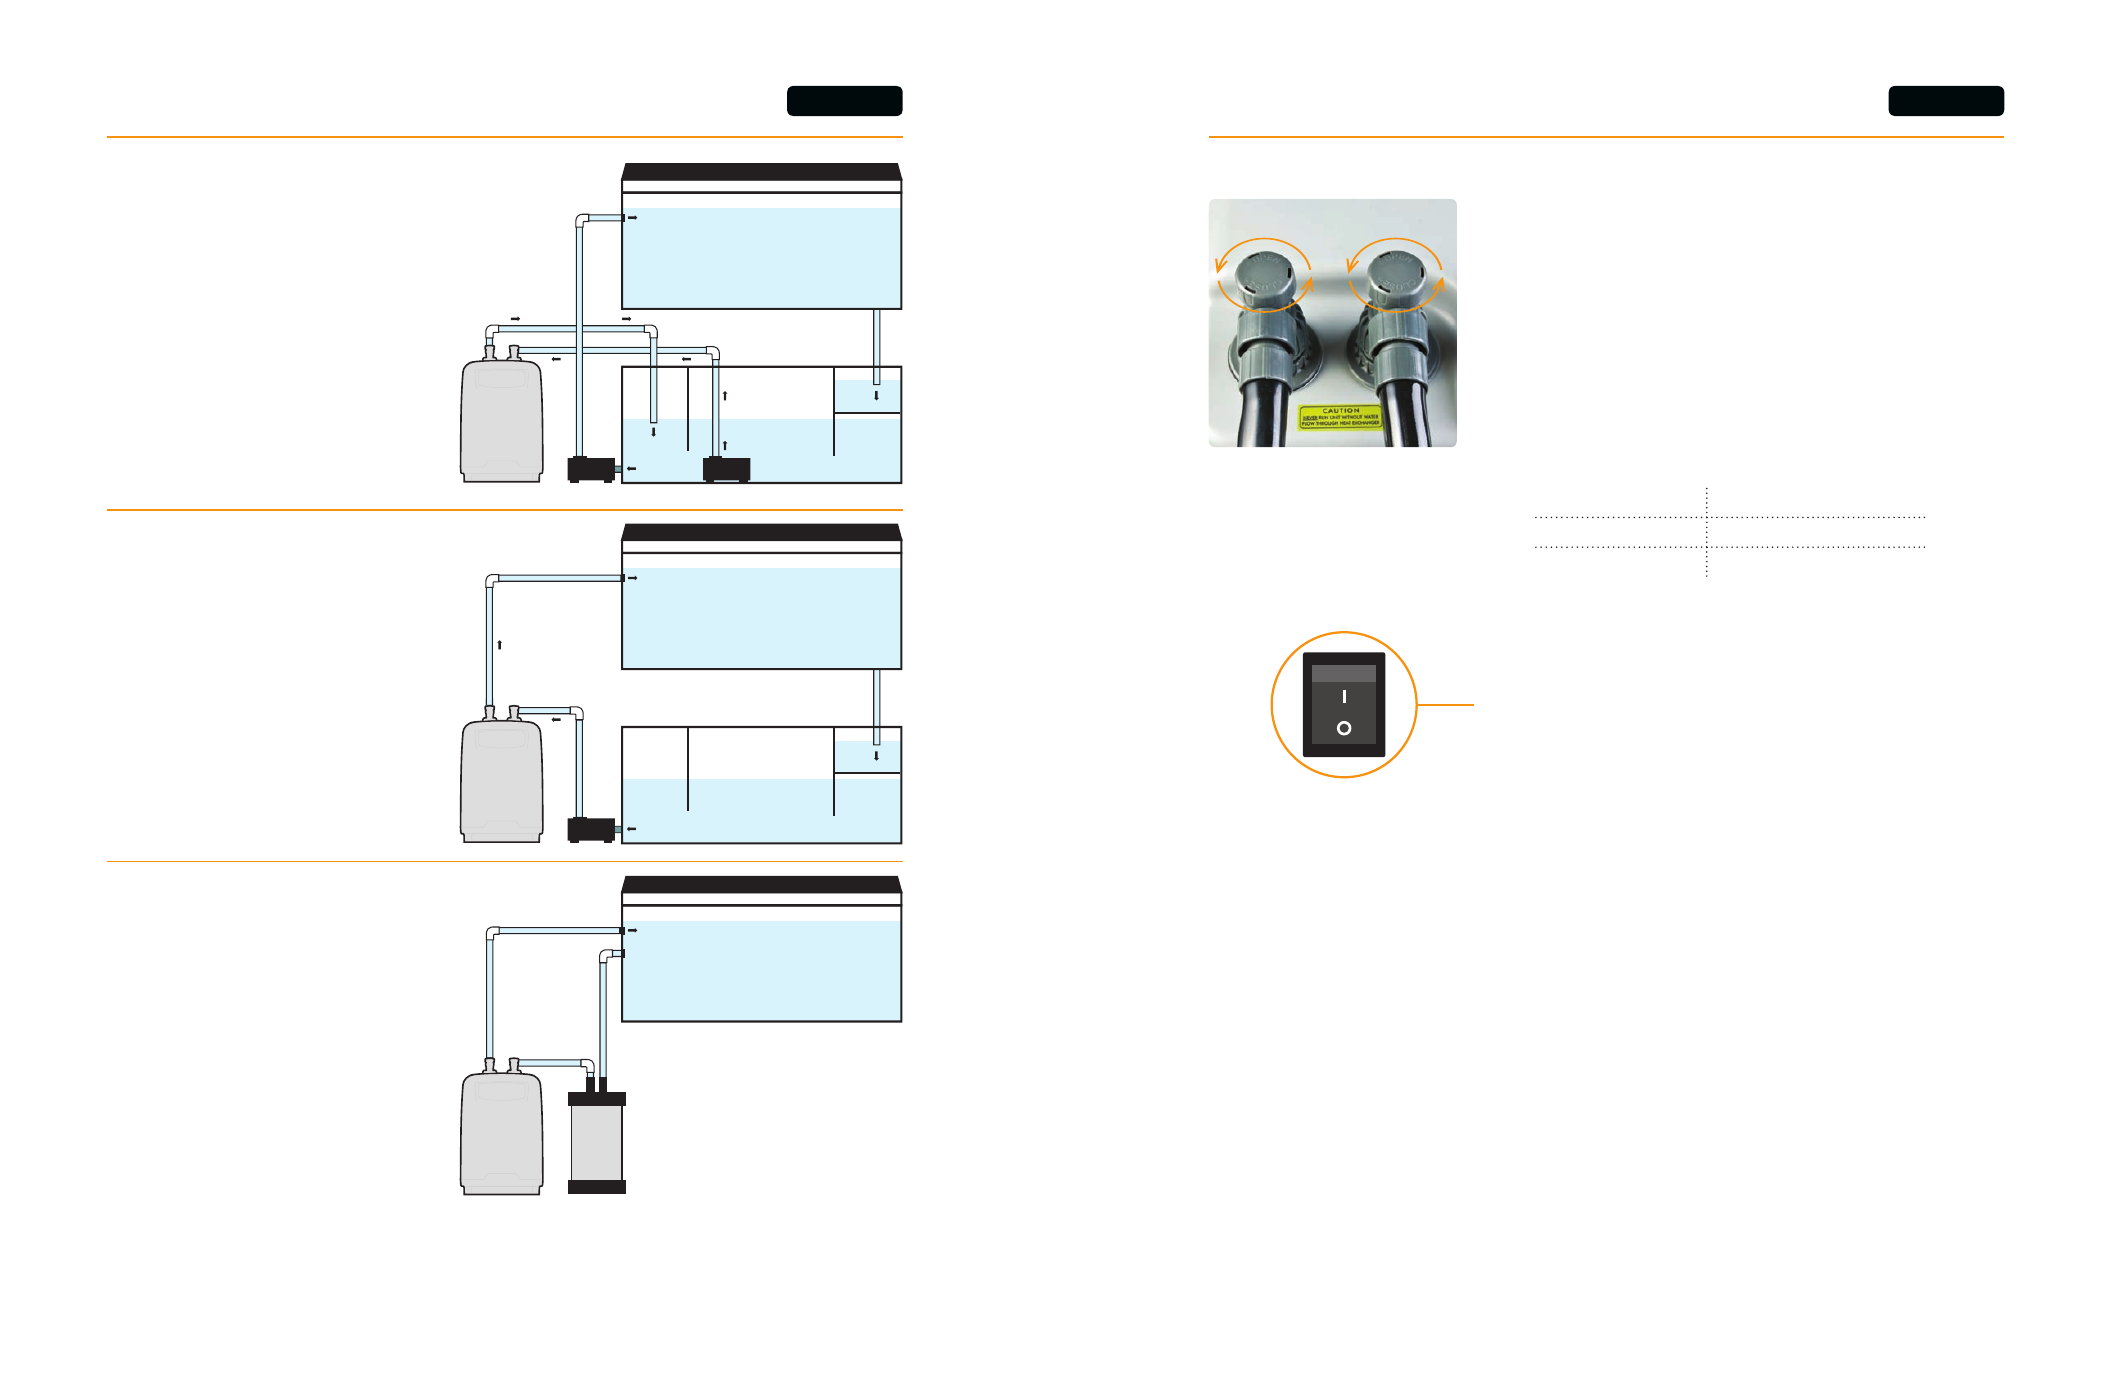
Starting Your Chiller
Open the Shut Off Valves by rotating the valve
1
counterclockwise.
Turn on the pump from the aquarium to the chiller.
2
Check for leaks and adjust as needed.
3
Make sure water is circulating through the chiller at an
4
appropriate rate. (see chart)
TR5
150gph - 270gph
TR10, TR15, TR20
180gph - 600gph
TR30, TR60
270gph - 810gph
Plug the chiller Power Supply Cable into the chiller and the
5
other end into an appropriate compatible source of electricity.
Turn power switch on.
6
Relocation after Installation
Rotate the Shut Off Valves to the closed position.
1
Loosen the ring nuts for shut off valves.
2
Remove shut off valves from chiller inlet and outlet.
3
You may then move the chiller to another location
4
Note: If you are moving the chiller a long distance, it may be necessary
to place the in/out plugs in the in/out ports of the chiller. Be sure to put
o-rings on in/out plugs before you put them in the in/out ports.
ALL MODELS
Operating Your Chiller
Note: These setup diagrams are intended to provide general examples of common plumbing arrangements, this does not cover all possible situations.
Pump, tubing, plumbing accessories are not included.
PUMP
PUMP
PUMP
Typical Installations
Submersible Pump Installation
Closed Loop
Water is being run through the chiller
by a separate pump and returned
back to the sump.
External Pump Installation
Inline
In this installation the chiller is
plumbed between the main return
pump and the tank. Be sure that
the flow rate is not too high in this
situation. If it is, use a ball valve off of
the main line into the chiller to slow
the water flow.
Canister Filter
In this installation water travels
through the canister filter into the
chiller where it is returned into
the aquarium. With this type of
installation filter the aquarium water
before it passes through the chiller to
reduce build up in the chiller.
ALL MODELS