3 rigging, 4 installing the fan package, 5 installing piping – Sterlco SF Series Cooling Towers User Manual
Page 13
Fiberglass Cooling Towers
Chapter 3: Installation
Page 13 of 25
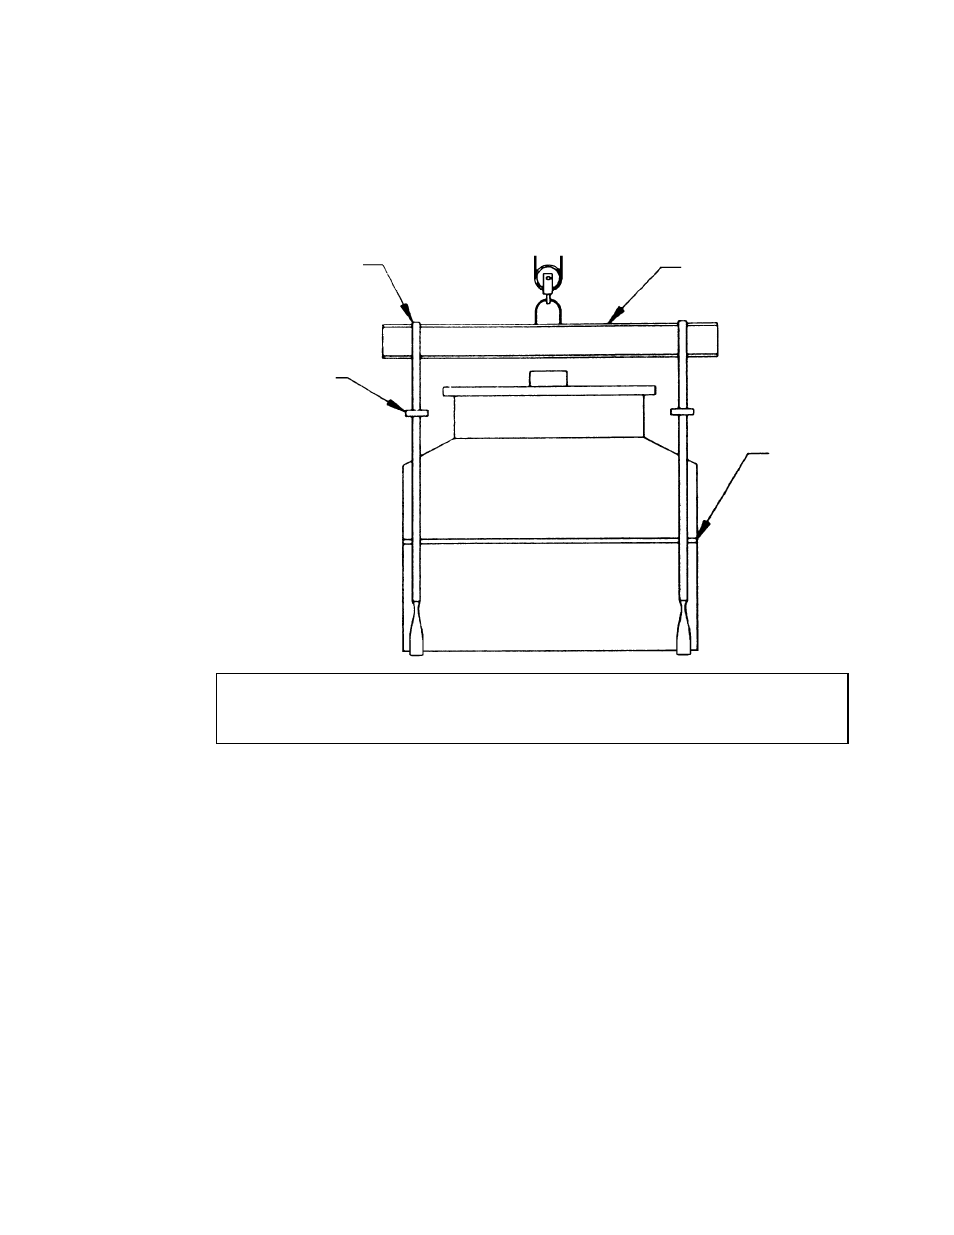
Do not let the rigging transfer any load to the cooling tower shell. Provide support to
the bottom of the cooling tower when rigging. Do not rig from the corners of the
optional base. Do not rig less than 8 inches from the corners.
3-3 Rigging
Handle the fiberglass cooling tower shell section very carefully. Until installed and properly
supported, it is subject to handling damage. See Figure 2 for rigging information.
Caution! Use an appropriately rated hoist to support the equipment.
Figure 2: Rigging Arrangement
I-beam
Channel
Spreader bar wide
enough to protect
cooling tower shell
Rope stay
The rope stay goes
all the way around the
vertical rope in position.
tower to keep the
3-4 Installing the Fan Package
Install the fan package after the tower is in position.
1. Remove the dunnage securing the fan package to the pallet.
2. Carefully rig the package using the lifting eyebolts provided.
3. Mounting holes have been pre-drilled at the factory; move the package into position
and fasten it securely with the stainless steel hardware provided.
3-5 Installing
Piping
Make sure that all piping attached to the cooling tower is externally supported. Do not
support anything from the cooling tower shell.
The cooling tower and related fittings and connections are constructed of plastic materials
and are not designed to bear external weight.
Do not apply high torque to the fittings that are made up into the tower fittings. Use a backup
wrench when applying torque to the fittings.
Caution! Use appropriately rated
hoist to support equipment.