Milestone Retail 2.2 User Manual
Page 13
Milestone XProtect Retail 2.2; User’s Manual
www.milestonesys.com
Page 13
Managing Queries
database is usually very large it is important to select a relatively small amount of results
to ensure that the performance of the Milestone XProtect Retail application and the SQL
server is not compromised.
4.
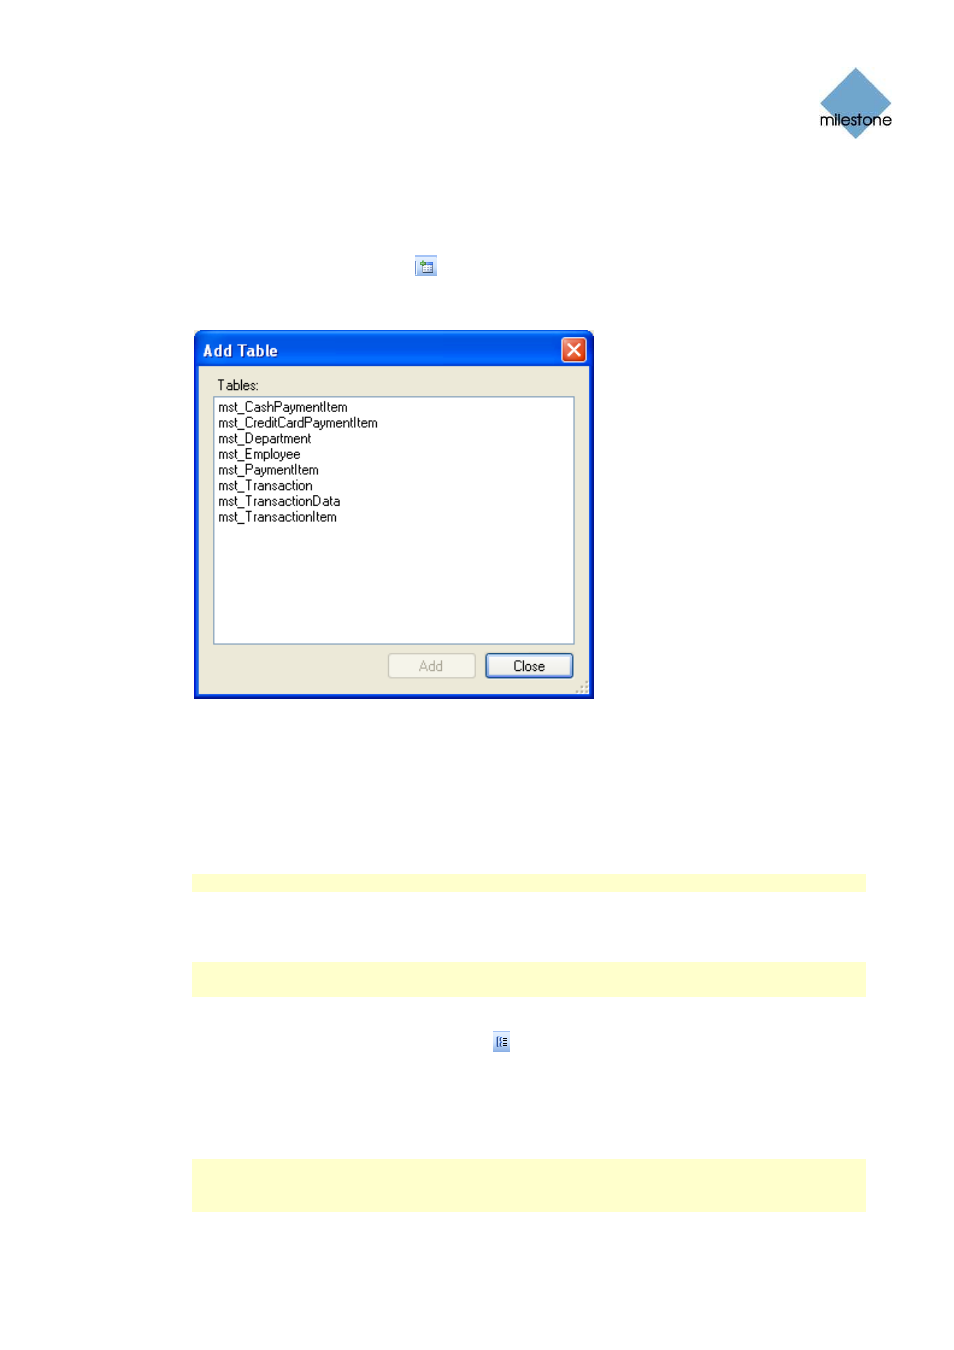
Add the required tables by selecting Add Table from the Query Designer menu or by
clicking on the Add Table icon
in the toolbar.
This will open up an Add Table dialog:
Select the required tables, and click the Add button.
5.
Tables will by default be joined based on their relations but these joins can be removed by
selecting the line connecting the two tables in the graphical representation and pressing
the Delete button.
New table joins can be added by clicking on the required field name in one table and
dragging it to equivalent field name in the adjacent table.
Note: All queries must be joined to the table mst_Transaction.
6.
Select output fields by clicking in the checkbox to the left of the field name in the graphical
interface or by adding a line to the criteria table.
Note: All normal queries must have the fields TransactionId and TransDate selected as
output fields.
7.
If you want to create a group by query either select Add Group By from the Query Designer
menu, or click on the Add Group By icon
in the toolbar. If not continue to next step.
This enables the drill down information section with Possible fields and the Selected fields
lists. From the Possible fields list select the information you want to include in the drill
down table. Selected information is displayed in the Selected fields list and will
automatically be generated with a group by query.
Note: To create a valid group by query, the fields TransactionId and TransDate from the
table mst_Transaction must be selected (there is no restriction on where they should be
represented in the list of selected fields).