Operation – WEN 6502 4 x 6 Belt / Disc Sander User Manual
Page 13
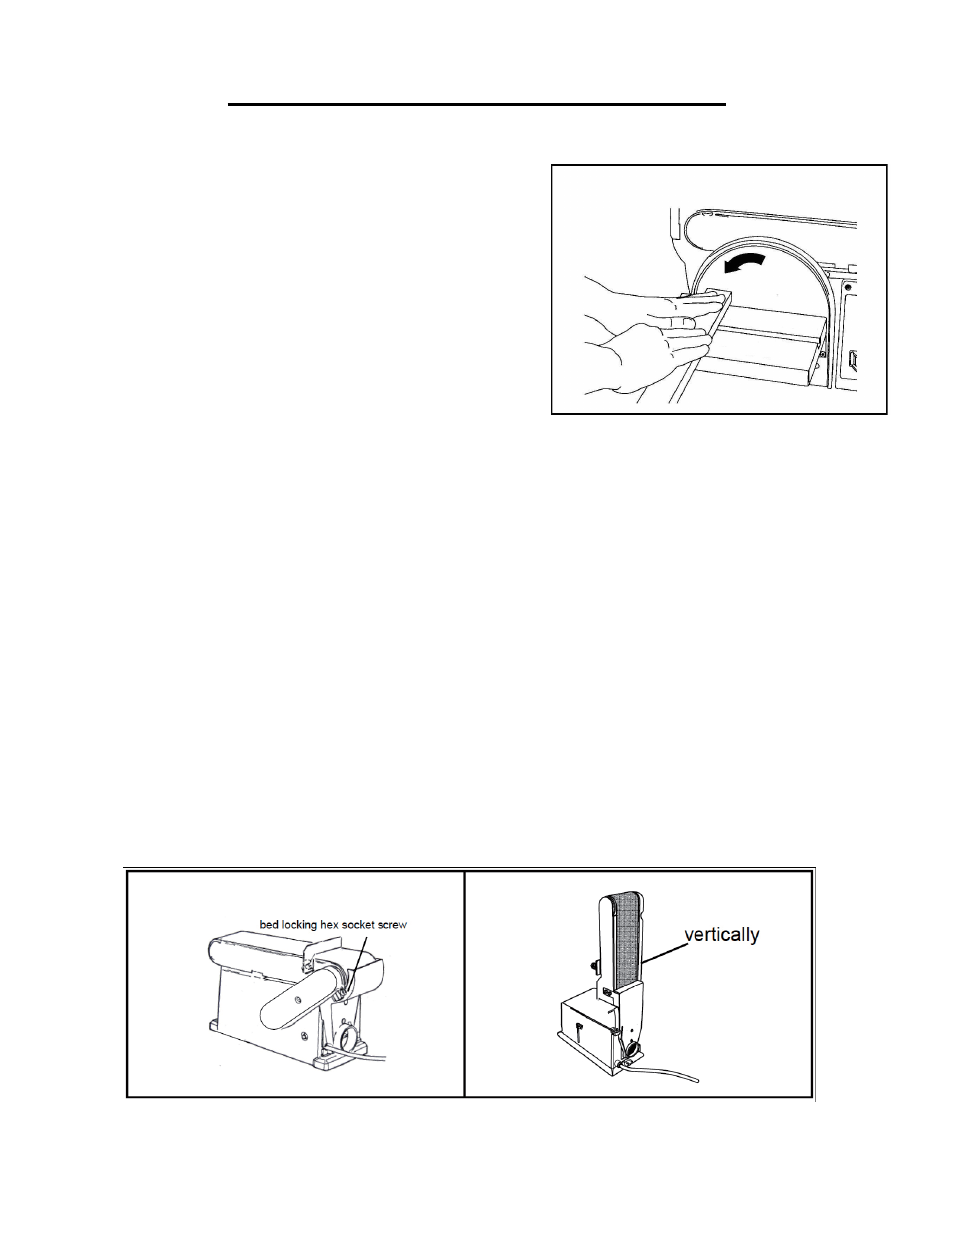
END SANDING AND OUTSIDE CURVE SANDING WITH THE DISC
Use for sanding the ends of small and narrow workpieces and
outside curved edges. Always work on the left side of the disc
(downward rotation side), holding the workpiece firmly with
light pressure against the sanding disc.
CAUTION: To avoid personal injury and/or damage to the
workpiece, become familiar with the rotation of the belt and
disc sanding surfaces.
The belt sander rotates counterclockwise or downward toward
the table or backstop. The disc sander rotates counterclock-
wise, downward toward the table on the left side of the disc and
upward from the table on the right side of the disc. Always use the left side of the disc; using the right side of the
disc will cause the workpiece to fly up or kickback and could result in injury. Review this instruction manual for
correct operation, adjustments, and basic sanding operations.
BELT SANDER - HORIZONTAL AND VERTICAL SANDING
Your belt & disc sander can sand vertically as well as horizontally. Depending on the operator’s needs and the
workpiece, the work-support can be used with either the horizontal or vertical position.
To change from one position to the other:
1. Locate the 15/64” (6 mm) hex wrench
2. Loosen the bed-locking hex-socket screw by turning it counter-clockwise.
3. Manually move the work support station into the vertical or horizontal position, as required.
4. Retighten the bed-locking hex-socket screw by turning it clockwise (using the 15/64” (6 mm) hex wrench).
Operational Note: Sand long workpieces with the sanding belt in the vertical position by moving the work
evenly across the sanding belt.
OPERATION
13