WEN 70716 10 inch Sliding Compound Miter Saw User Manual
Page 12
CAUTION:To ensure correctblade rotation, always installthe blade with the
bladeteeth and the arrow printedon the side of the bladepointing downwards. The
y to tighten the arbor bolt securely (tighten in a
place the guard retraction arm and secure onto the rotating blade guard (Fig.
25).
correctly and covers the blade as the saw
the saw to the power source and run the blade to make certain that it is
Cross-cutting (without slide action)
When cutting a narrow piece of wood, it is not necessary touse the slide mechanism.
In these cases, ensure that theslide lock knob(13) is screwed down to prevent the
saw armfrom sliding.
A crosscut is made by cuttingacross the grain of theworkpiece. A 90º crosscut
ismade with the miter table setat 0º (Fig. 33). Miter crossc sare made with the table
t atsome angle other than zero.
. Pull on the release knob (Fig. 24) and lift the saw arm to its full height.
. Rotate the miter table until the pointer aligns with the desired angle.
o
e movingduring the cut and cause serious personal injury.
e, the board could break and jam the blade.
er with
ler stand, a work surface level with the saw’s
e workpiece wherever possible.
g it to the other
clamp (Fig. 34).
9. Before turning on the saw, perform a dry run of the cutting operation to check that there are no problems.
direction of the blade’s rotation is alsostamped with an arrow on the upper blade
guard.
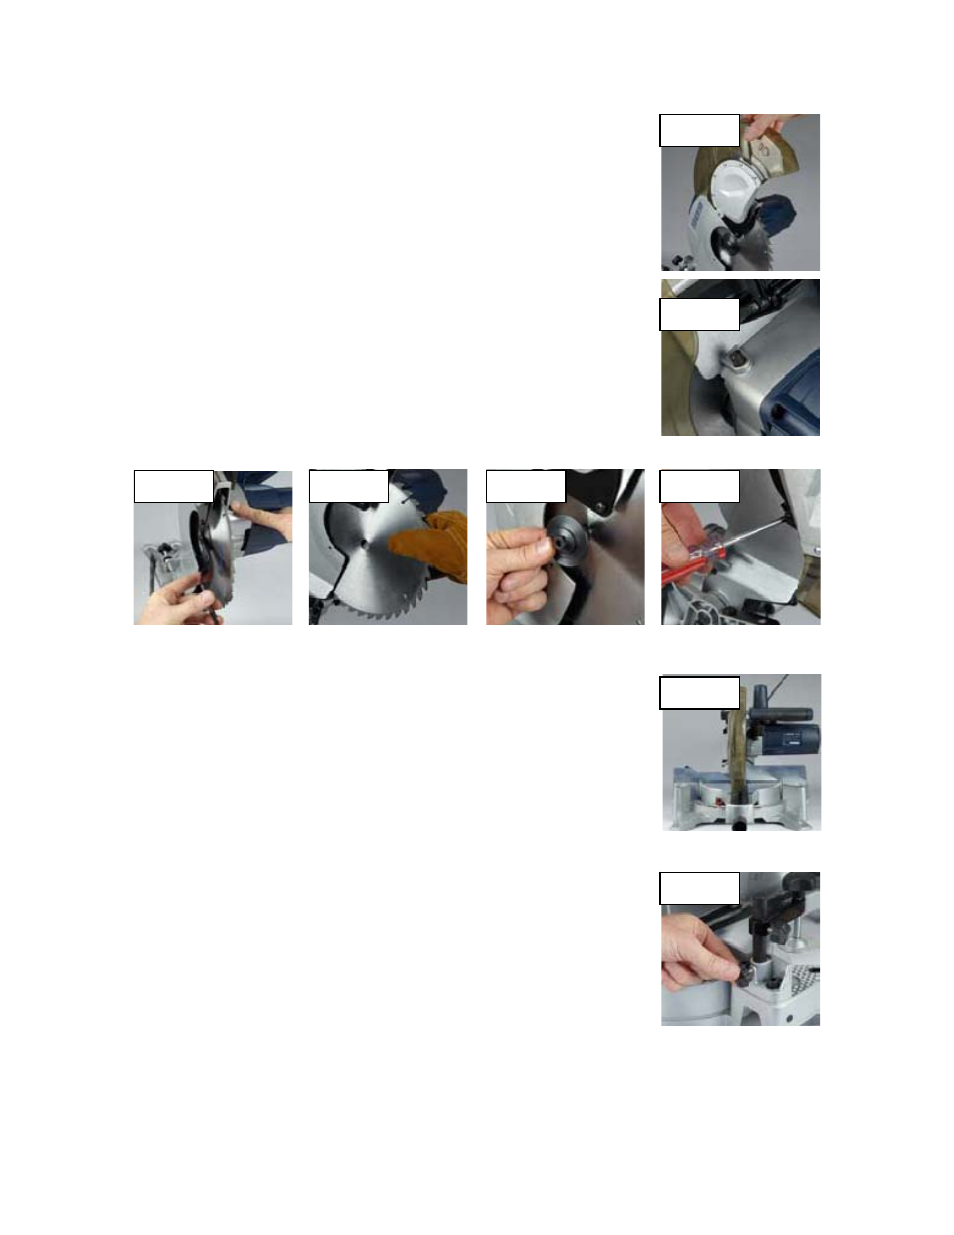
12. Replace the outer flange (Fig. 31).
13. Depress the spindle lock button (Fig. 28) and replace the flat washer and arbor
bolt.
14. Use the 6mm hex ke
counterclockwise direction).
15. After lowering the blade guard, hold the rotating lower blade guard and arbor
bolt cover in position and tighten the fixing screw (Fig. 32).
16. Re
17. Check that the blade guard operates
arm is lowered.
18. Connect
operating correctly.
ut
se
1
2. Loosen the miter lock (Fig. 15).
3
4. Retighten the miter lock (Fig. 15).
WARNING: Be sure to tighten the miter lock before makinga cut. Failure to do s
could result in the tabl
5. Place the workpiece flat on the table with one edge securely against the fence.
If the board is warped, place the convex side against the fence. If the concave
side is placed against the fenc
6. When cutting long pieces of timber, support the opposite end of the timb
either the side support arms, a rol
table or a combination of the three.
7. Use the clamp assembly to secure th
Fig. 27
Fig. 28
Fig. 29
Fig. 30
Fig. 31
Fig. 32
Fig. 33
Fig. 34
8. It is possible to remove the clamp assembly by loosening the clamp assembly lock a
side of the table. Make sure the clamp assembly lock is tight before using the
nd movin
12