Warning – Video Mount Products IWB-1B User Manual
Page 3
Step 1
Before starting, lay out all parts to your mount and match them
to the parts list provided. Verify that you have all your parts
before attempting to assemble the mount. Please identify
which color your LCD-1/LCD-2537 is, silver or black, and only
use the parts #7-11 or #12-16 which are the correct color for
your mount. Set aside the other color of parts. If you wish to
paint the wall box , mount supports and trim cover to
match or wall or mounting surface please do so at this time.
Step 2
Identify a proper installation site of the IWB-1. Note: The IWB-1
is designed to go in between two wooden studs with 16” cen-
ters. There will not be enough space remaining to the side of
the IWB-1 for electrical wires/cables, plumbing, ductwork or
insulation. Please take this into account when locating the
installation site.
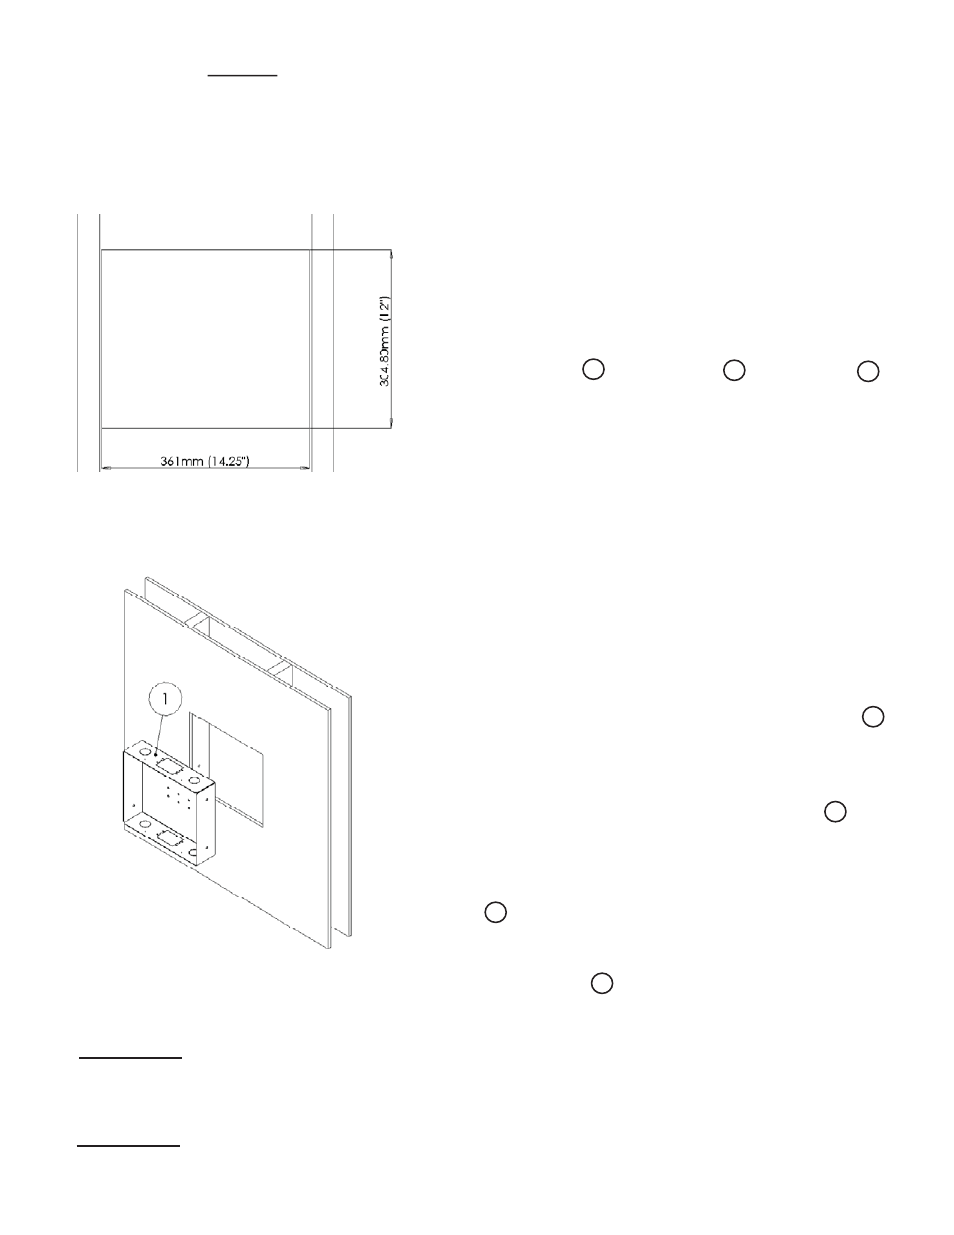
** Step 3 **
Use a stud fi nder to locate the desired studs and mark their
locations. Center and level the housing and using the hous-
ing as a template draw around the edges of the box .
Cut out the drywall within the drawn line.
Step 4
If installing electrical junction boxes into the wall box please
do so at this time using the knockouts in the top or the bot-
tom of the box. Route any audio/visual cables through the
knockouts also located on the top and bottom of the wall
box at this time as well.
Step 5
Insert the wall box into the wall.
1
WARNING: It is HIGHLY recommended the installation of the IWB-1 be installed by a
qualifi ed professional, as the installation process can be dangerous and result in per-
sonal injury or death if done improperly. If at any point you are unsure about what you
are doing, STOP and contact a qualifi ed professional.
Step 3: Outline of the cutout for the IWB-1
**
WARNING:
ELECTRICAL SHOCK HAZARD! CUTTING OR DRILLING INTO ELECTRICAL WIRES OR CABLES
CAN RESULT IN DEATH OR SERIOUS PERSONAL INJURY! Always make sure the area you are preparing to cut
or drill into is completely clear of electrical wires before you proceed in order to prevent injuries.
**
WARNING:
EXPLOSION AND FIRE HAZARD! CUTTING OR DRILLING INTO GAS PLUMBING CAN RESULT IN
DEATH OR SERIOUS PERSONAL INJURY! Always make sure the area you are preparing to cut or drill into is com-
pletely clear of gas, water, waste or any other plumbing before you proceed in order to prevent injuries.
Step 5: Inserting the wall box into the wall
1
1
2
4
1
1