Triton RL5000 Installation Manual User Manual
Page 42
4 2
9.
Load the currency cassette using
the instructions in Section 4, Cash
Replenishment, in the RL5000 User
Manual. Place the appropriate
denomination label (supplied in the
accessory box) on the cassette.
Install the currency and reject
cassettes and rotate the dispensing
mechanism back to the operating
position. (cassettes towards rear of
cabinet) Slide the dispenser back
into the cabinet. Close and lock the
security cabinet.
NOTE: You can access the cassettes
from the operating position by rotating
the turntable either 90° or 180°
clockwise.
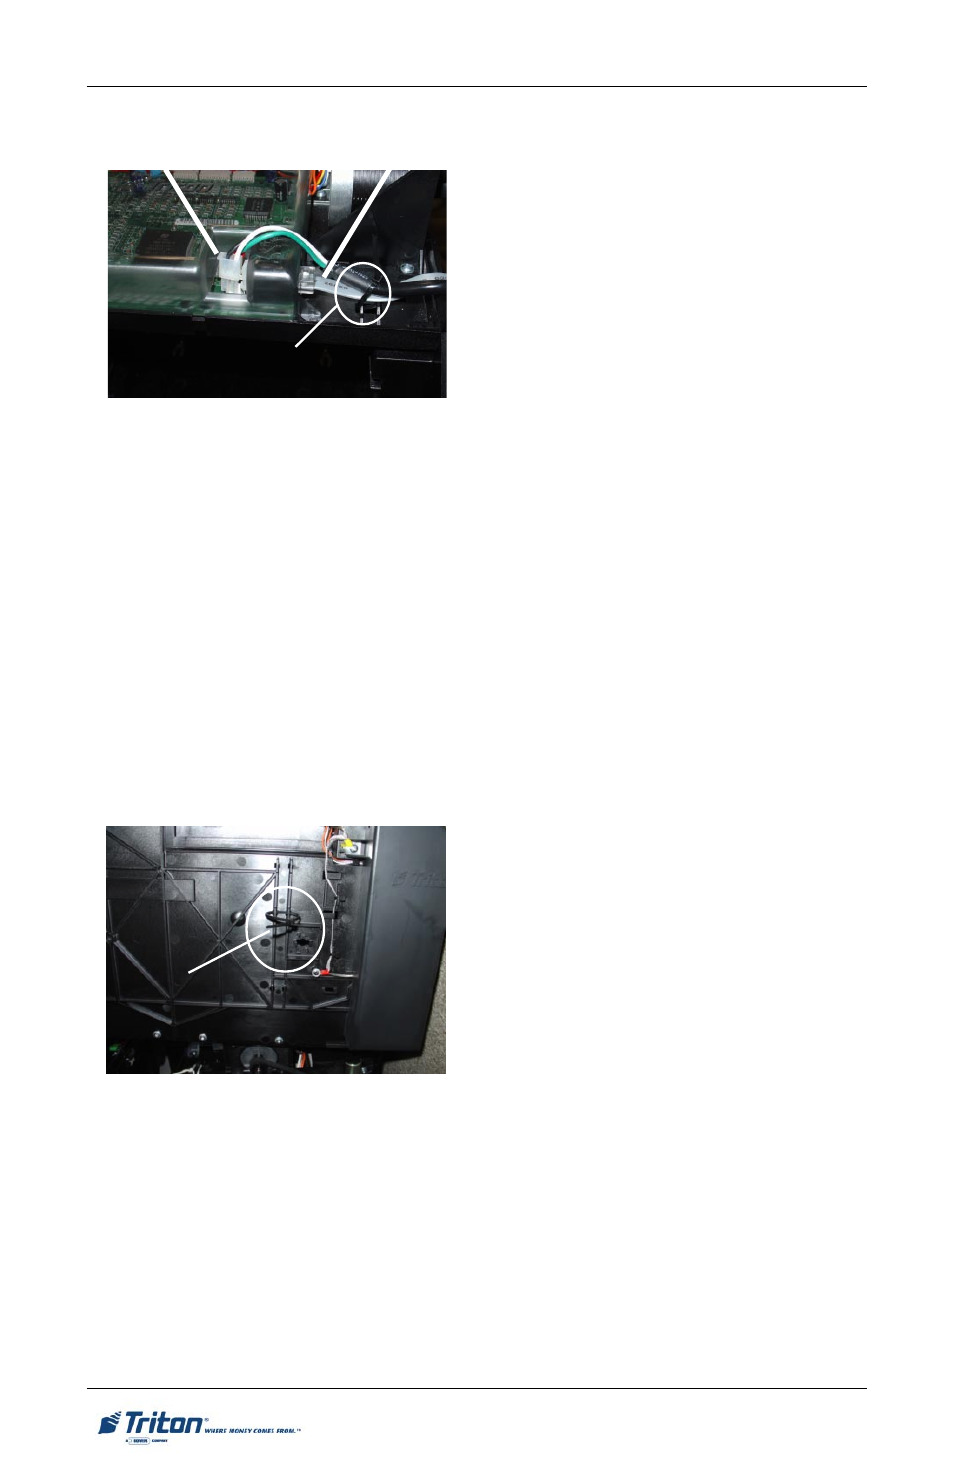
Figure 9. Data / power connections.
Power
connector
Data
connector
a.
Access the Management Functions
main menu screen. Refer to the
RL5000 User Manual for
instructions on accessing the
Management Functions main
menu.
b.
Select Diagnostics from the
Management Functions screen,
then Dispenser.
RL5000 S
ERIES
I
NSTALLATION
G
UIDE
Secure tie
wrap!!
8.
(For TDM-150) Route the serial
communications cable and power
cable through the tie-wrap loop
located on the side of the dispenser
shown in Figure 10. Continue to
route cables through second tie
wrap as shown in Figure 9. Plug
the data cable into jack J11. Plug
the DC power connector into jack
J12 (Figure 9). Pull both tie wraps
to secure cables to dispenser.
Figure 10. Cable tie wrap location
for TDM-150 (side of dispenser).
10. Open the control panel and apply
AC power to the ATM by pushing
the AC power switch to the ON (1)
position.
11. Complete the ATM setup, if
necessary, according to the
instructions in the RL5000
Configuration manual or applicable
Service manual.
12. Follow the remaining steps to
perform a Test Dispense:
Route cables
and secure
tie wrap!!