Pivot pal mount parts breakdown, Model #ppt-175, Spreader – SnowEx Junior 325 User Manual
Page 42
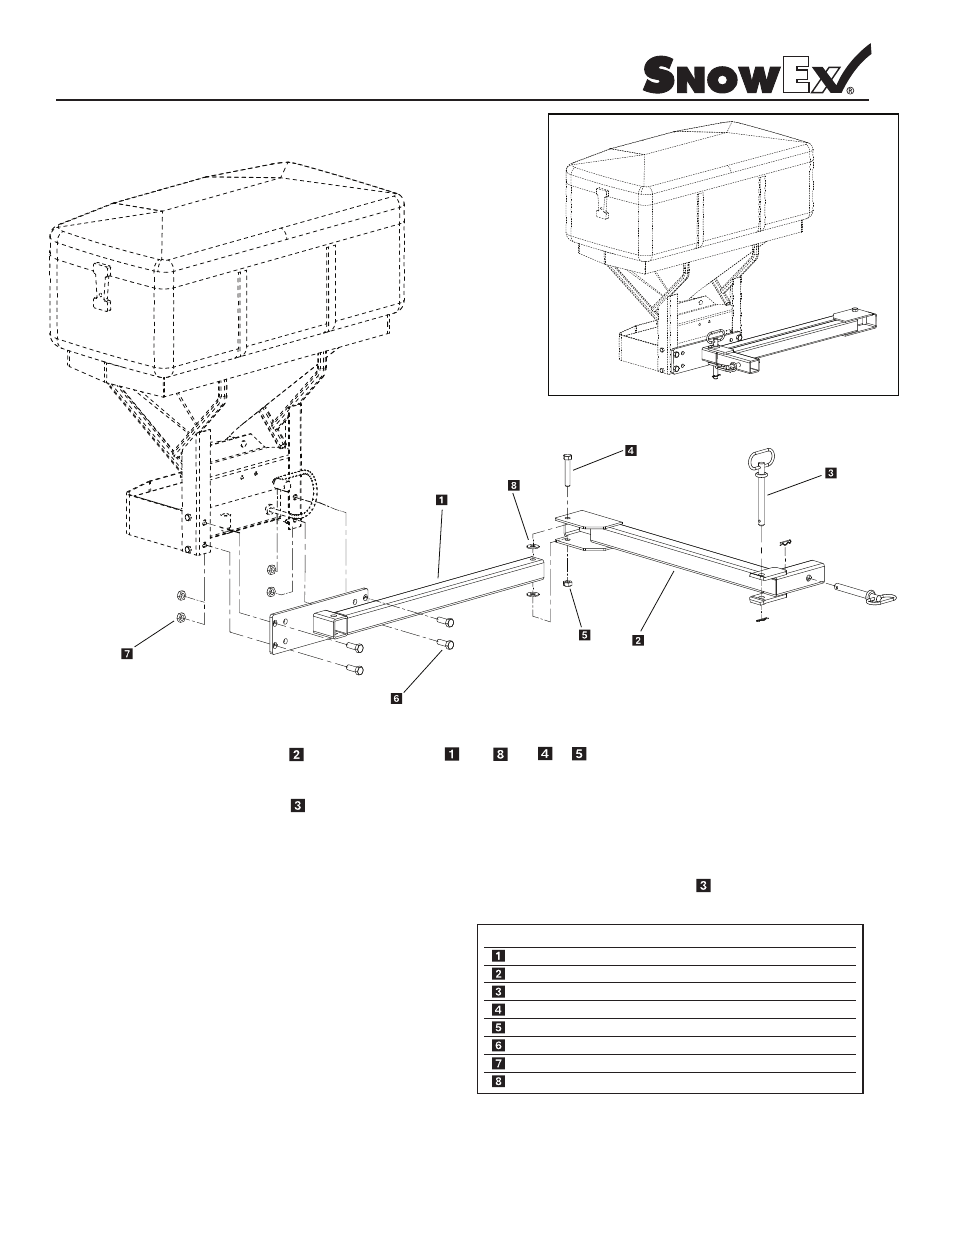
Pivot Pal Mount Parts Breakdown
Model #PPT-175
© Trynex International 2009 L1040
7 — 42
Spreader
(reference only)
PPT-175
Assembled View
Step 1: Assemble spreader swing arm to spreader hitch arm with and & nut and bolt. Do not over tighten since this
may cause the arm to bind and will not swing open freely.
Step 2:
Step 3: Remove existing 1/2” bolts from spreader drive assembly and mount spreader assembly to spreader (see illustration).
Re-tighten hardware per illustration.
Step 4: With assitance, lift spreader into position and insert into vehicle receiver mount. Install hitch pin with clip.
Step 5: Remove swing arm hitch pin and swing spreader out
on drivers side, at this time use a spray lubricant such
as automotive lithium type or a grease based product.
This will help prevent unwanted corrosion in the pivot
joint; this should be checked on a regular basis during
the season.
Step 6: Close spreader and re-install hitch pin with clip.
Step 7: Plug spreader into spreader harness and test for
power on.
.
y
t
Q
n
o
it
p
i
r
c
s
e
D
.
o
N
t
r
a
P
y
e
K
D 6051 Hitch Arm 1
D 6052 Swing Arm 1
D 4136 Hitch Pin With Clip 2
D 6052 1/2” x 2-1/2” Shoulder Bolt 1
D 4124 3/8”-16 Nylon Hex Nut 1
D 4116 1/2”-13 x 1-1/2” Hex Bolt 4
D 4120 1/2”-13 Lock Nut 4
D 6049 1/2” x 1/6” Bronze Thrust Washer 2
Collapse assembly and install hitch pin to keep assembly from opening.