Step 10 attaching & securing base feet, Step 7 – ShelterLogic 58542 Run-In Shed 22 x 24 x 12 User Manual
Page 5
STEP 10 ATTACHING & SECURING BASE FEET
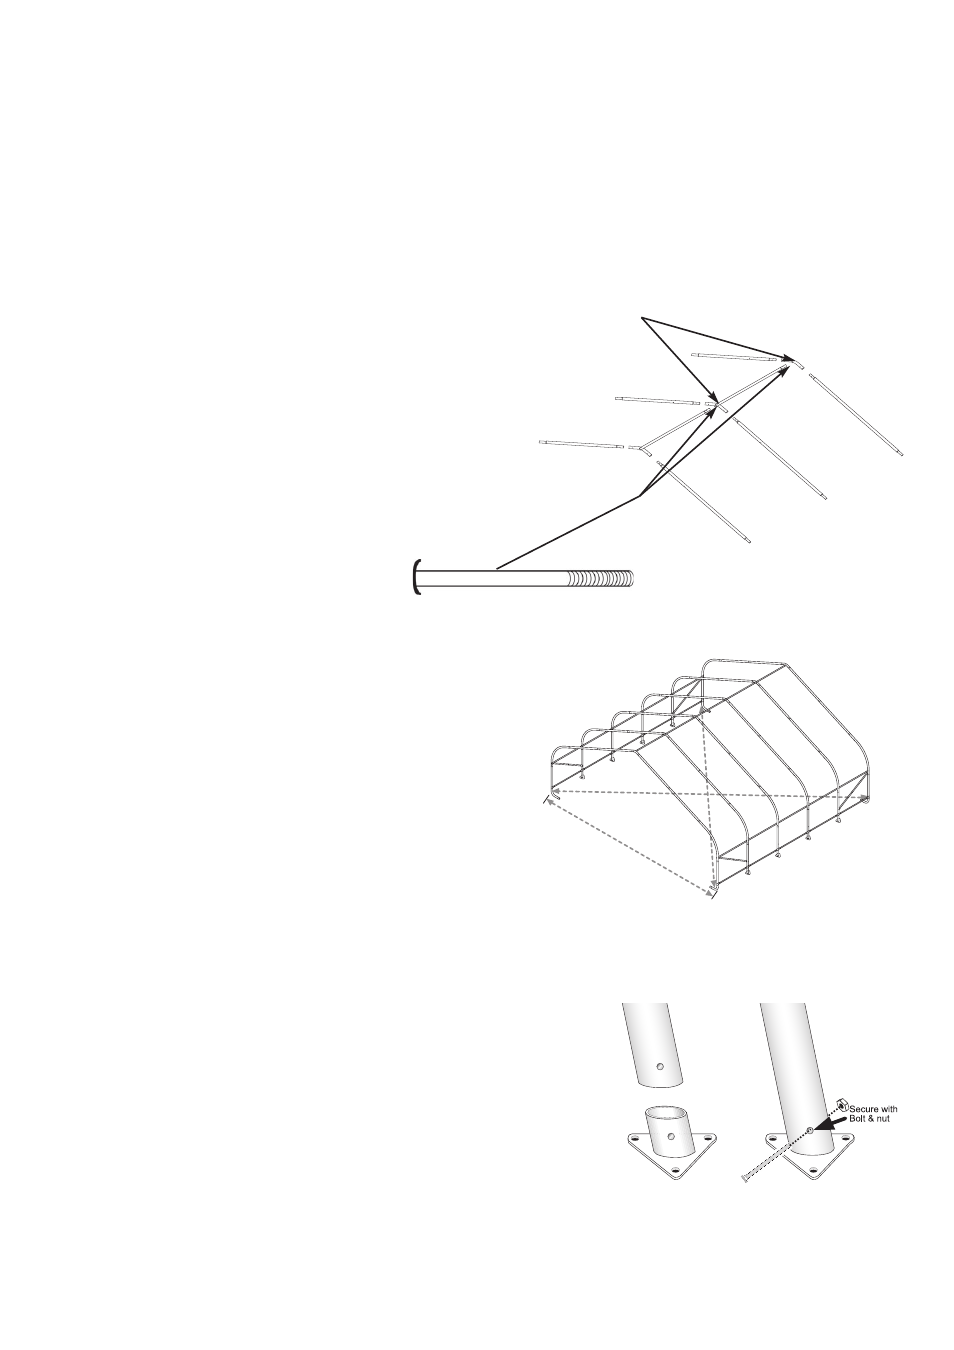
Install the top cross rail assembly starting with #11103 Cross
Rail Swedged 48 1/2"L inserted into the End 2-Way Connector.
Secure with a #648 5/16 X 2" bolt and #690 nut. Place the
plain end of a #11103 Cross Rail Swedged over the end and
put the joint on the top of the middle rib. Secure with a #11133
5/16 X 4" Round Head Bolt and #690 Nut. Continue adding
#11102 Cross Rails and finish with the #11101 Cross Rail Plain
End inserted into the last end 3-way connector and secure with
a #648 5/16 X 2" bolt and #690 nut.
(Fig.10)
NOTE: Use the special Round Head Bolts for securing the
top rail to the middle ribs only!!!
Step 8 Installing T
Step 9 SQUARING THE SHELTER
op Rail
Install the Top Rail
Over all Middle Ribs
Check that the shelter's width is correct from the outside to
outside of the uprights at ground level. Check also that the
shelter is square by measuring diagonally from corner to
corner at ground level.
(Fig.11)
The two measurements must be within 2 inches of each
other.
Depending on the model you have purchased, your base feet will either fit
onto the outside of the leg poles, or slide inside the leg poles. After installing
Base Feet Plates onto bottom of Middle leg Poles, be sure to line up the
pre-drilled hole in the leg with the pre-drilled hole in the base foot. Insert
5/16" x 2 3/4" bolts all the way through leg and foot, to other side, secure with
nuts.
(Fig.12)
STEP 7
Install the other end rib as you had installed all the middle ribs only use #11104 crossrails and attach the sliding crossrail
using the remaining 3-way coverrail clamps.
Note: The final windbrace assemblies should be installed as shown. Be sure the upper of the windbraces are
installed between the rib and crossrail
22'
Fig.10
Fig.11
Fig.12
Page 5