ShelterLogic 71534 Peak Style Storage Shelter 12 x 20 x 8 User Manual
Page 3
Page 4
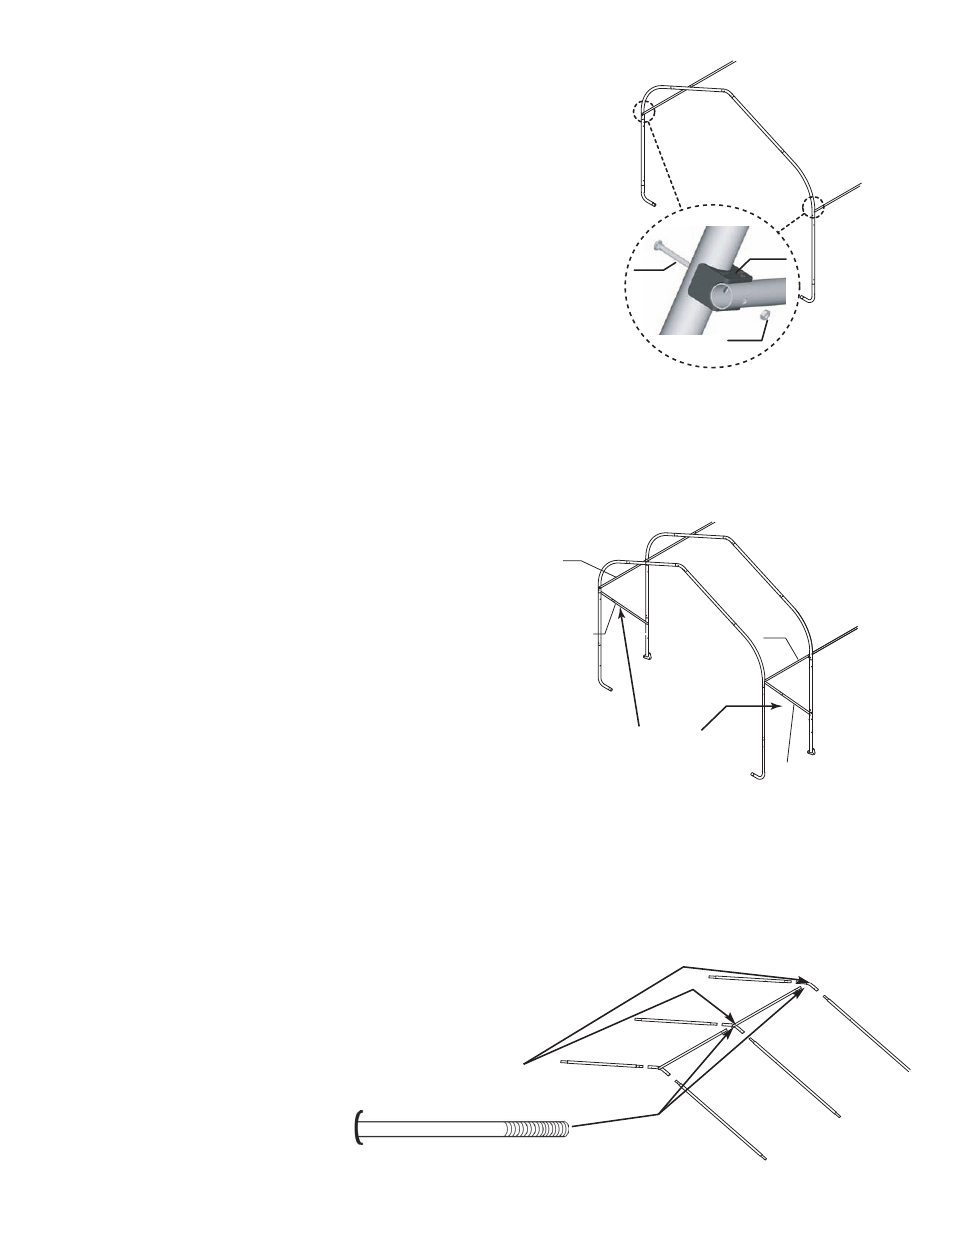
STEP 5: INSTALL WIND BRACES
Fig. 5
STEP 6: INSTALL TOP RAIL
Fig. 6
STEP 4: INSTALL SIDE RAILS AND
SHELTERLOCK™ STABILIZER BLOCKS
Fig. 4
Fig. 5
Wind Brace
2030
2030
10135
10135
669
2030
2030
Fig. 2
Fig. 4
10210
800260
1010
Install the Top Rail
Over all Middle Ribs
Fig. 6
With help move the first end rib into the desired staked area. Place
the ShelterLock on the upright as shown in Fig. 4. From the outside
of the rib insert the bolt through the upright and then through the
ShelterLock. Place the plain end of the side rail over the bolt and
nest it into the ShelterLock. Install the nut onto the bolt and tighten.
Repeat these steps for the opposite side and all of the remaining ribs.
The side rails for the last rib will have two plain ends.
Take the wind brace and attach it between the end rib and the
first middle rib as shown in Fig. 5.
Any attachments at the
cross rails should be made on the very inside of the cross rail.
Place the first top rail over the pipe on the top end connector Fig. 6. The same cross
rail should lay on top of the first middle rib as with all of the middle ribs. Secure the
rails to the frame with the hardware indicated in Fig 6. The top rail attached to the
last rib will be installed over the pipe on the top end connector.