Seed Hawk Ground Drive 2011 Calibration Guide User Manual
Page 7
Seed Hawk
®
Manual Calibration Guide
6
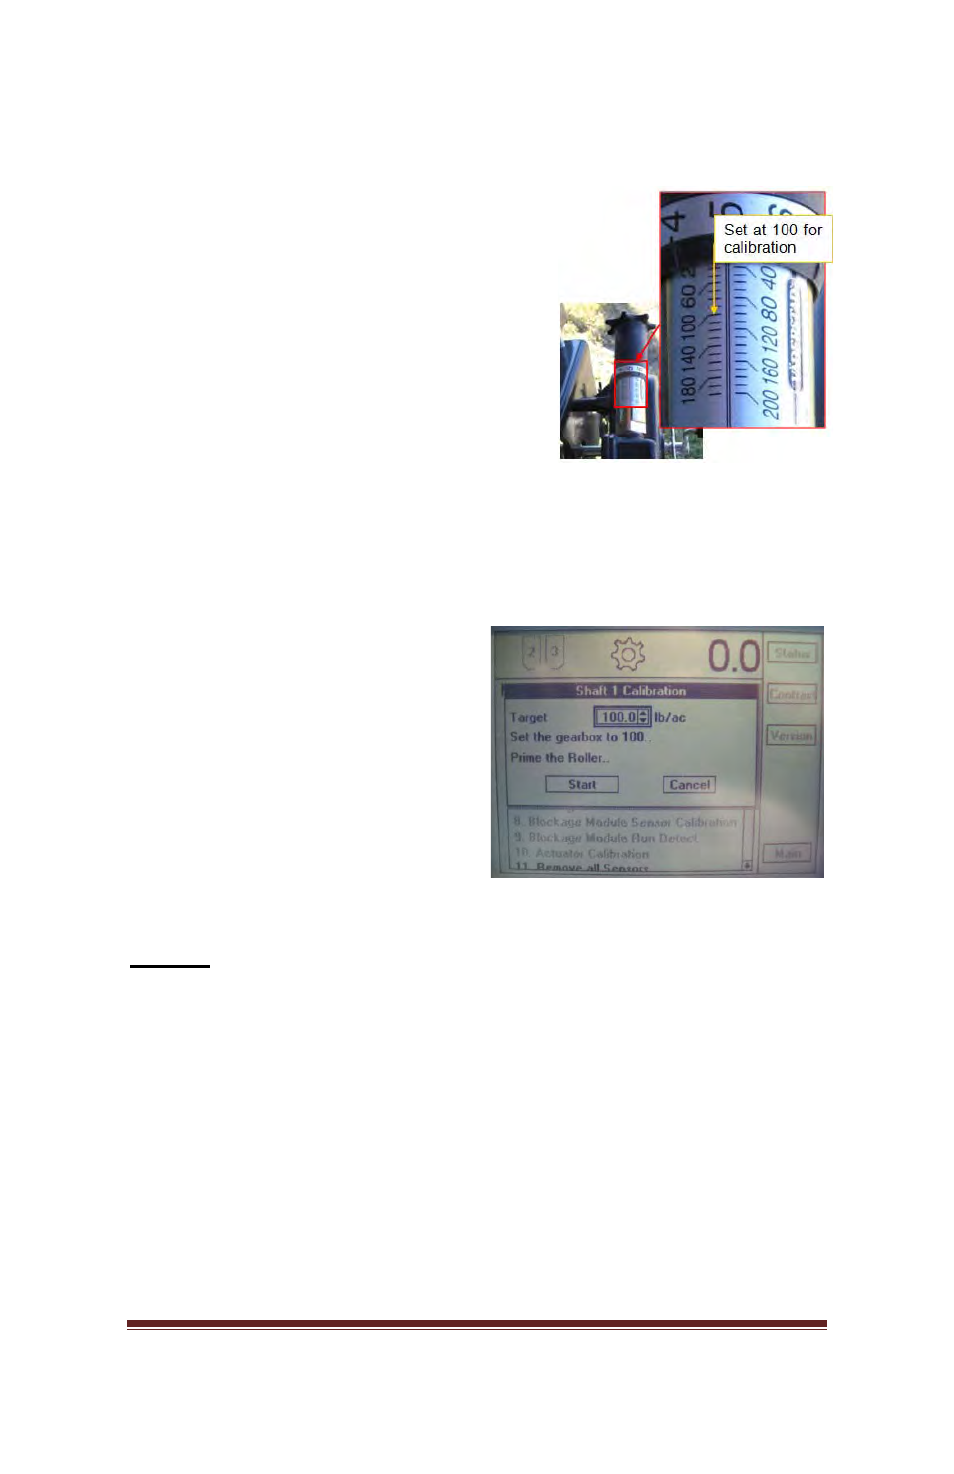
As stated on the screen: set the
gearbox on the implement to a
setting of 100 using the
increase/decrease switch on the side
mounted control box and PRIME
THE METER to ensure full flow at the
beginning of the calibration.
Note: Empty the product out of the calibration bucket, this is
not needed for the rest of the calibration procedure.
Once this step is complete,
highlight the “Start Box” using
the Selector Knob and use
the Enter Key or Toggle
Button to select Start.
Step 2:
The screen now displays the number of meter
revolutions counted with “Continue” highlighted. Turn the meter a
number of revolutions while catching the metered material in the
catch bin. Stop turning the meter. The number of revolutions is
displayed. Press Continue to save the information collected
during the calibration procedure.
NOTE: There is no set number of cranks required. It's
recommended to take as large of sample as possible.