Adjustments – RIKON Power Tools 10-320 User Manual
Page 8
8
Tools Required:
Small 90° square
(not supplied)
The table may be set at 90° to the saw blade
(See Fig.09) by adjusting the table stop screw
(A, B) (See Fig.10) underneath the table.
The table stop screw rests on the top of the
quick release adjustment stop. By first loosening
the locking nut (A) and then adjusting the screw
(B), the table can be set correctly. Re-tighten the
locking nut (A) making sure that the setting is
maintained. (See Fig.11)
The table may also be set at 90° to the back of
the saw blade by adjusting the trunnion micro
adjustment screws. (See below)
Setting Table Square to Front and Rear of
Blade
Place a square against the saw blade on the
front (against the teeth) and rear positions. If the
table requires adjustment, proceed as follows:
a. Using a wrench, release the flange nuts on the
lower table trunnion.
b. Place the M5 Hex “L” wrench on the hex.
socket micro-adjusting set screws and adjust
until the table is square to the saw blade in the
front and rear positions.
c. Tighten the flange nuts and recheck the saw
blade and the table for square. (See Fig.12)
Fig. 10
Fig. 11
Fig. 12
A
B
Fig. 09
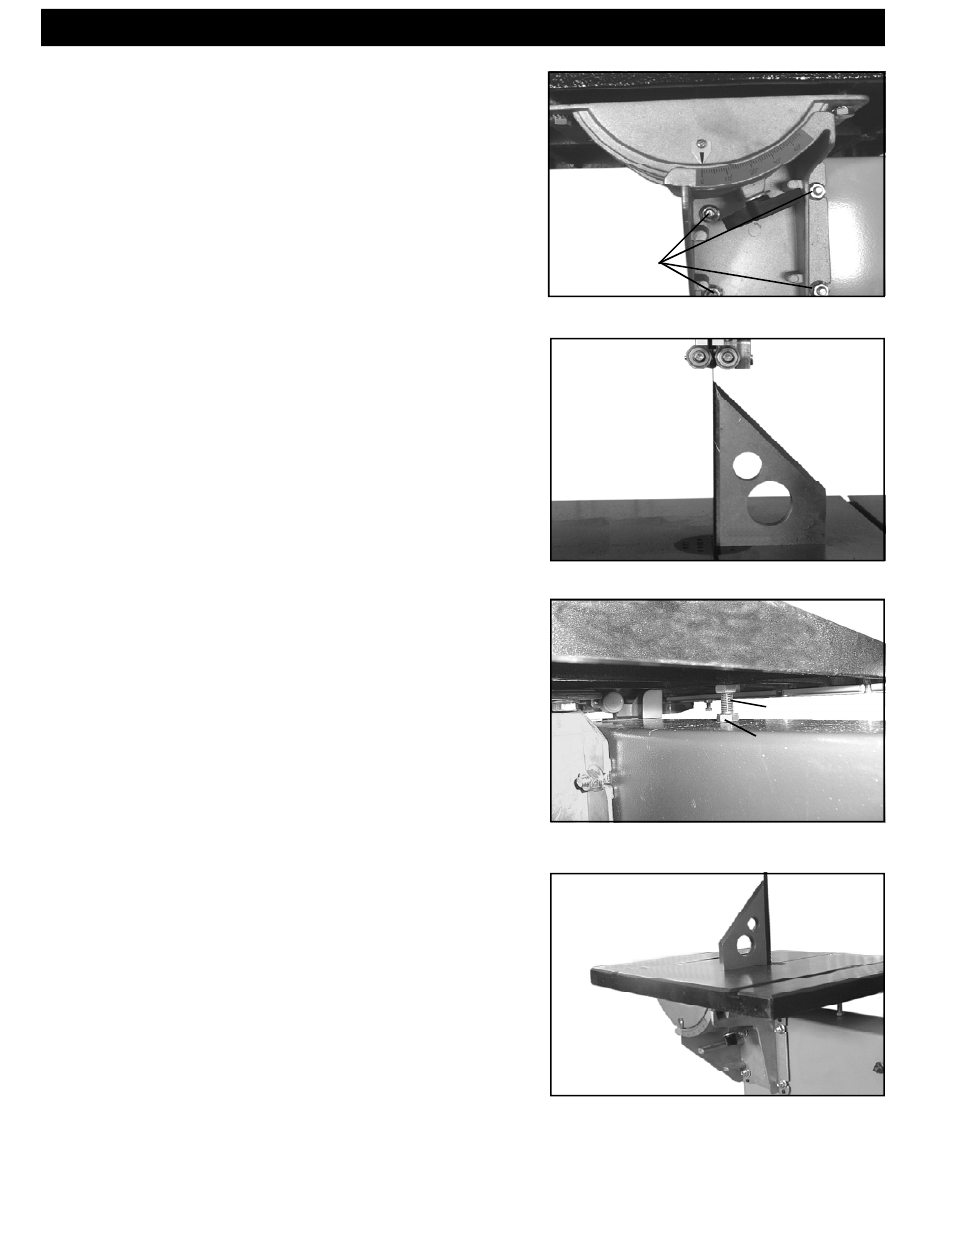
Centering the Table to the Blade
To center the table to the blade, loosen the four M8
nuts (G), which hold the lower trunnion to the
bandsaw frame. (See Fig.09) Slide the table
sideways until the blade is at the center of the slot
in the table insert.
Tighten the 4 nuts making sure the table is square
to blade.
G
Setting the Table Square to Saw Blade
Adjustments