RIKON Power Tools 10-320 User Manual
Page 11
Unplug the bandsaw from the electrical supply.
Set the tracking of the blade before setting the
blade guides.
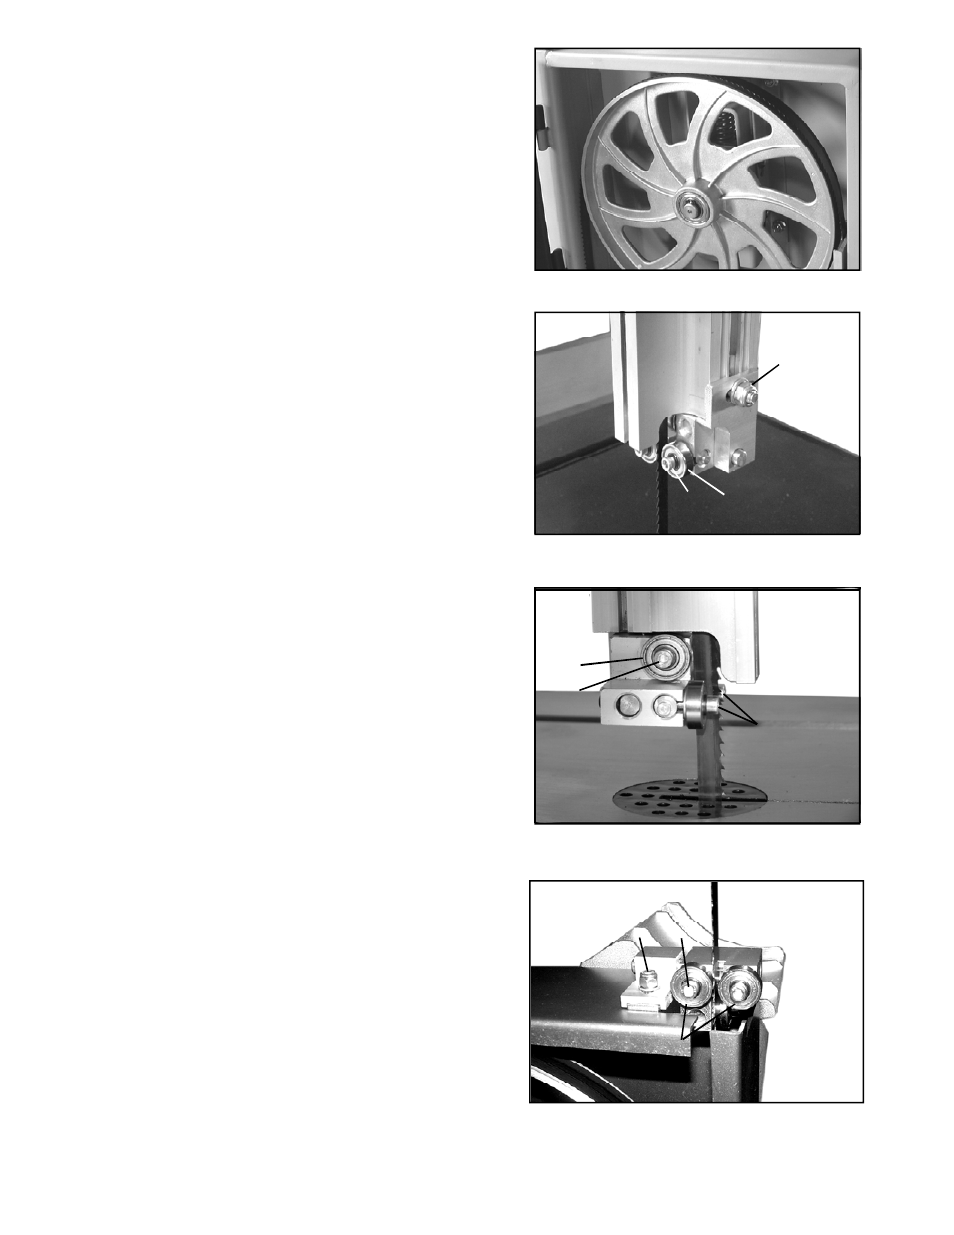
Once the blade is installed and tensioned, track
the blade by turning the upper band-wheel by hand
in a clockwise rotation and adjusting the tracking
knob simultaneously (F). (See Fig.19)
The blade should run in the center of the band-
wheel as shown. (See Fig.19)
When the correct adjustment is achieved, lock the
tracking knob in position with the wing nut.
Adjusting the Blade Guides
Upper Guides
To adjust the upper blade guides, first position the
roller guides (A) relative to the blade by loosening
the hex nut (B) and moving the guide carrier until
the roller guides (A) are approximately 1/16"
behind the gullets of the blade. (See Fig.20)
Next set the roller guides (A) to within 1/32" of the
blade by releasing the screw (C) on each side of
the blade. Do not set the guides too close as this
will adversely affect the life of the blade. (See
Fig.20)
Finally, adjust the large thrust bearing (D) to be
just clear of the back of the blade by unlocking the
hex cap screw. (See Fig.21)
When the correct adjustment is reached, lock the
thrust bearing in position with the hex cap screw
(E).
Lower Guides
To adjust the lower blade guides (F) , first position
the guides so that they are approximately 1/16"
behind the gullets of the bandsaw blade by
loosening the nut (G), then move the guide carrier
casting to the desired position. Re-tighten the nut
(G) to lock in position. (See Fig.22)
Adjust the guides (F) to within 1/32" of be blade
by releasing the socket cap (H).
11
Fig. 19
Fig. 20
Fig. 21
Fig. 22
E
C
D
D
H
F
B
A
C
Tracking the Bandsaw Blade