Adjustments – RIKON Power Tools 10-346 User Manual
Page 13
CHANGING THE BANDSAW BLADE
Unplug the machine from the electrical
supply. This ensures that the Bandsaw will not
accidentally turn on if the ON/OFF switch is bumped.
Wear gloves for protection.
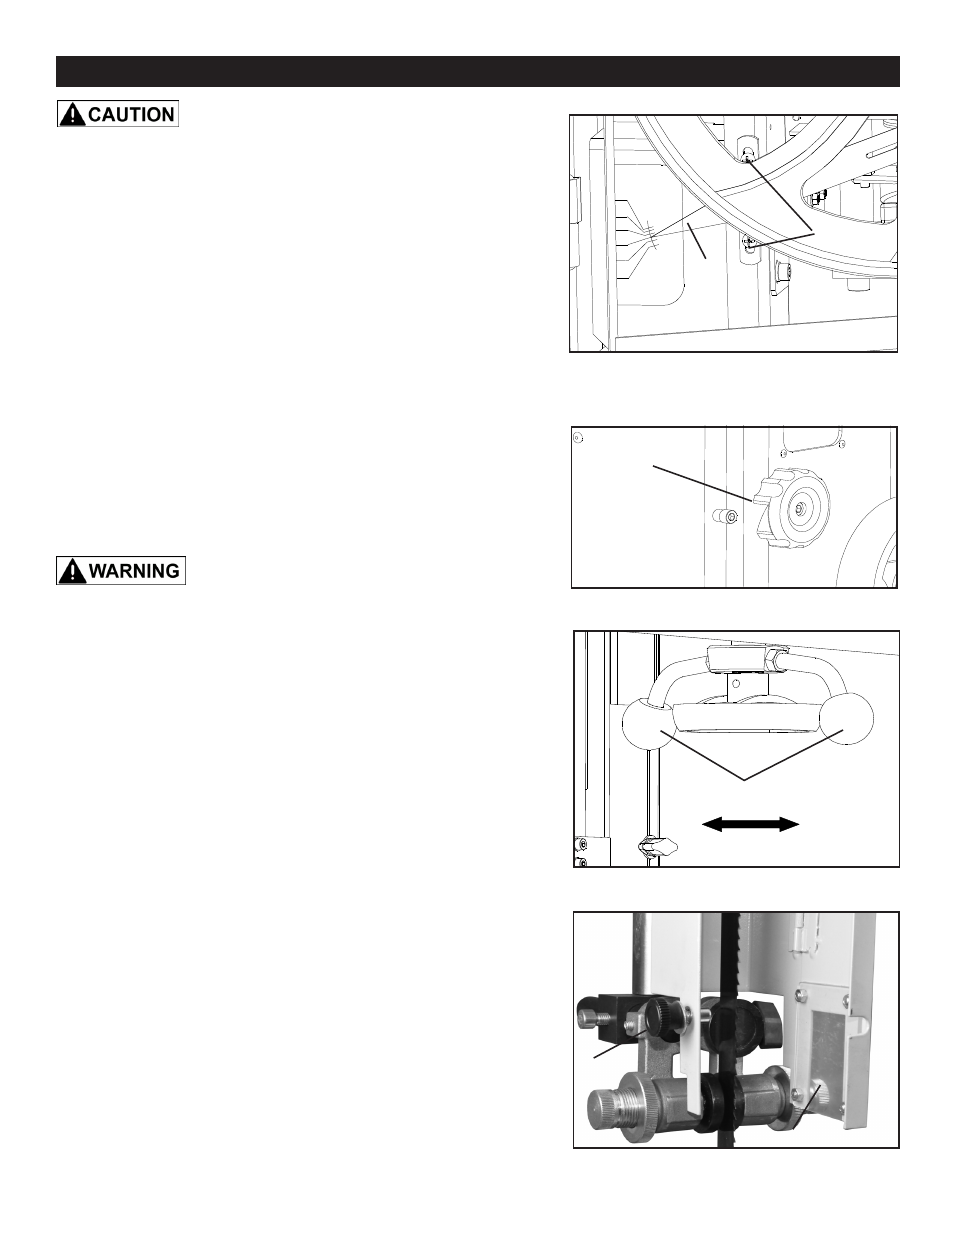
a) Open the top and bottom wheel doors by turning
the door locking knobs. (A-Fig.14)
b) Release the blade tension by moving the quick
release lever (Fig.15) from right to left. Open the
hinged door on the blade guard by loosening the
wing screw (A-Fig.16).
c) Remove the saw blade by feeding it through the
slot in the table, upper and lower blade guides
and the slot in the spine of the machine. Be
careful not to cut yourself.
d) When installing the new blade, ensure the blade
teeth are pointing downwards and towards you at
the position where the blade passes through the
table.
e) Center the blade on both wheels.
Continued on page 14
ADJUSTMENTS
Figure 13
A
B
13
On
Off
A
Figure 14
Figure 15
A
Hinged Door
Figure 16
图13
A
图14
Quick Release Lever
On
Off
Always tension the blade with the quick
release lever in the “On” position. Failure to do so could
result in lack of blade tension or tension failure.
BLADE TENSION INDICATOR ADJUSTMENT
The Blade Tension Indicator arrow should be checked
and adjusted the first time the saw is set up and run,
and whenever a new blade is installed. The blade
tension indicator can also be adjusted for blades
made from thicker steel, or cut over/under in length by
different manufacturers.
With moderate tension on the blade loosen the two
adjusting screws with a Phillips-head screw driver
(A-Fig.13). Adjust the blade indicator up/down as
needed (B-Fig.13) and re-tighten the two adjusting
screws.